


Persistence One is excited to announce that the incentivized testnet for Persistence DEX V2 (ie, BTC Interoperability, powered by Intents), is now live.
Persistence One will also have a reward multiplier program for existing XPRT stakers who participate in the incentivized testnet, which will give users extra incentives during the mainnet. This multiplier ensures that early supporters of the Persistence One ecosystem receive enhanced rewards during the incentivized testnet phase while ensuring some form of Sybil resistance.
The incentivized testnet follows up on the earlier conducted three phases of closed beta testing, which was based upon early access invite codes. We’ve been working hard behind the scenes on this BTC Interoperability solution and are looking forward to hearing about the user experience and feedback from the incentivized testnet.
This article will guide you through the entire process of moving Bitcoin across networks in less than 30 seconds on Persistence One’s Incentivized testnet.
For a better perspective, we have divided the guide into the following sections:
Table of Contents
- How to access the Incentivized Testnet
- Tasks to be eligible for rewards
- How to have staked XPRT before participating
- How to setup and connect wallet
- How to claim faucet funds
- How to claim gas fee
- Cross chain BTC swapping tasks you need to complete
- How to perform a swap
- How to fill out feedback form to complete the participation
- How to troubleshoot issues
- Frequently Asked Questions (FAQs)
- About Persistence One
How to access the Incentivized Testnet
This part of the guide will walk you through accessing the Incentivized Testnet.
- To get started, we will need to visit the Persistence One website – https://persistence.one
- Scroll down towards the bottom, and you will see this button saying ‘Try On Testnet’.
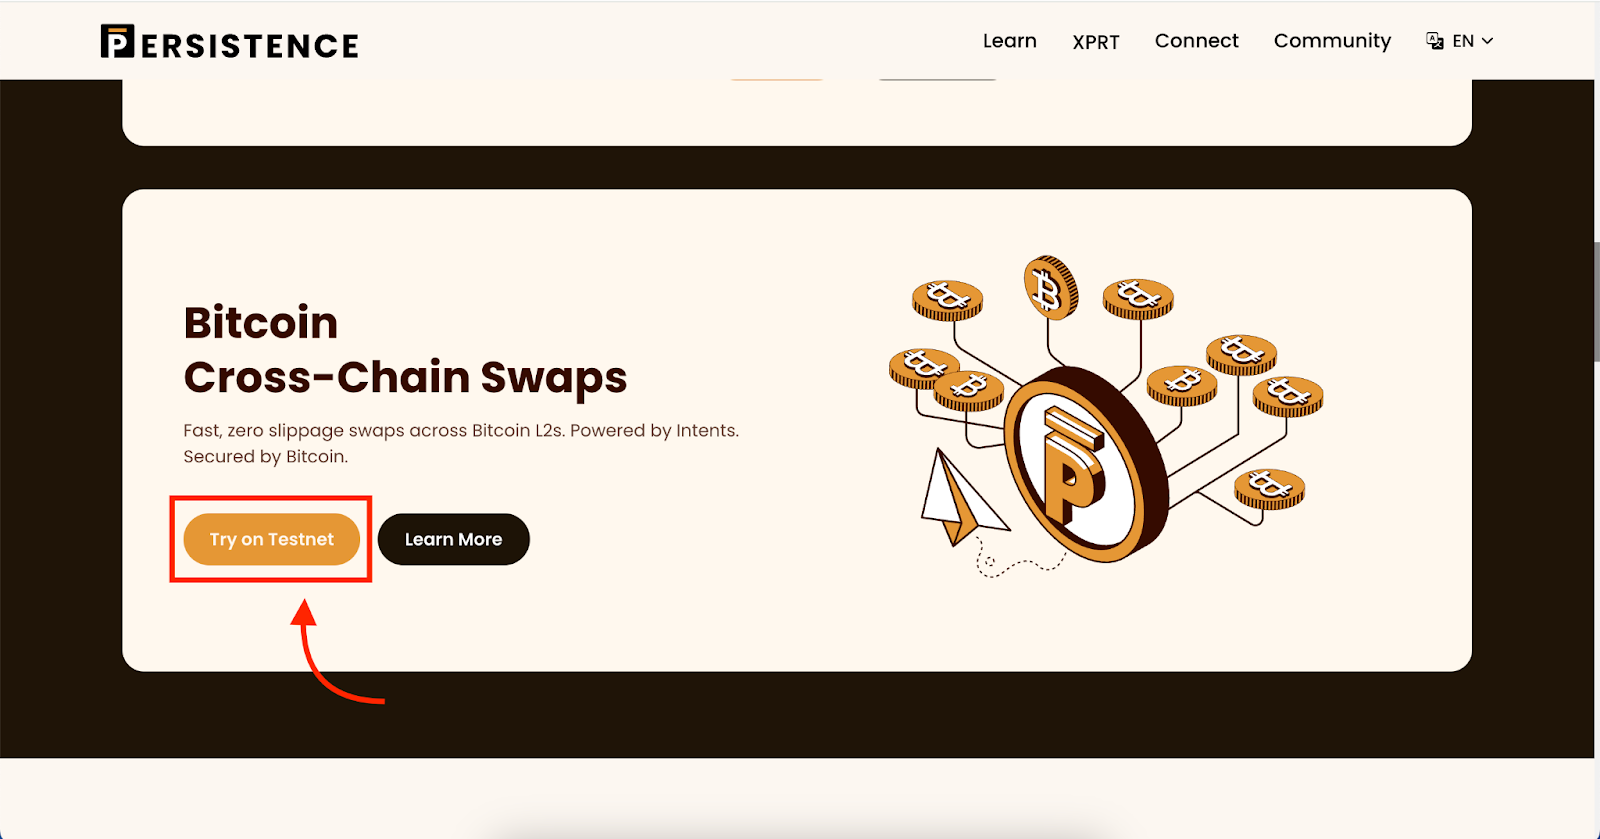
- Click on the same to enter the Incentivized Testnet.
Tasks to be eligible for rewards
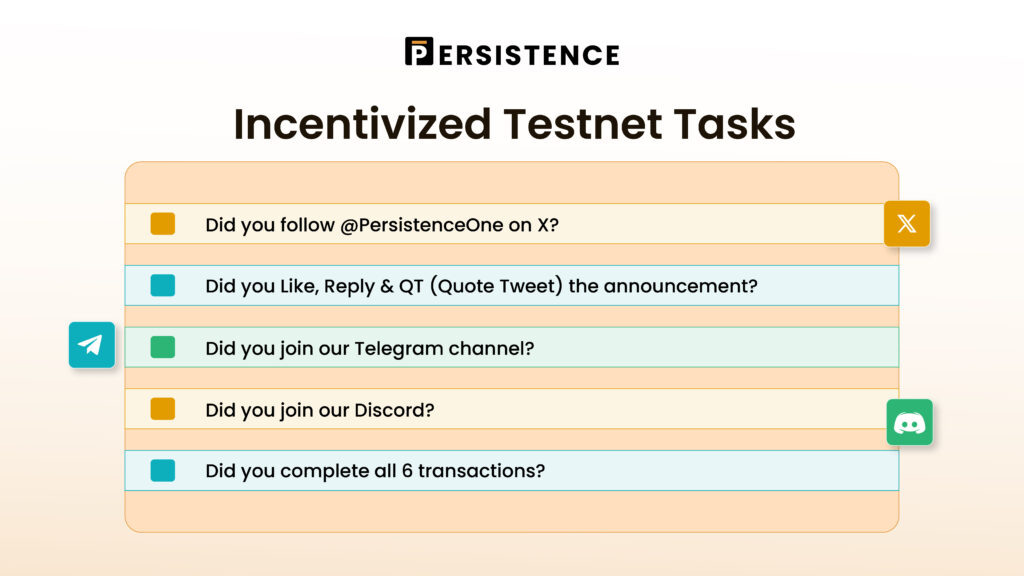
To become eligible, you will need to complete five simple tasks that include both social and on-chain activities.
Note that eligibility does not guarantee you rewards. The team reserves the right to exclude any participant from any rewards without the need for justification.
How to have staked XPRT before participating
Staking is a core part of the Persistence One ecosystem. It’s how you support network security and earn staking rewards for your contribution. By staking XPRT, you also become eligible for reward multipliers in the incentivized testnet.
The multipliers are as follows:
- Users with ≥ 1,000 Staked XPRT: Eligible for a 2X multiplier.
- Users with ≥ 5,000 Staked XPRT: Eligible for a 5X multiplier.
You will need to revisit the platform upon mainnet launch to connect your Persistence address, which has staked XPRT, with your EVM address to claim rewards. We would recommend joining the announcement channel to stay updated in future.
We have a detailed guide for the entire process, covering each step you can find below. If you are stuck at any point or encounter issues, don’t hesitate to reach out to us; we will be happy to help you.
How to setup and connect wallet
Bitget is one of the supported Web3 wallets that you can use to participate, alongside Metamask, OKX Wallet, and TokenPocket Wallet.
We have curated guides below that walks you through installing a compatible wallet, connecting it to our Bitcoin Interoperability Testnet, and making your first BTC cross-chain swapping transactions.

How to claim faucet funds
Upon connecting your wallet to the Incentivized testnet, we will send you the required funds (CBBTC on Sepolia Base, and WBTC on Bitlayer) after you place a request through the faucet tab. You can only place a request once every 24 hours.
If the same does not work as expected. You can raise a ticket on Discord, and we will assist you further.

How to claim gas fee
Obtaining gas tokens on Base Sepolia, Bitlayer or BEVM is simple. Use the following links:
Sepolia – https://docs.base.org/docs/tools/network-faucets/
Bitlayer – https://www.bitlayer.org/faucet
BEVM – https://bevm-testnet-faucet-alpha.vercel.app/
If you face any issues, reach out to our team on Telegram (@PersistenceOneChat), and we’ll gladly assist you by providing the required gas token.
Cross chain BTC swapping tasks you need to complete
You must complete at least one transaction using the same address, to the following paths, along with the other social tasks, mentioned in the feedback form.
- Sepolia Base to Bitlayer
- Sepolia Base to BEVM
- Bitlayer to Sepolia Base
- Bitlayer to BEVM
- BEVM to Sepolia Base
- BEVM to Bitlayer
How to perform a swap
After ensuring you have faucet funds along with the Gas fee token on the source chain, follow the steps below to initiate a swap on the Incentivized testnet.
Let’s go through the process step by step.
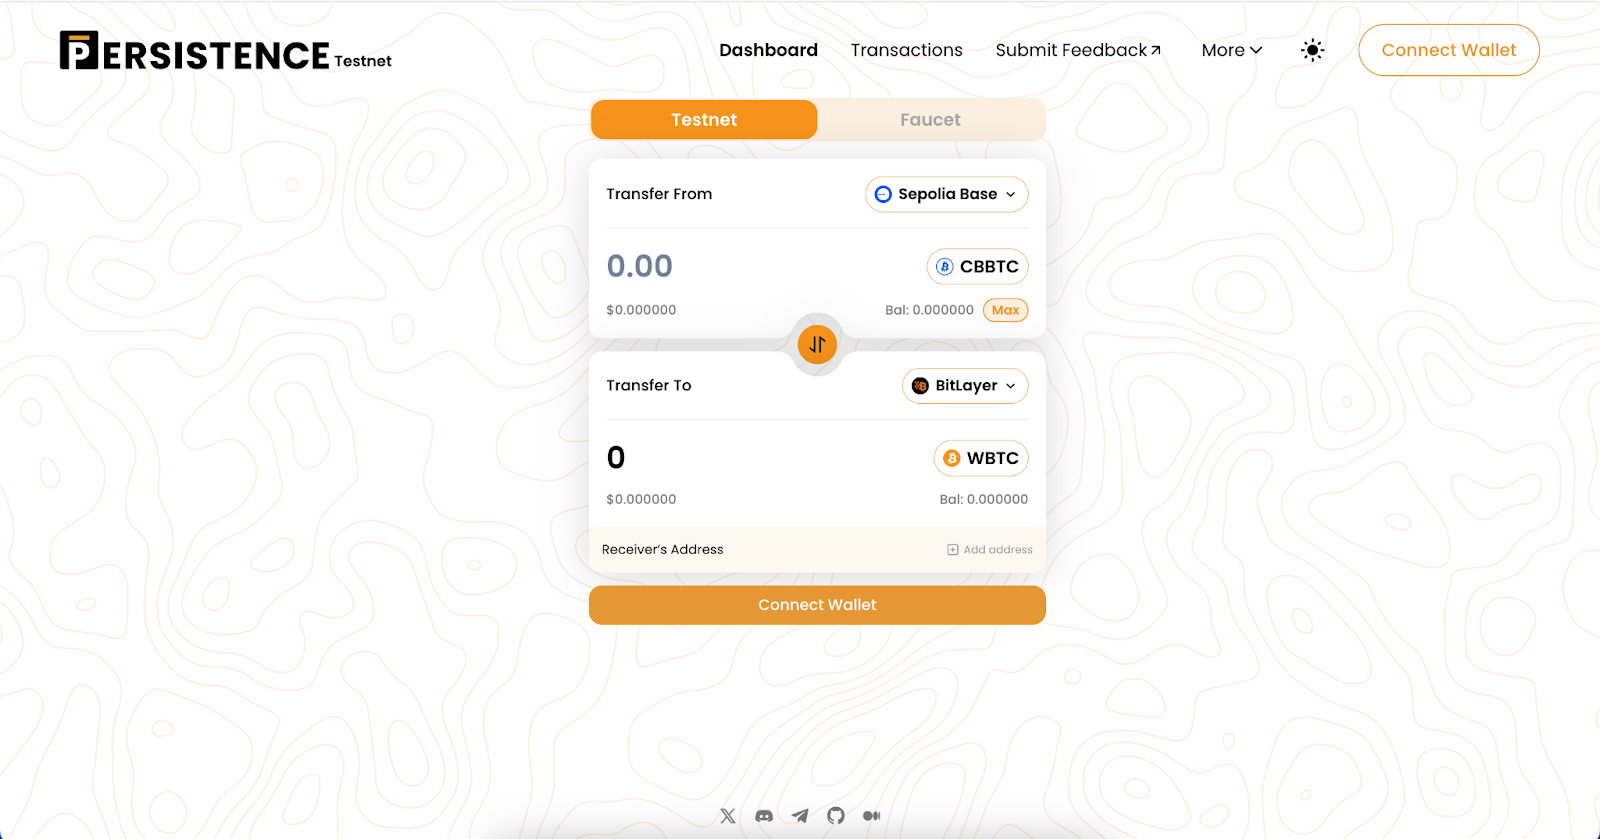
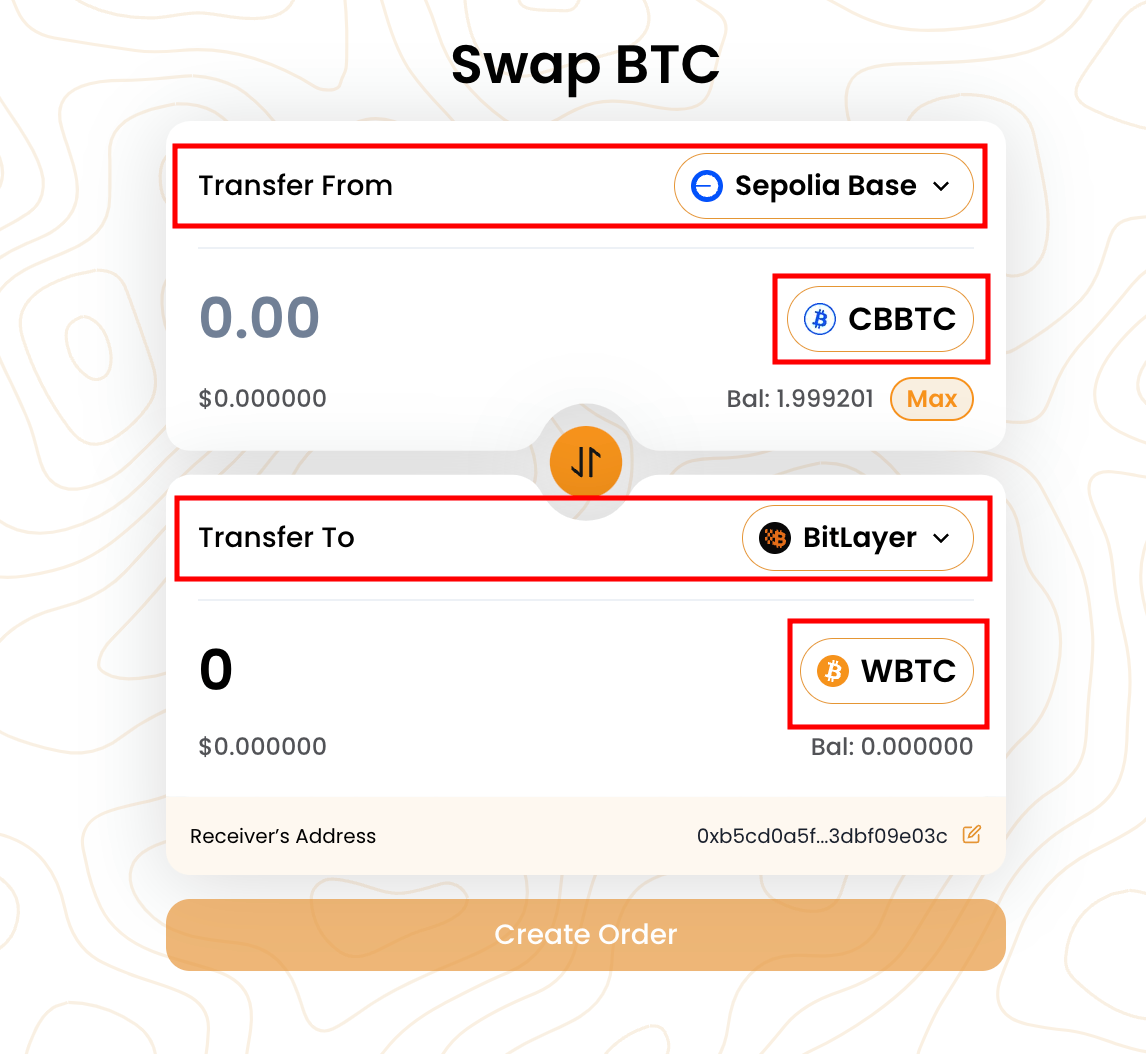
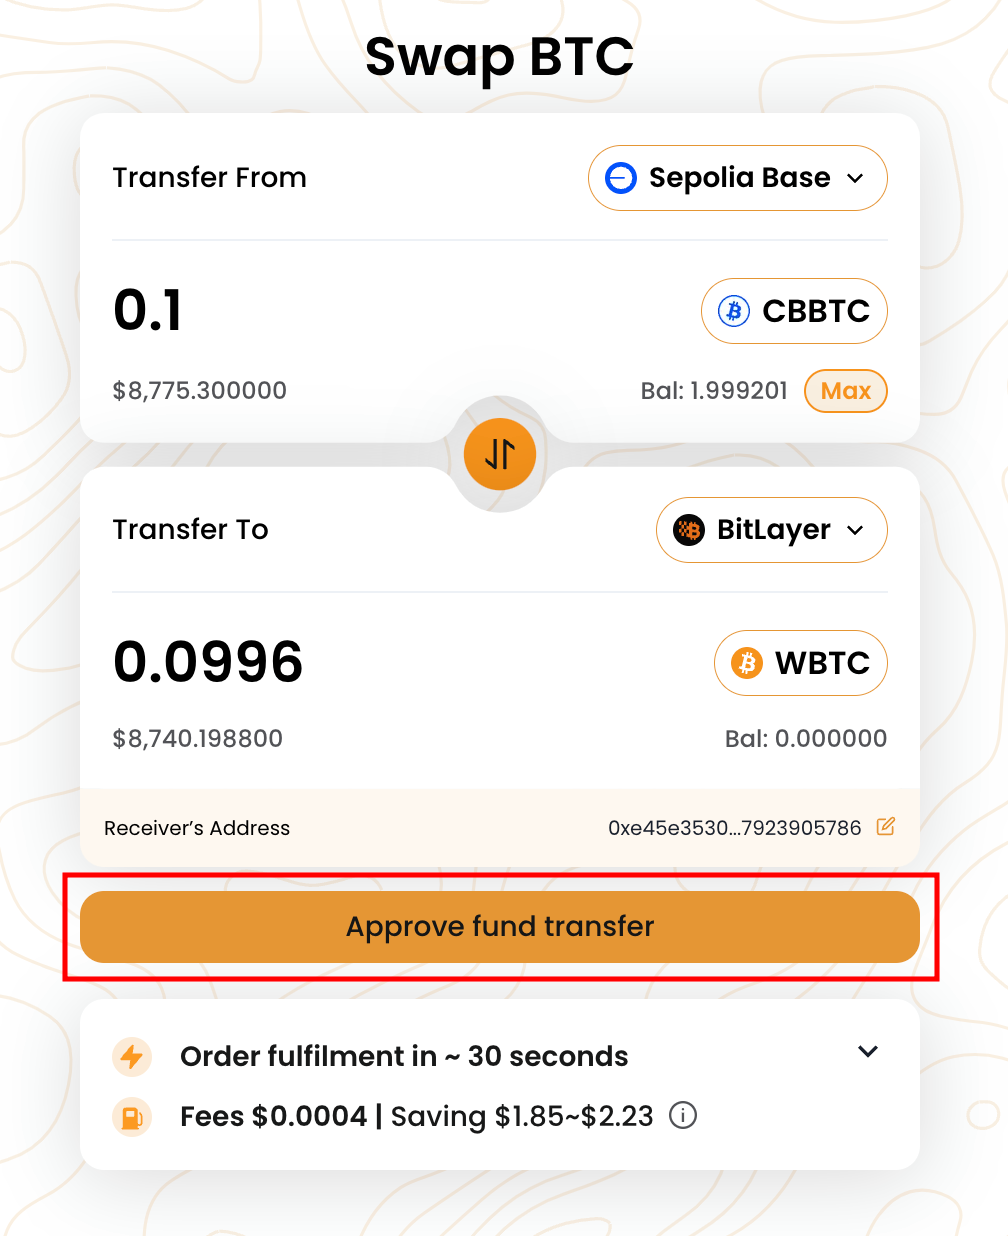
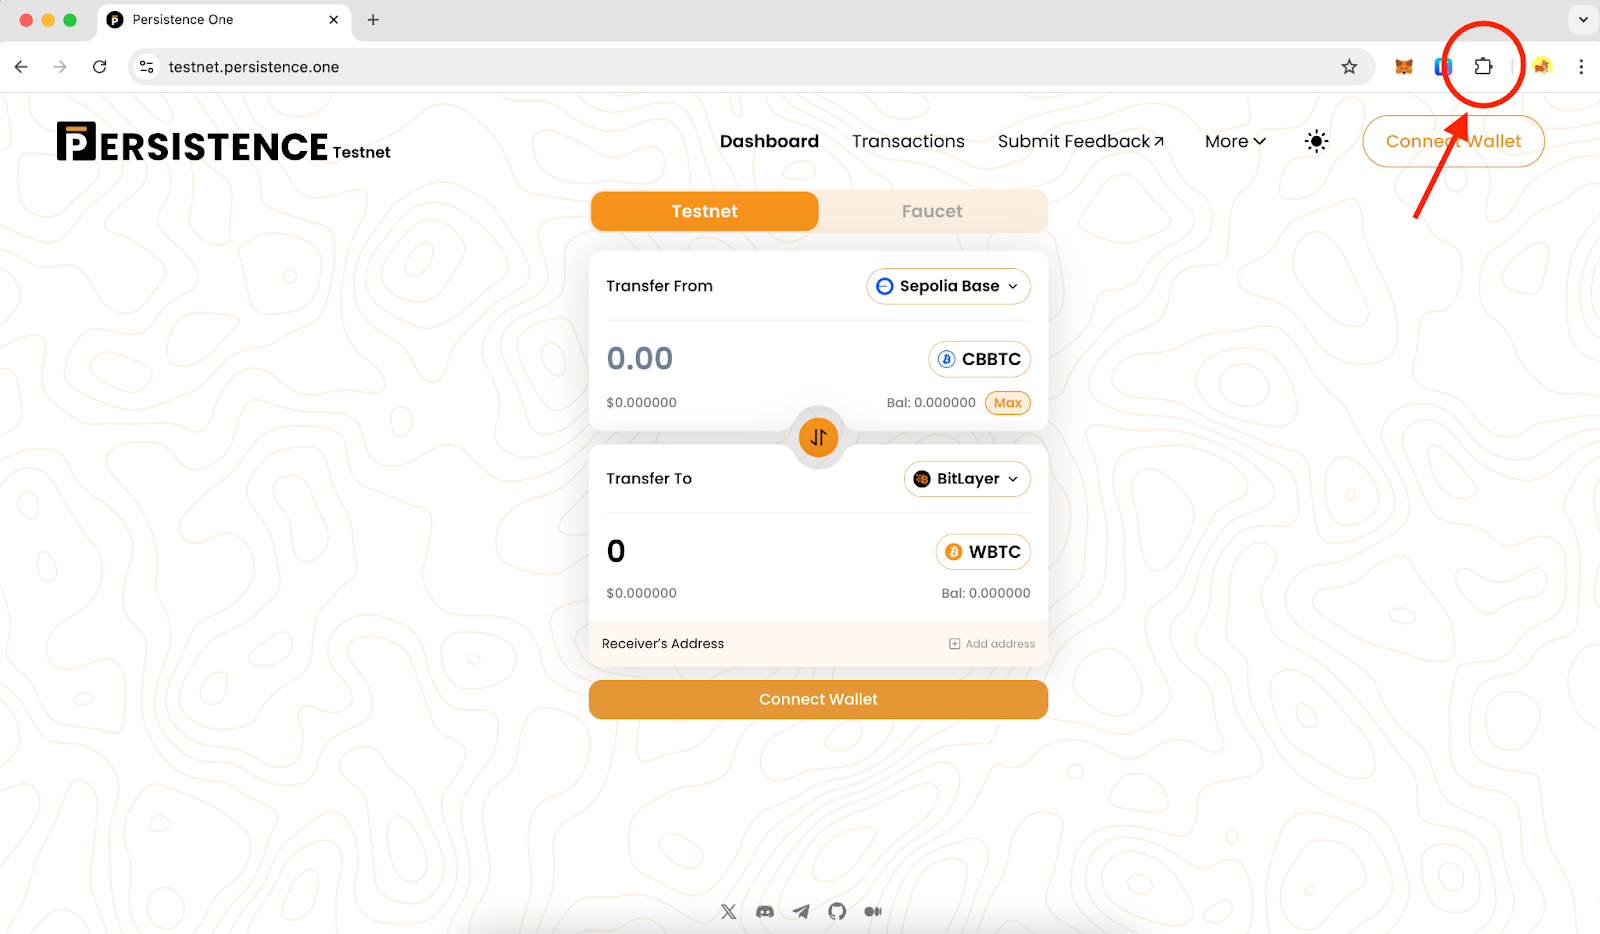
- Ensure the “Transfer From” part of the dashboard is selected from “Sepolia Base” to swap cbBTC. The “Transfer To” section should have “BitLayer” selected to swap into WBTC:
- Enter the desired amount of cbBTC you wish to swap into wBTC in the following field:
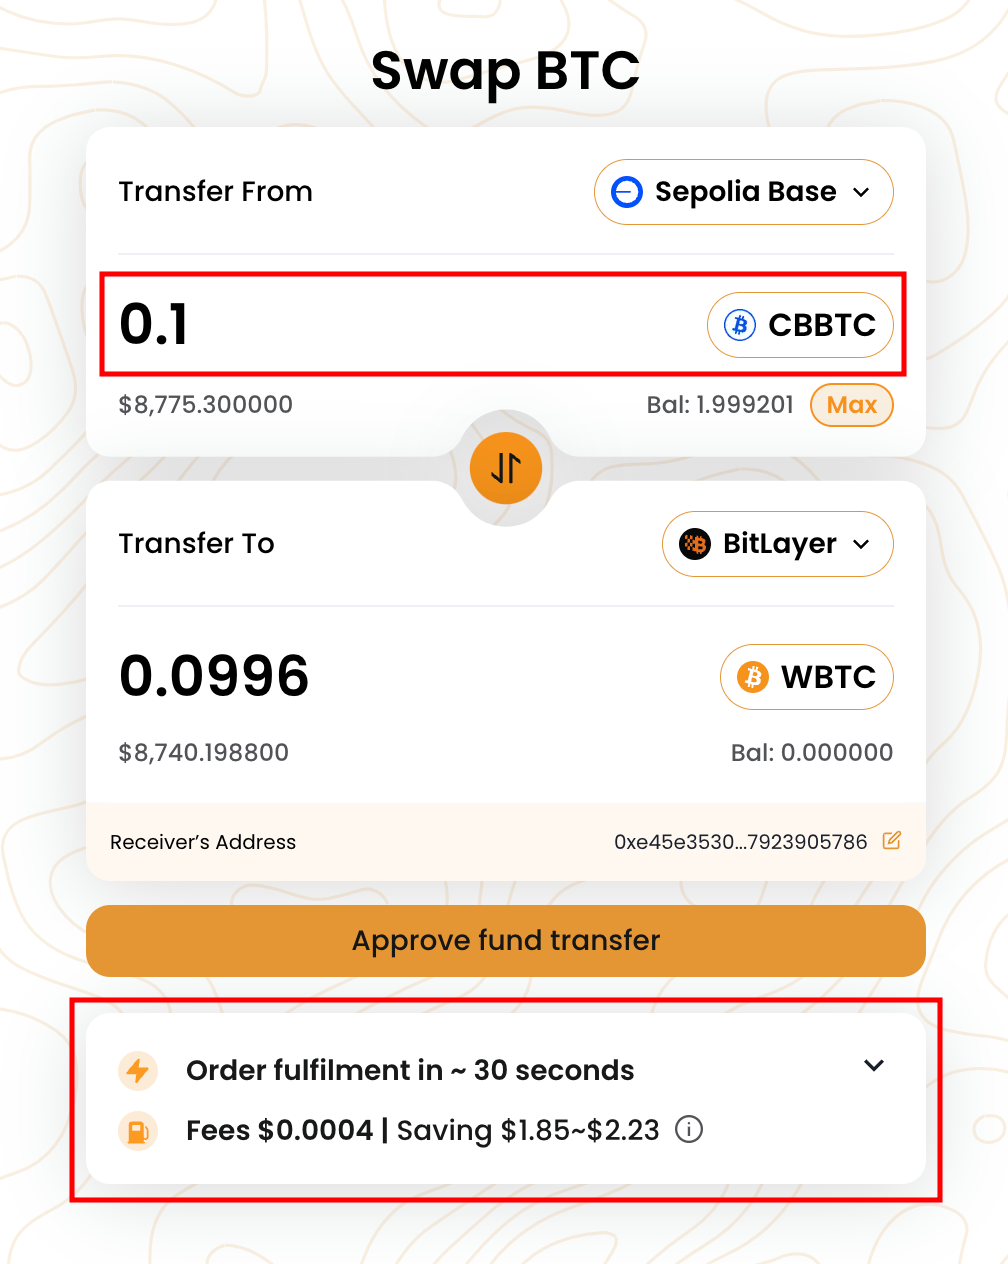
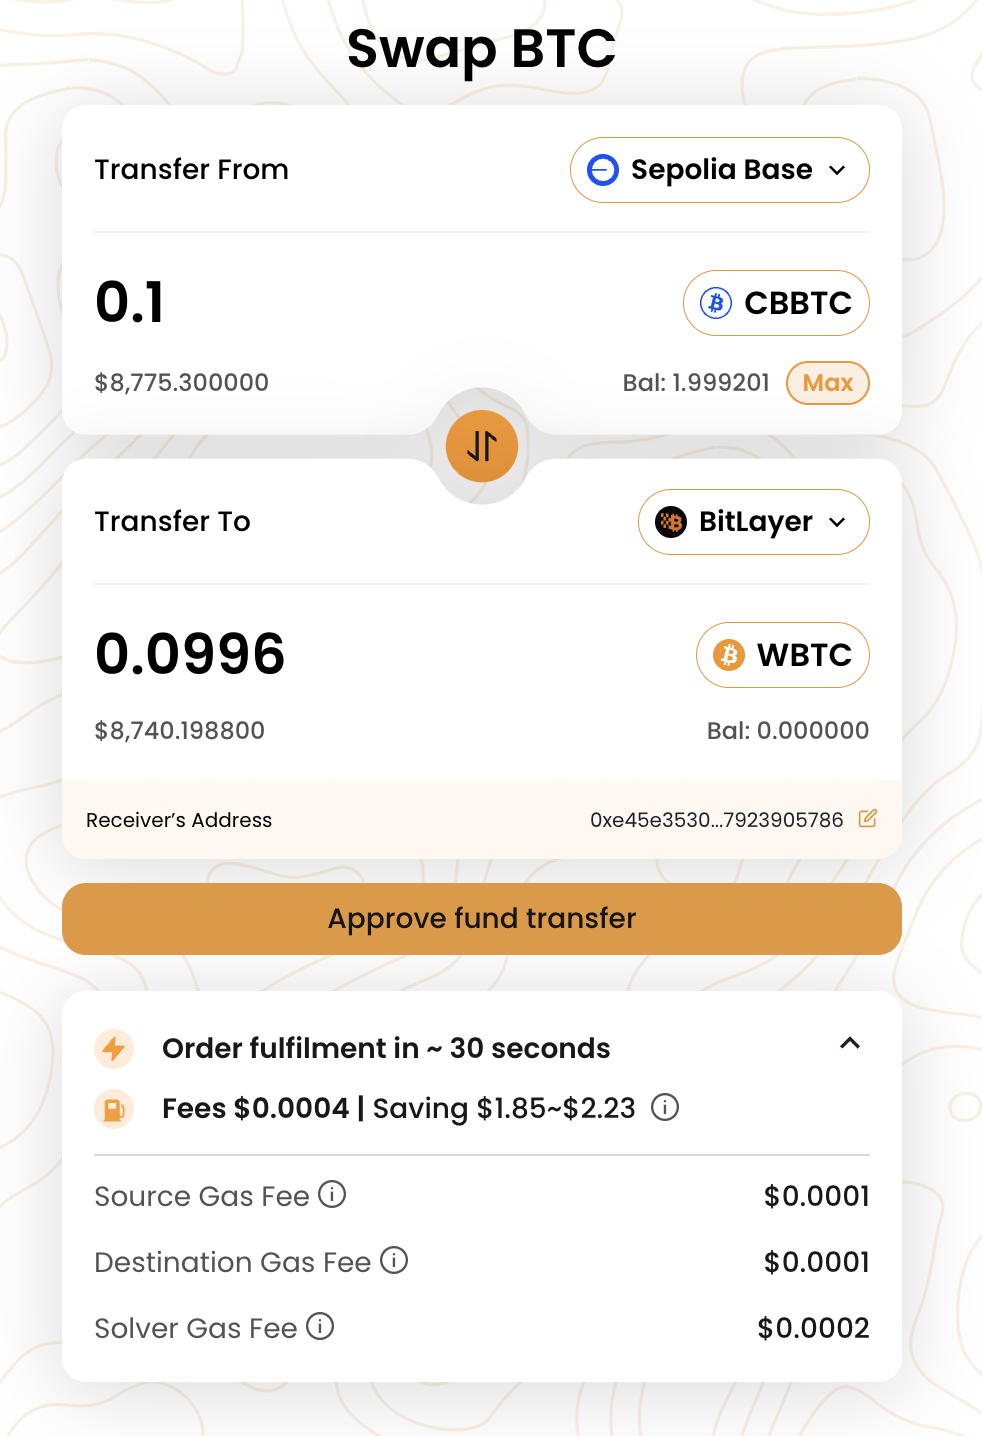
- You will notice a notification at the bottom of the dashboard showing that the order fulfilment will occur in around 30 seconds. This notification also indicates the fees involved. You can expand the notification to view more details:
- Once you are happy to execute the swap, hit “Approve fund transfer”:
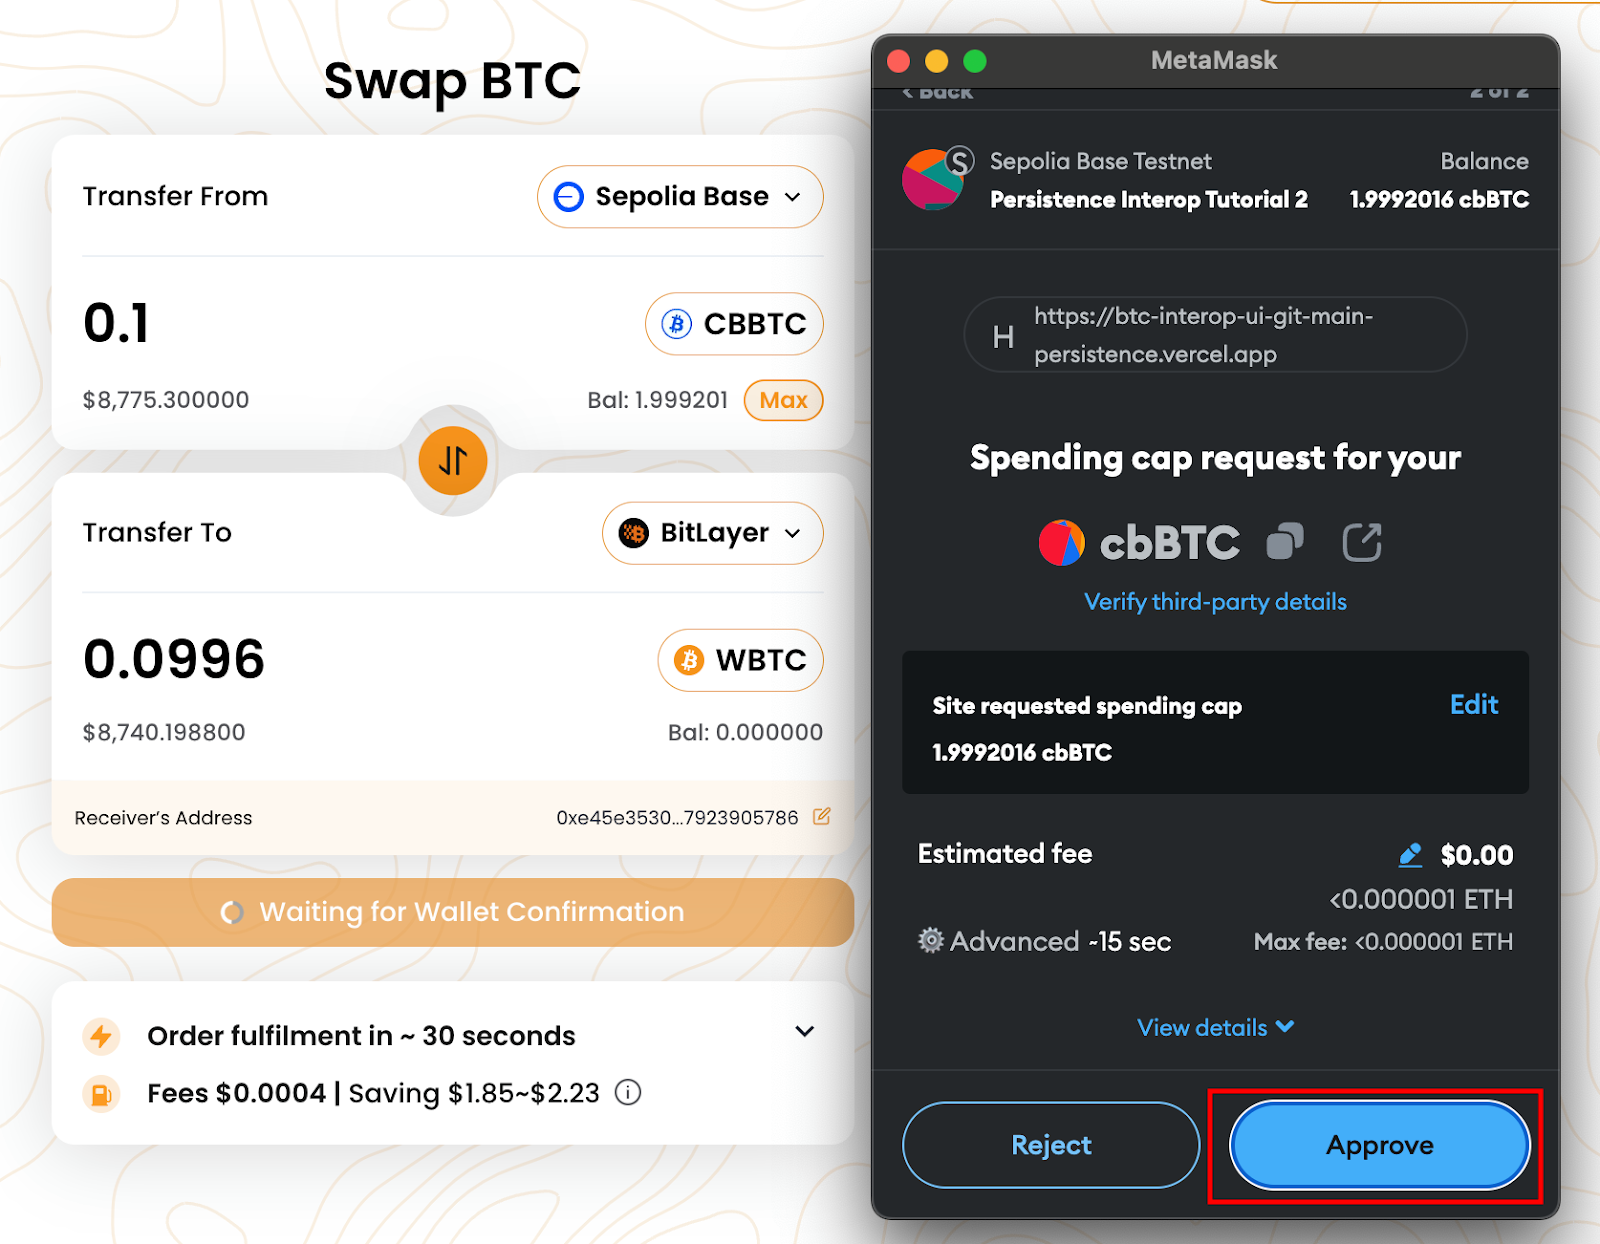
- A Metamask window will appear, asking you to grant the Persistence One dApp permission to spend your tokens for the swap. Hit “Max” and then hit “Next”:

- On the following notification, hit “Approve”:
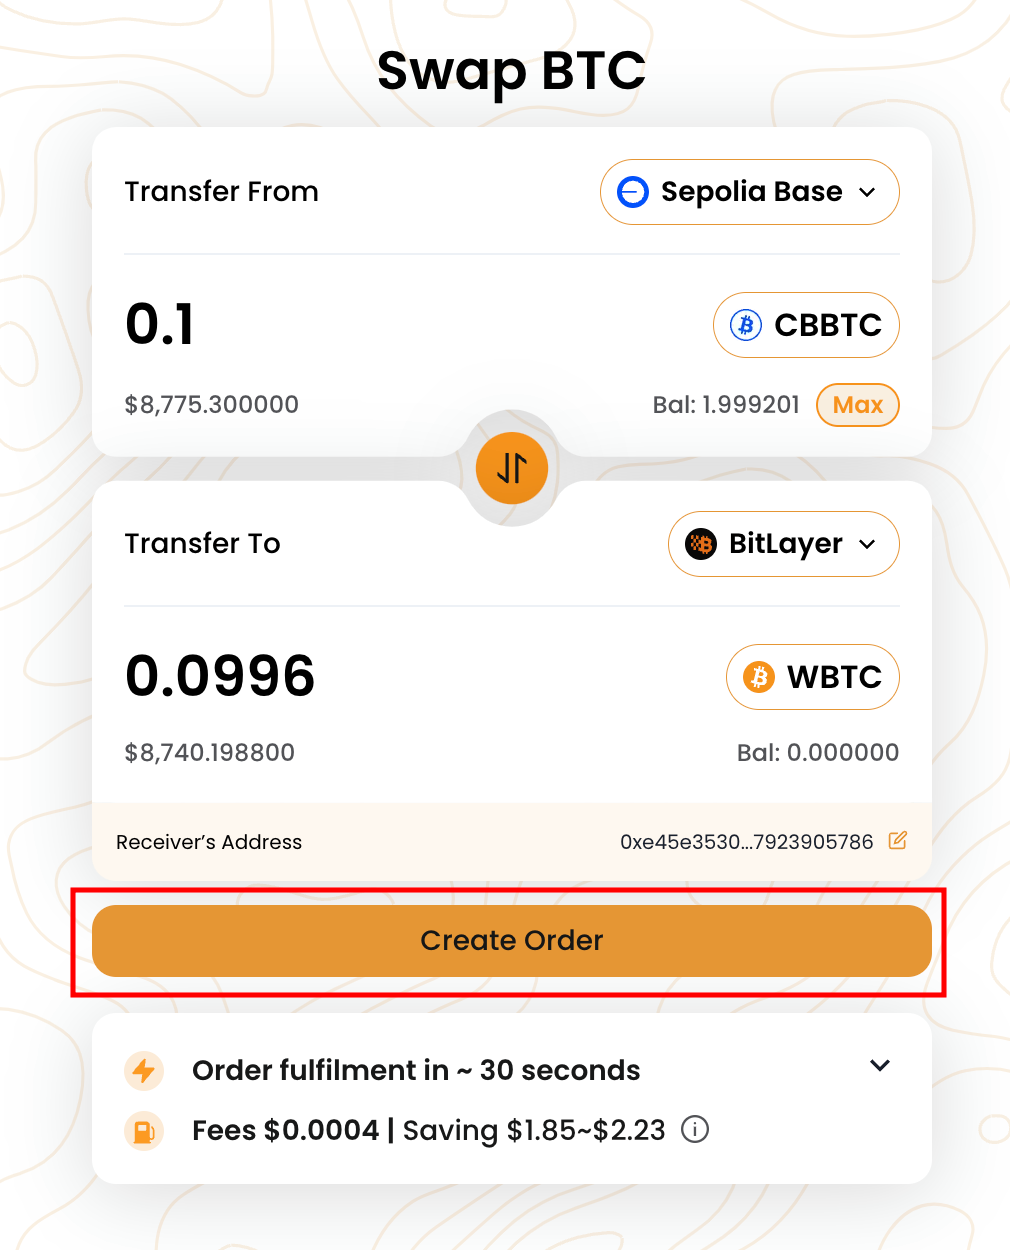
- Once approved, you can create the order for the BTC cross-chain swap. To do this, hit “Create Order”:
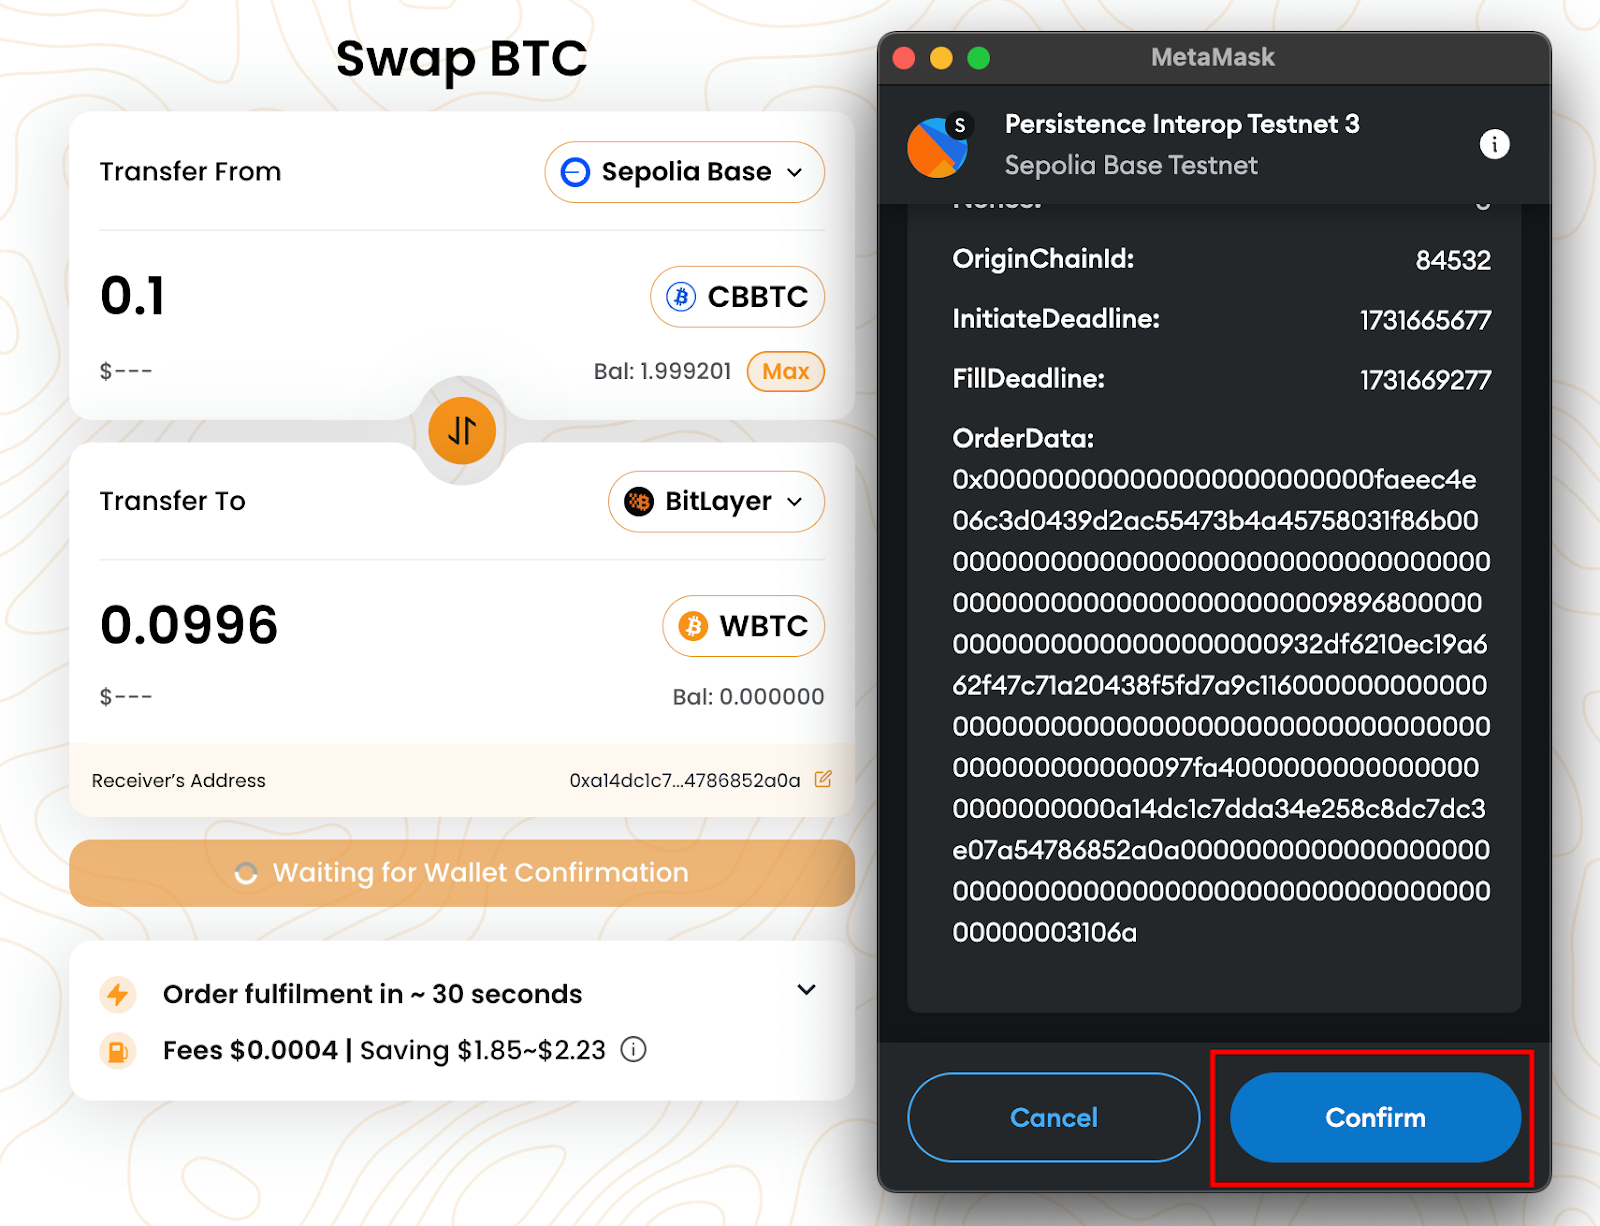
- A Metamask window will appear, asking you to confirm the transaction. Scroll to the bottom of the notification and hit “Confirm”:
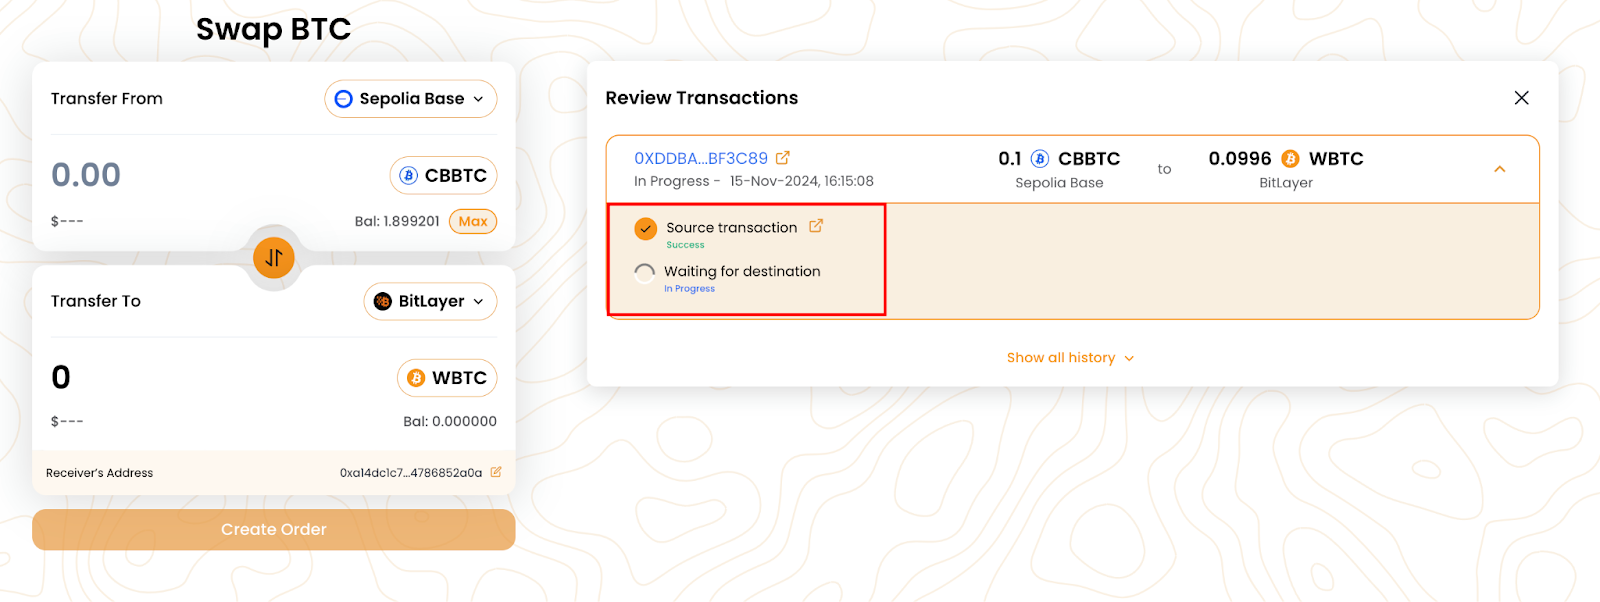
- A new window will appear in the UI, showing the status of your transaction. The first step of the cross-chain swap is sending the funds to the Persistence One contract on the source chain, which, in this case, is on Base:

- After a few seconds, you will notice that the source transaction is marked as complete. The next step of the cross-chain swap is for the Solver to send you the funds on the destination chain. In this case, the Solver will be sending WBTC on the Bitlayer chain:
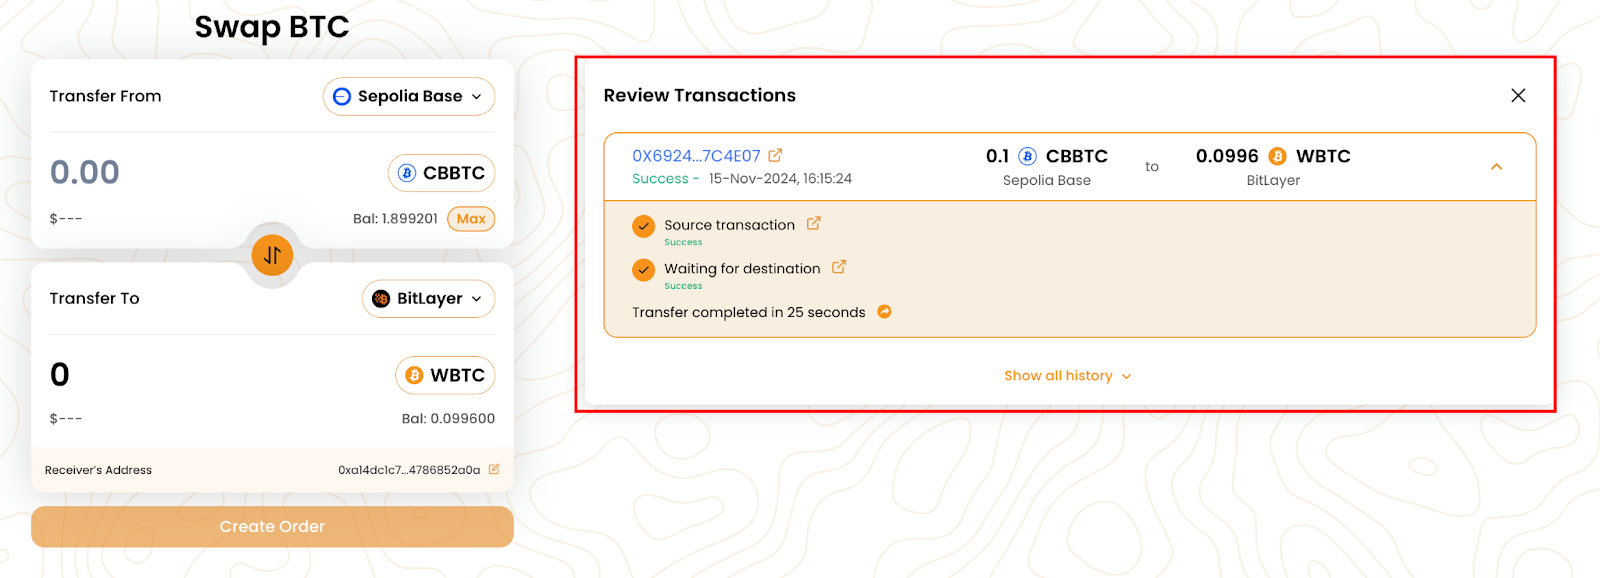
- After a few more seconds, the entire transaction will be complete. You can see that this took just 25 seconds:
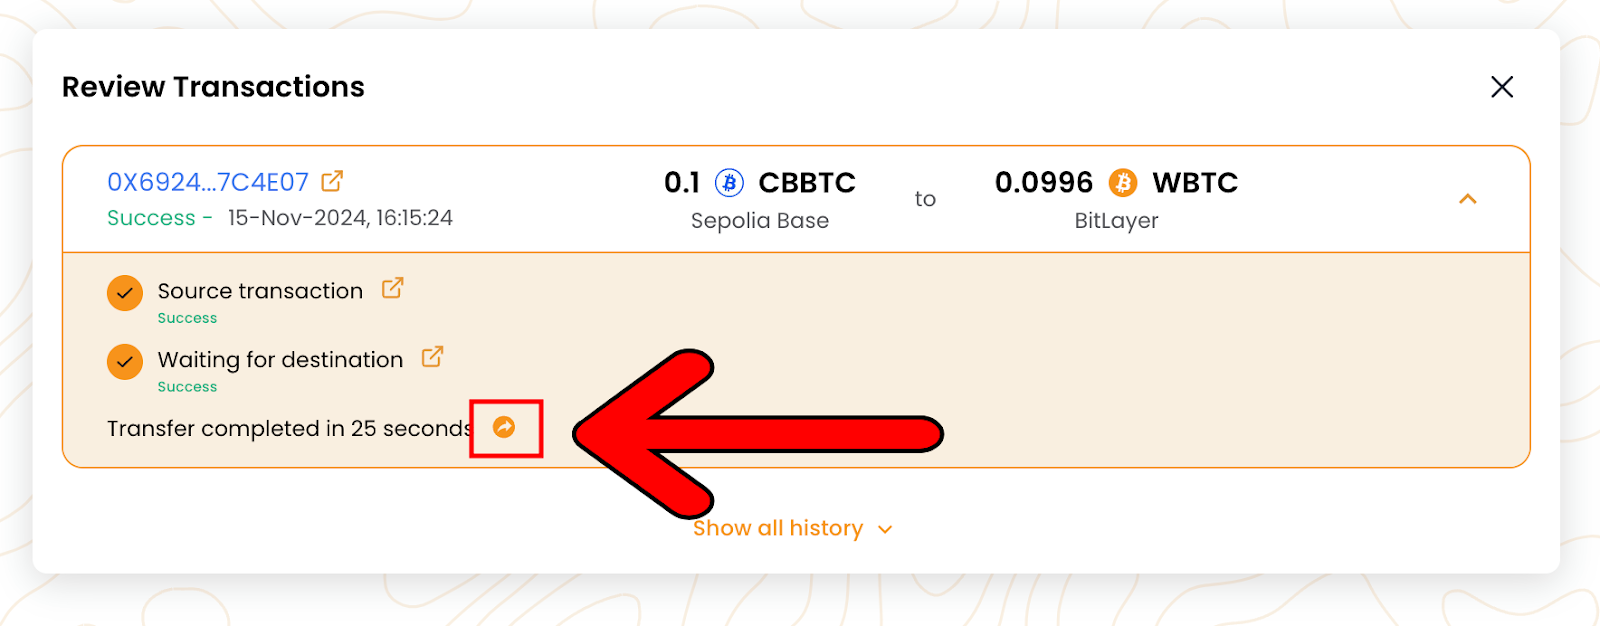
- The following button can be pressed to share your cross-chain swap:
- Please feel free to use any of the buttons to share the seamless intent-based cross-chain swap:
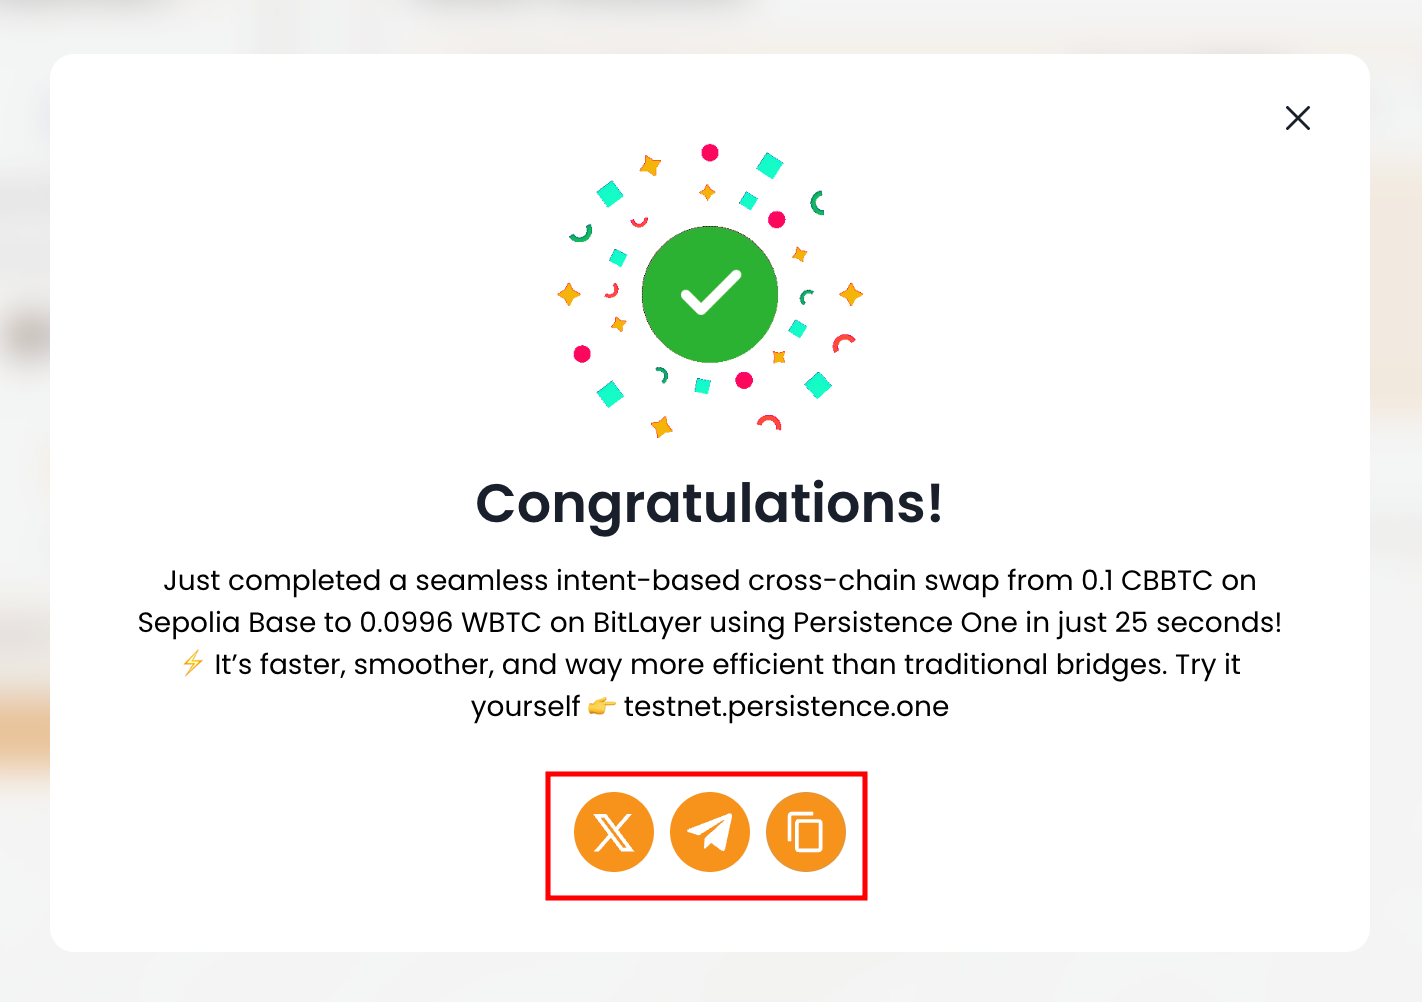
That’s all there is to it. You have successfully conducted an intents-based cross-chain BTC swap from the Base network to Bitlayer on the testnet.
How to fill out feedback form to complete the participation
To complete your participation in the incentivized testnet, filling out the feedback form is mandatory. Without this, we won’t be able to gather any reports of bugs, product issues or documentation errors.
This form will take you less than 5 minutes to complete.
Click on the navbar link in the top menu bar to proceed to the form, and submit after filling in all the fields.

How to troubleshoot issues
To troubleshoot any issues, please raise a ticket on our Discord or ask in Persistence One Community Chat, and our team will be happy to assist you.
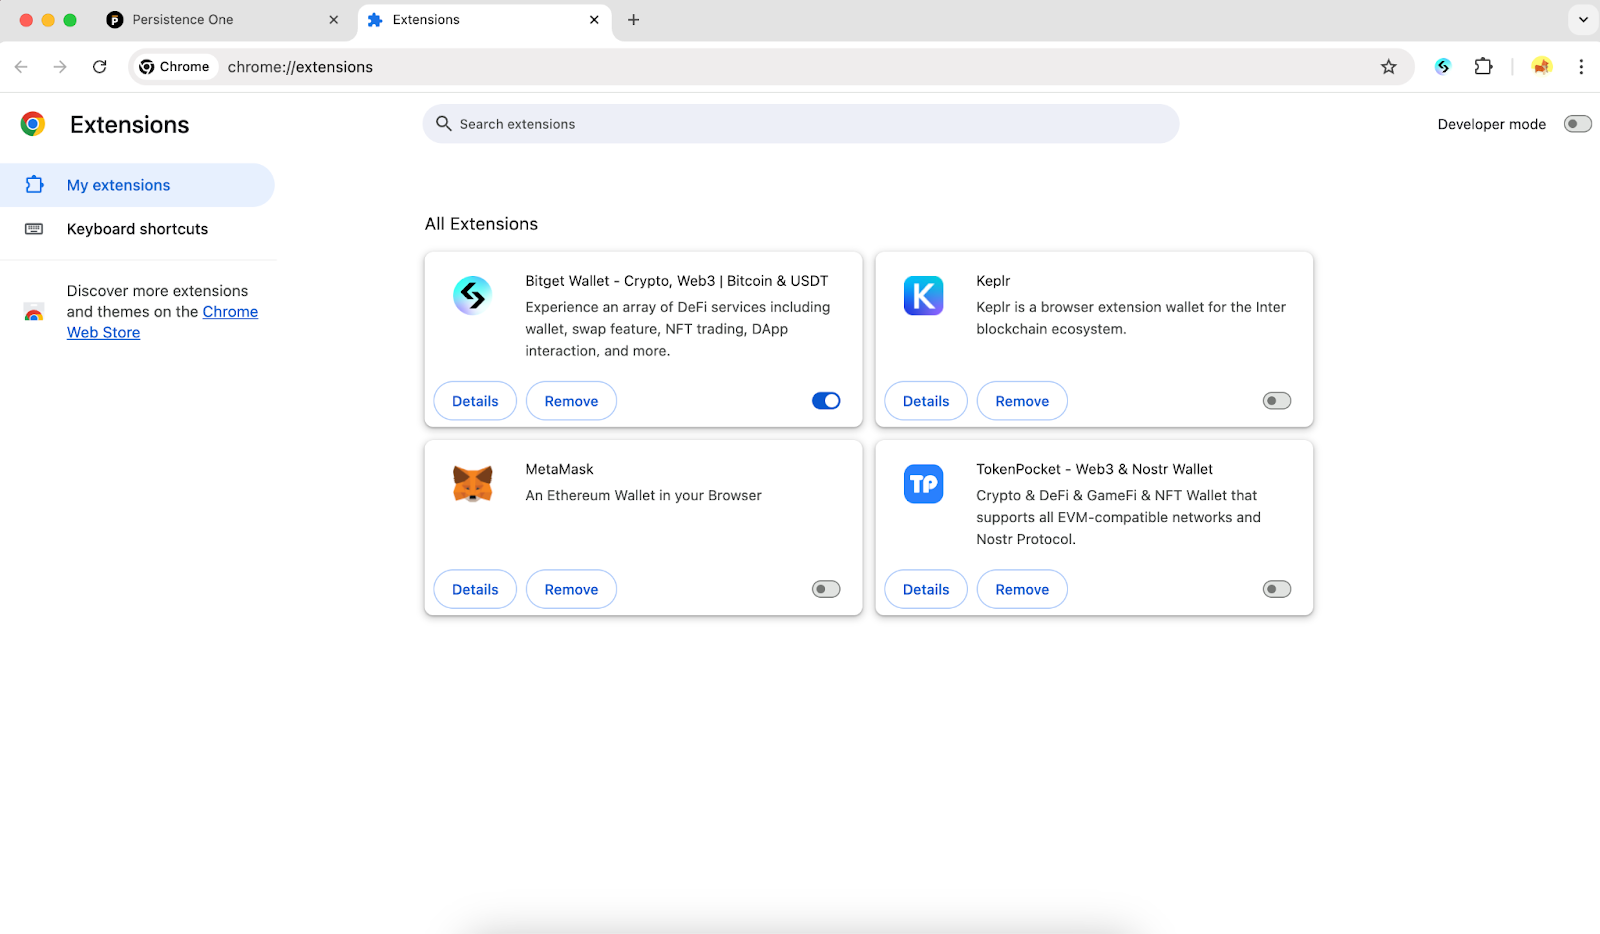
Known Issue #1 – Failure to connect wallet.
Please disable other wallet extensions, try restarting your browser to connect, and try again.
Disable the other wallets by clicking the toggle next to them.
Frequently Asked Questions (FAQs)
a) Are there any fees for using Persistence One on testnet?
No, participating in the incentivized testnet is voluntary and completely free of charge. However, you will require the source chain gas token to perform transactions.
b) How can I track the status of my swap?
You can monitor the status of your swaps under the ‘Transactions’ tab in the menu bar. If you notice any discrepancies, please inform the team or include details in your feedback.
c) How can I report a bug or provide feedback?
We highly value your feedback. Please click on the ‘Submit Feedback’ link in the menu, which opens a Google form. It takes about 5 minutes to complete.
d) What security measures are in place to protect my assets?
Our cross-chain solution uses Intents to fulfil orders, which enhances efficiency, security, and speed compared to traditional bridges with liquidity pools. When you place an order, funds are escrowed on the Persistence One contract on the source chain until the solver fulfils your intent on the destination chain.
Only after a successful transaction are the escrowed funds released to the solver.
e) What happens to my assets if I encounter an error during a swap?
If the order isn’t fulfilled, the funds remain in escrow, and the order will expire. The user will need to claim it later from the ‘Transactions’ page. This feature is still a work in progress and will be released shortly.
f) Who can I contact if I face any issues or have questions?
You can always seek help from our moderators or the team, on Telegram or Discord. Additionally, you can read more general FAQs here.
About Persistence One
Persistence One is building the BTCFi Liquidity Hub, enabling fast, near zero-slippage swaps for XPRT, BTC-variants, and BTCfi tokens on Persistence DEX.
BTCFi’s rapid growth has created multiple BTC-related assets, making fragmentation a big challenge. Persistence One will provide a single liquidity hub, simplifying value transfer across the Bitcoin ecosystem.
Twitter | LinkedIn | Telegram | YouTube | Reddit | [email protected]