


XPRT is now live on Aerodrome on Base chain, providing the opportunity for XPRT holders to trade or provide liquidity with their XPRT on the Ethereum Layer-2 scaling solution from Coinbase with lower fees and lightning-fast transactions.
This tutorial will guide you through the process of adding liquidity to the XPRT/USDC pools on Base through Aerodrome Finance. This will allow you to become a liquidity provider and earn fees from swaps made through the pool and LP rewards. Best of all, incentives for LPs are coming very soon and the pool will be incentivised for the foreseeable future.
To complete this tutorial, you’ll need XPRT on Base Chain. We’ve already released a tutorial on how to easily bridge XPRT from the Persistence Core-1 chain to the Base Chain using Squid Router. If you need a reminder on how to do it, take a look at this article.
In addition, you will need USDC on Base to add liquidity to the pool and some ETH on Base to pay for transaction fees.
If you have these three assets, you’ll have everything you need to get started.
Connecting your wallet to Aerodrome
There are two pools for XRPT on Aerodrome: a basic volatile pool and a concentrated liquidity pool.
The procedure to add liquidity to either pool is very straightforward and won’t take more than a few minutes.
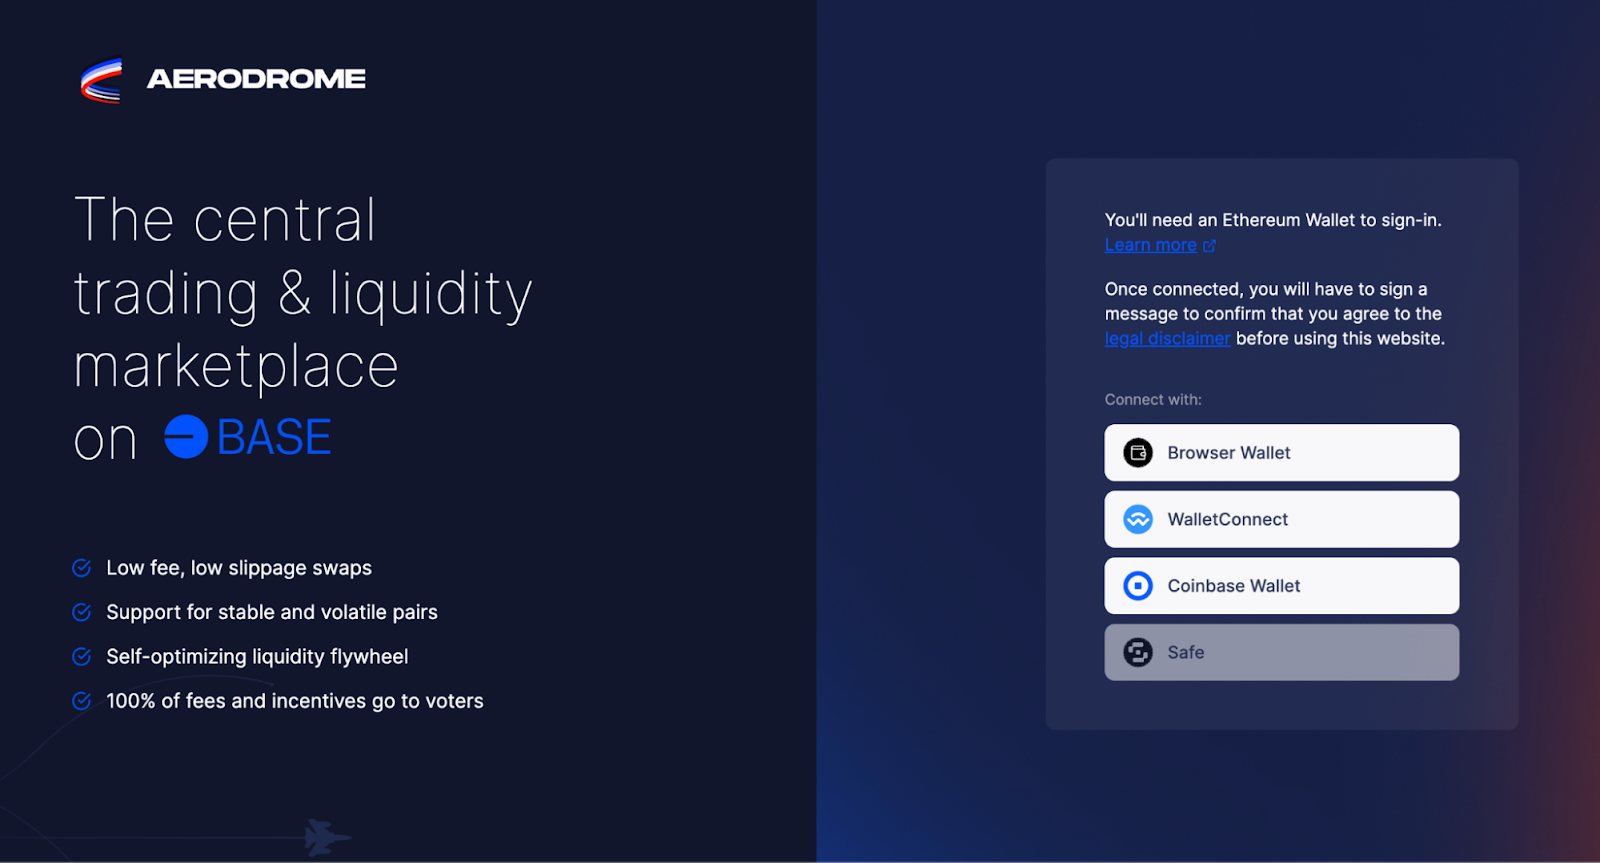
The first step required before adding liquidity to either pool is connecting your wallet to the Aerodrome Finance platform.
- Navigate to https://aerodrome.finance/ and click “Connect”:

- This will bring up a dialogue requesting you to choose a wallet to connect to Aerodrome:
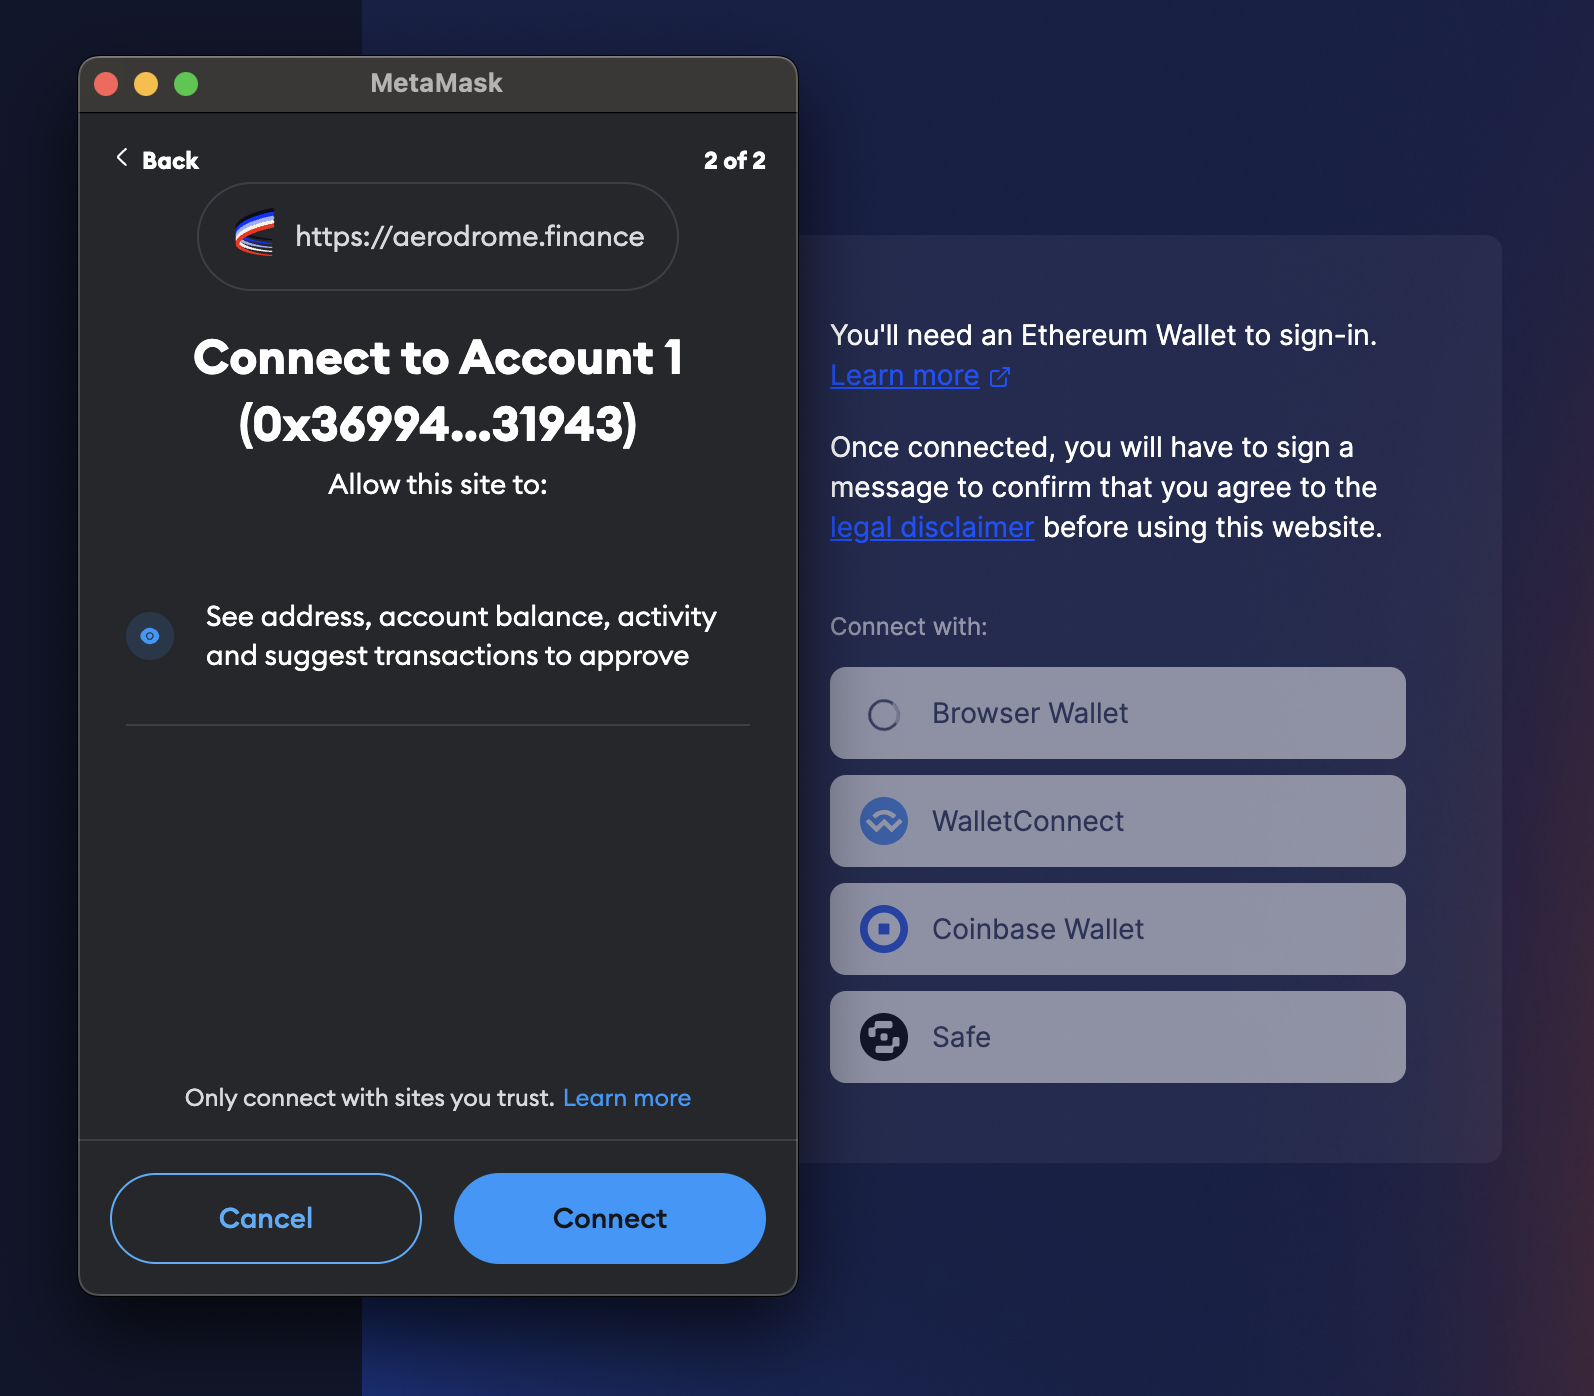
- For the purpose of this tutorial we will be using MetaMask. To connect to MetaMask, click on “Browser Wallet,” and a MetaMask notification will appear. To connect, simply hit “connect” on the wallet notification:
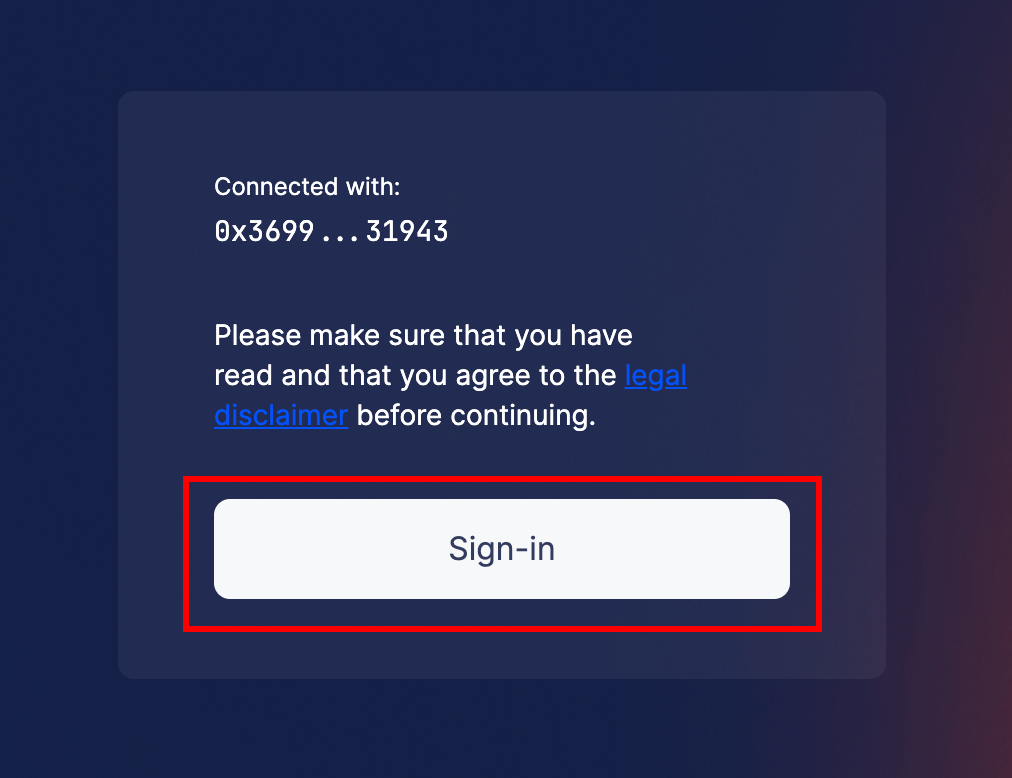
- Once connected, you will be asked to “Sign In” to agree to the legal disclaimer. Hit “Sign-In”:
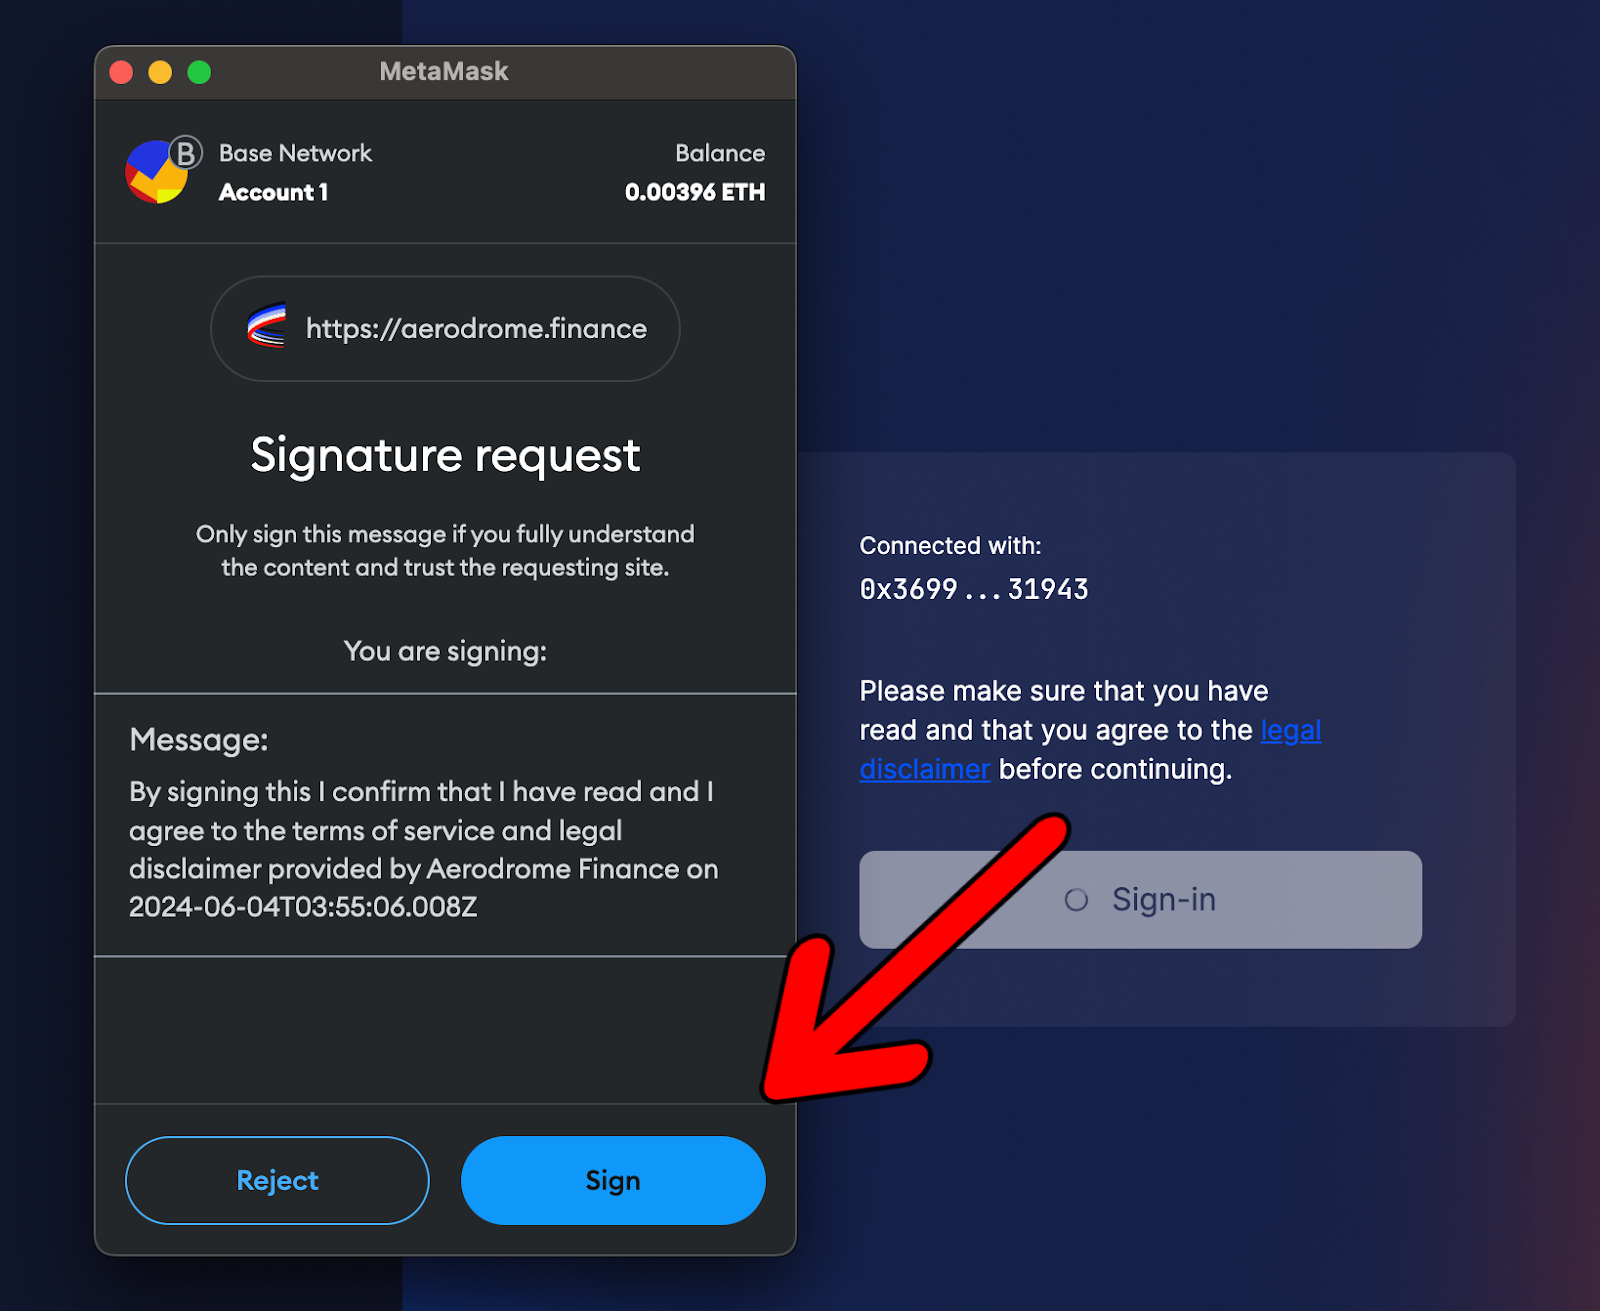
- Another MetaMask wallet notification will appear, asking for a signature request to sign the legal disclaimer. If you’re happy to accept the legal disclaimer, hit “sign”:
Once signed, you will have officially connected your wallet to Aerodrome Finance and can continue to the next step.
Adding Liquidity to the CL200-USDC/XPRT Pool
This next part of the guide covers how to add liquidity to the CL200-USDC/XPRT Pool, which is a concentrated liquidity pool.
Concentrated liquidity is a novel Automated Market Maker (AMM) design introduced by Uniswap that allows for more efficient use of capital. It allows LPs to set a range within which they want to add liquidity. Liquidity providers can earn more fees as trades occur within this range, optimizing their capital efficiency.
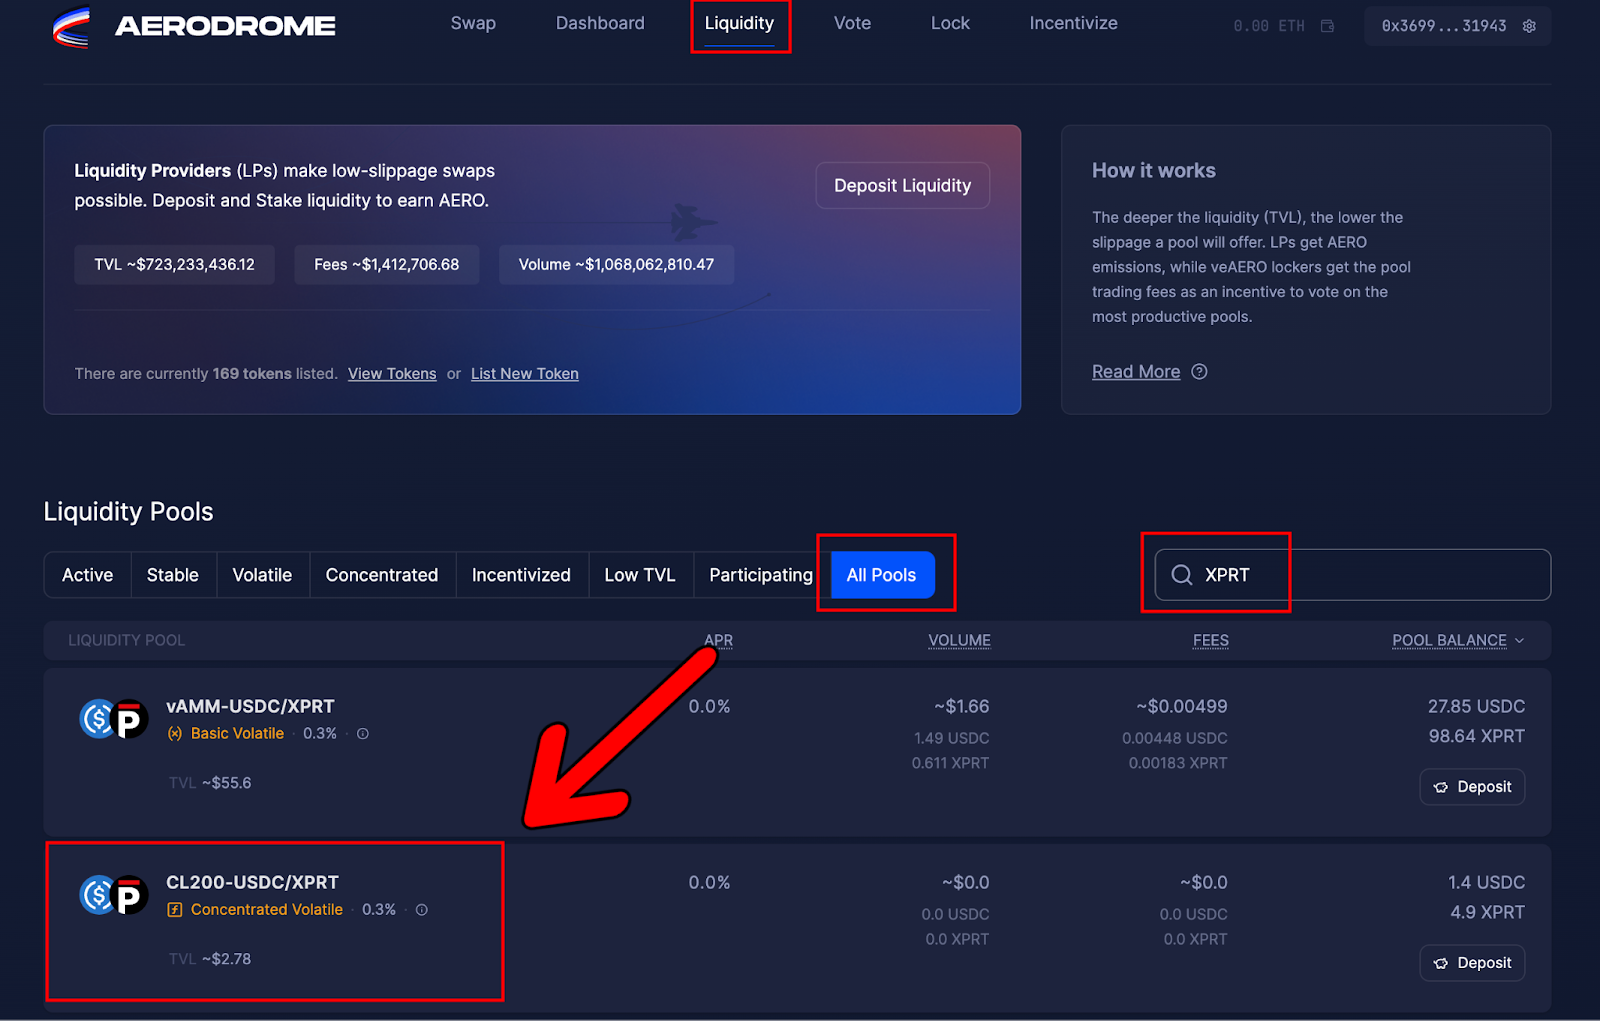
- Head to the Liquidity page, search for XPRT, and click the CL200-USDC/XPRT Pool:
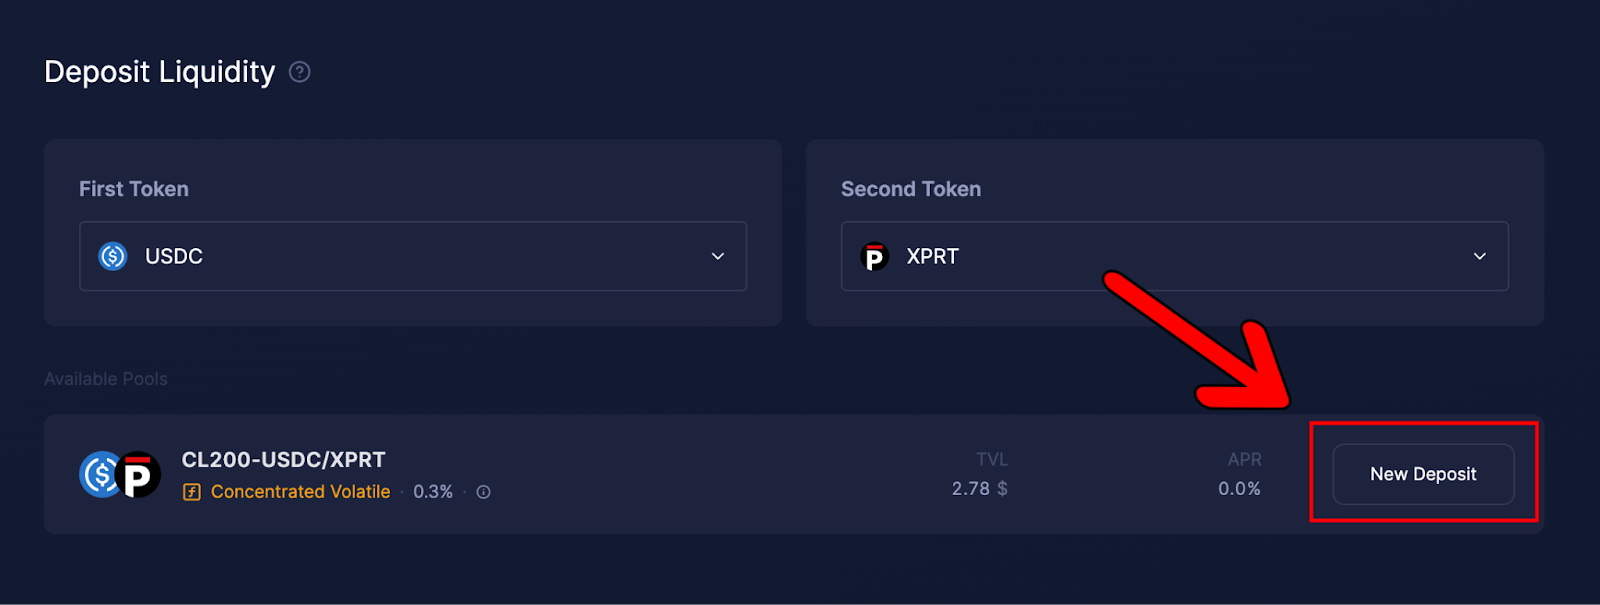
- Click “New Deposit”:
- This will bring up the following dashboard:
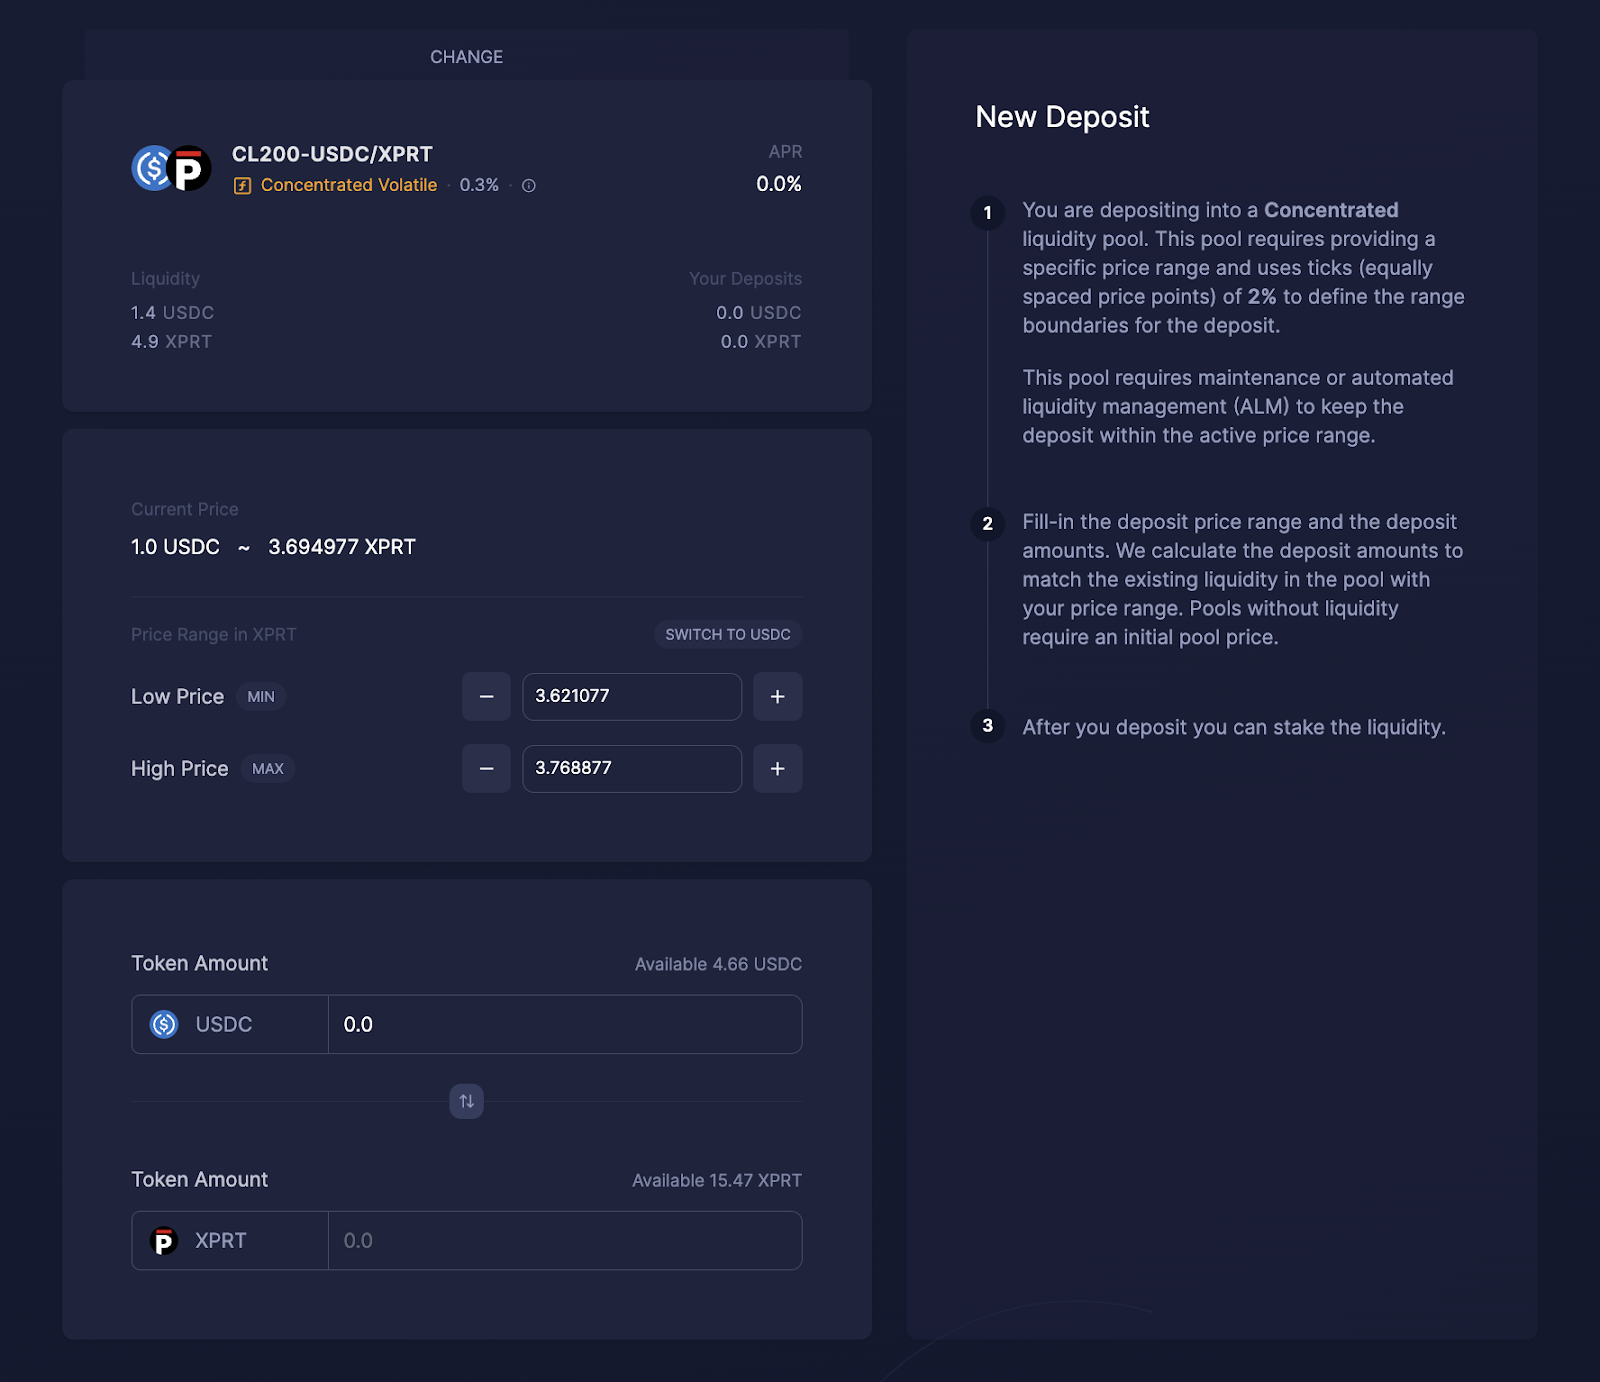
- The next step is defining the price range to accept swaps and inputting the amount of tokens to add to the pool:
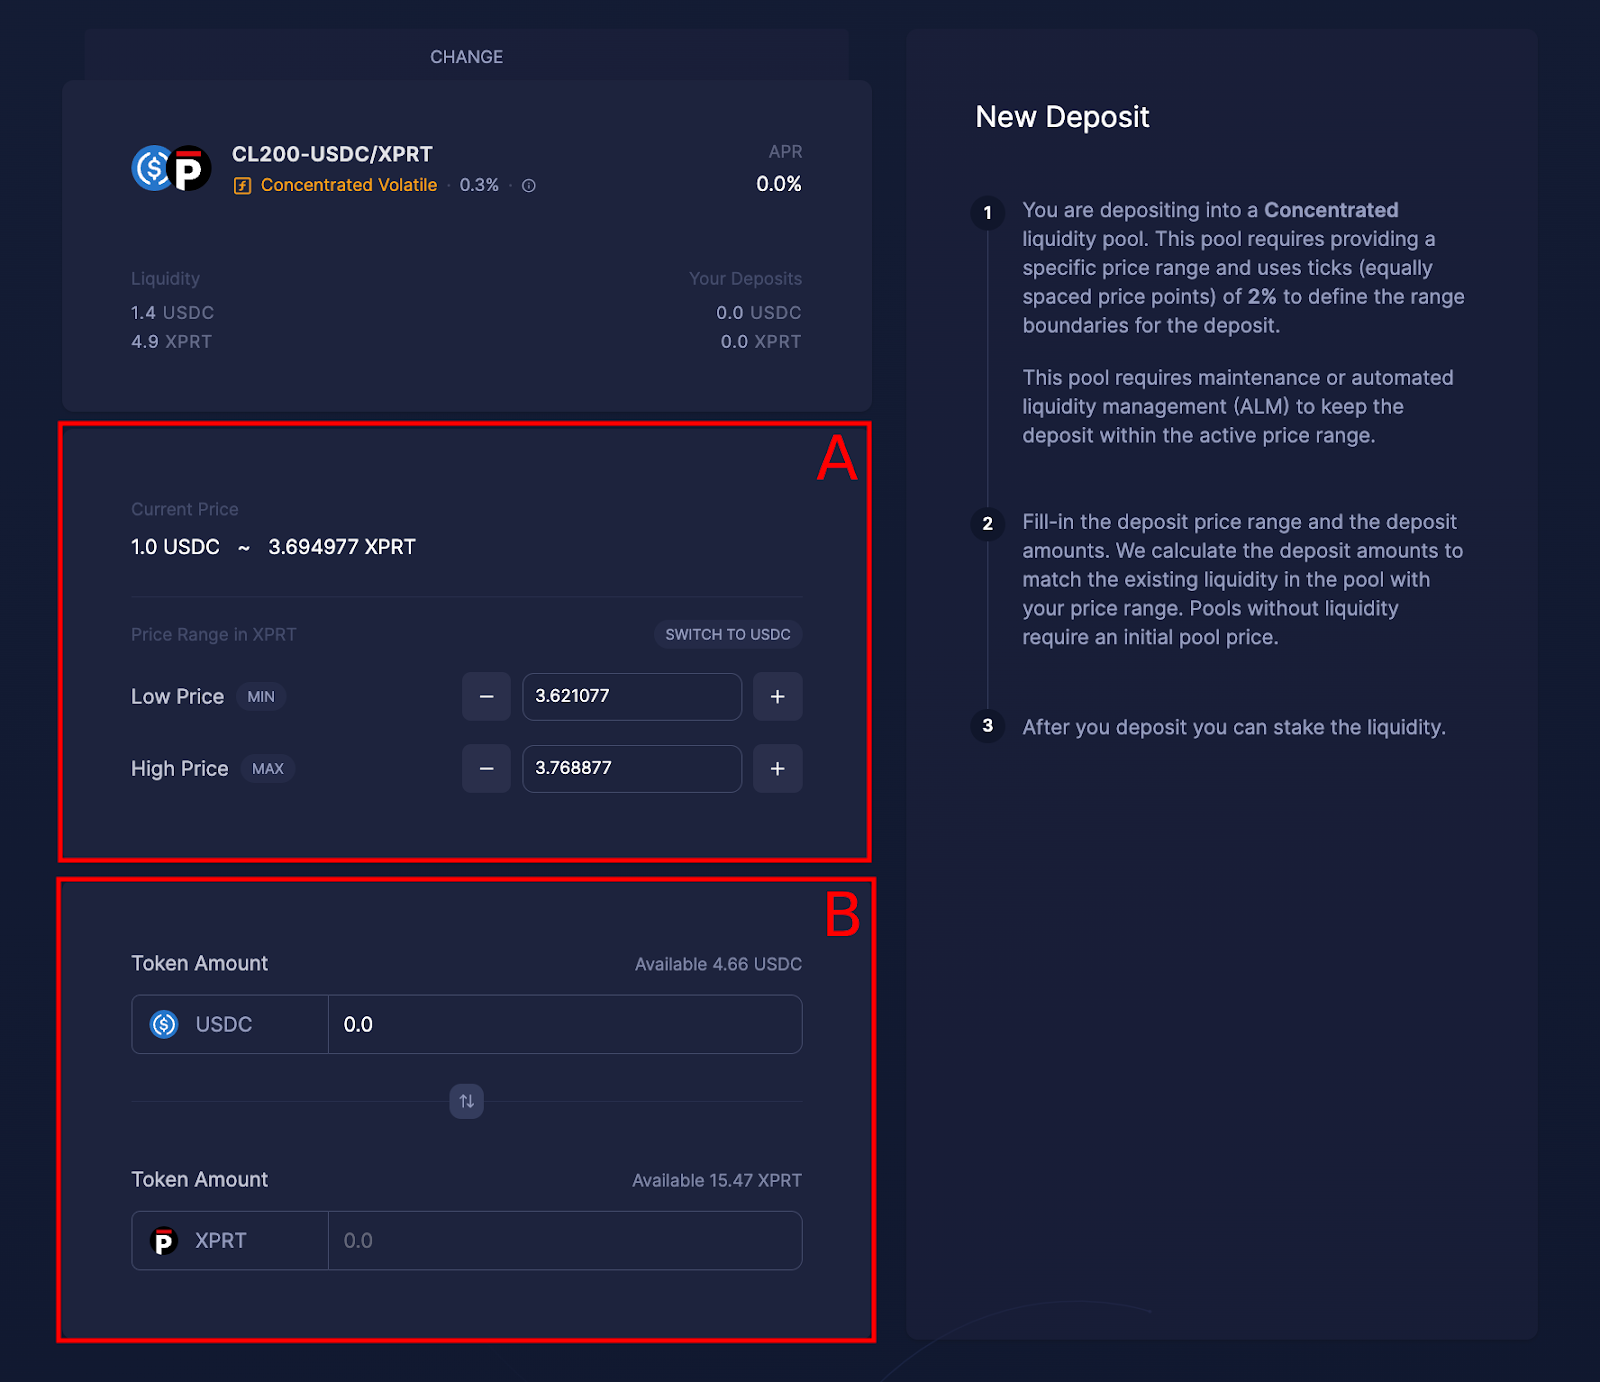
- In the diagram above, Box A allows you to adjust the price range in USDC that you’re happy to facilitate a swap within. The default parameters for Box A use ticks of 2% to define the range boundaries for the deposit.
- Box B allows you to input the amount of liquidity to add. To add liquidity, simply input an XPRT amount or USDC amount, and the other field will automatically populate.
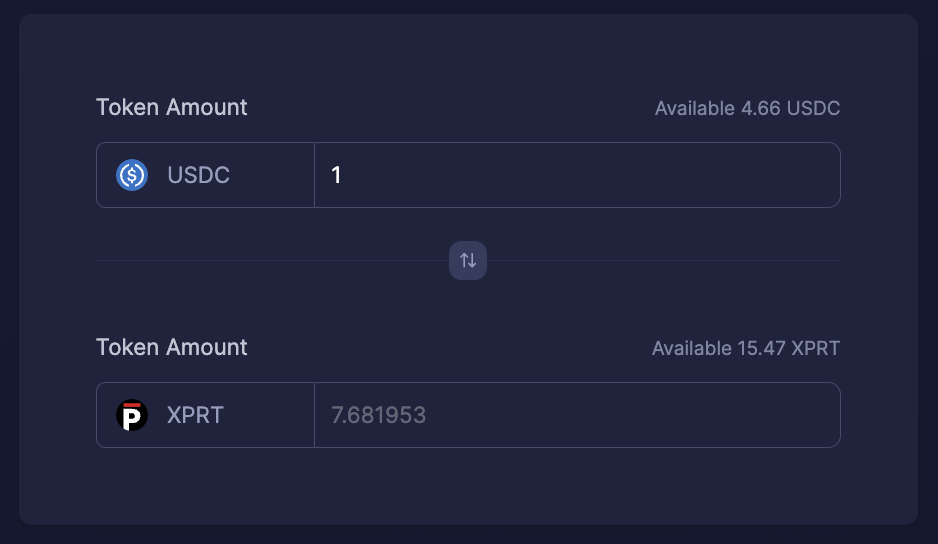
- In this case, we will add 1 USDC to the liquidity pool (the XPRT amount will automatically be calculated on the dashboard):
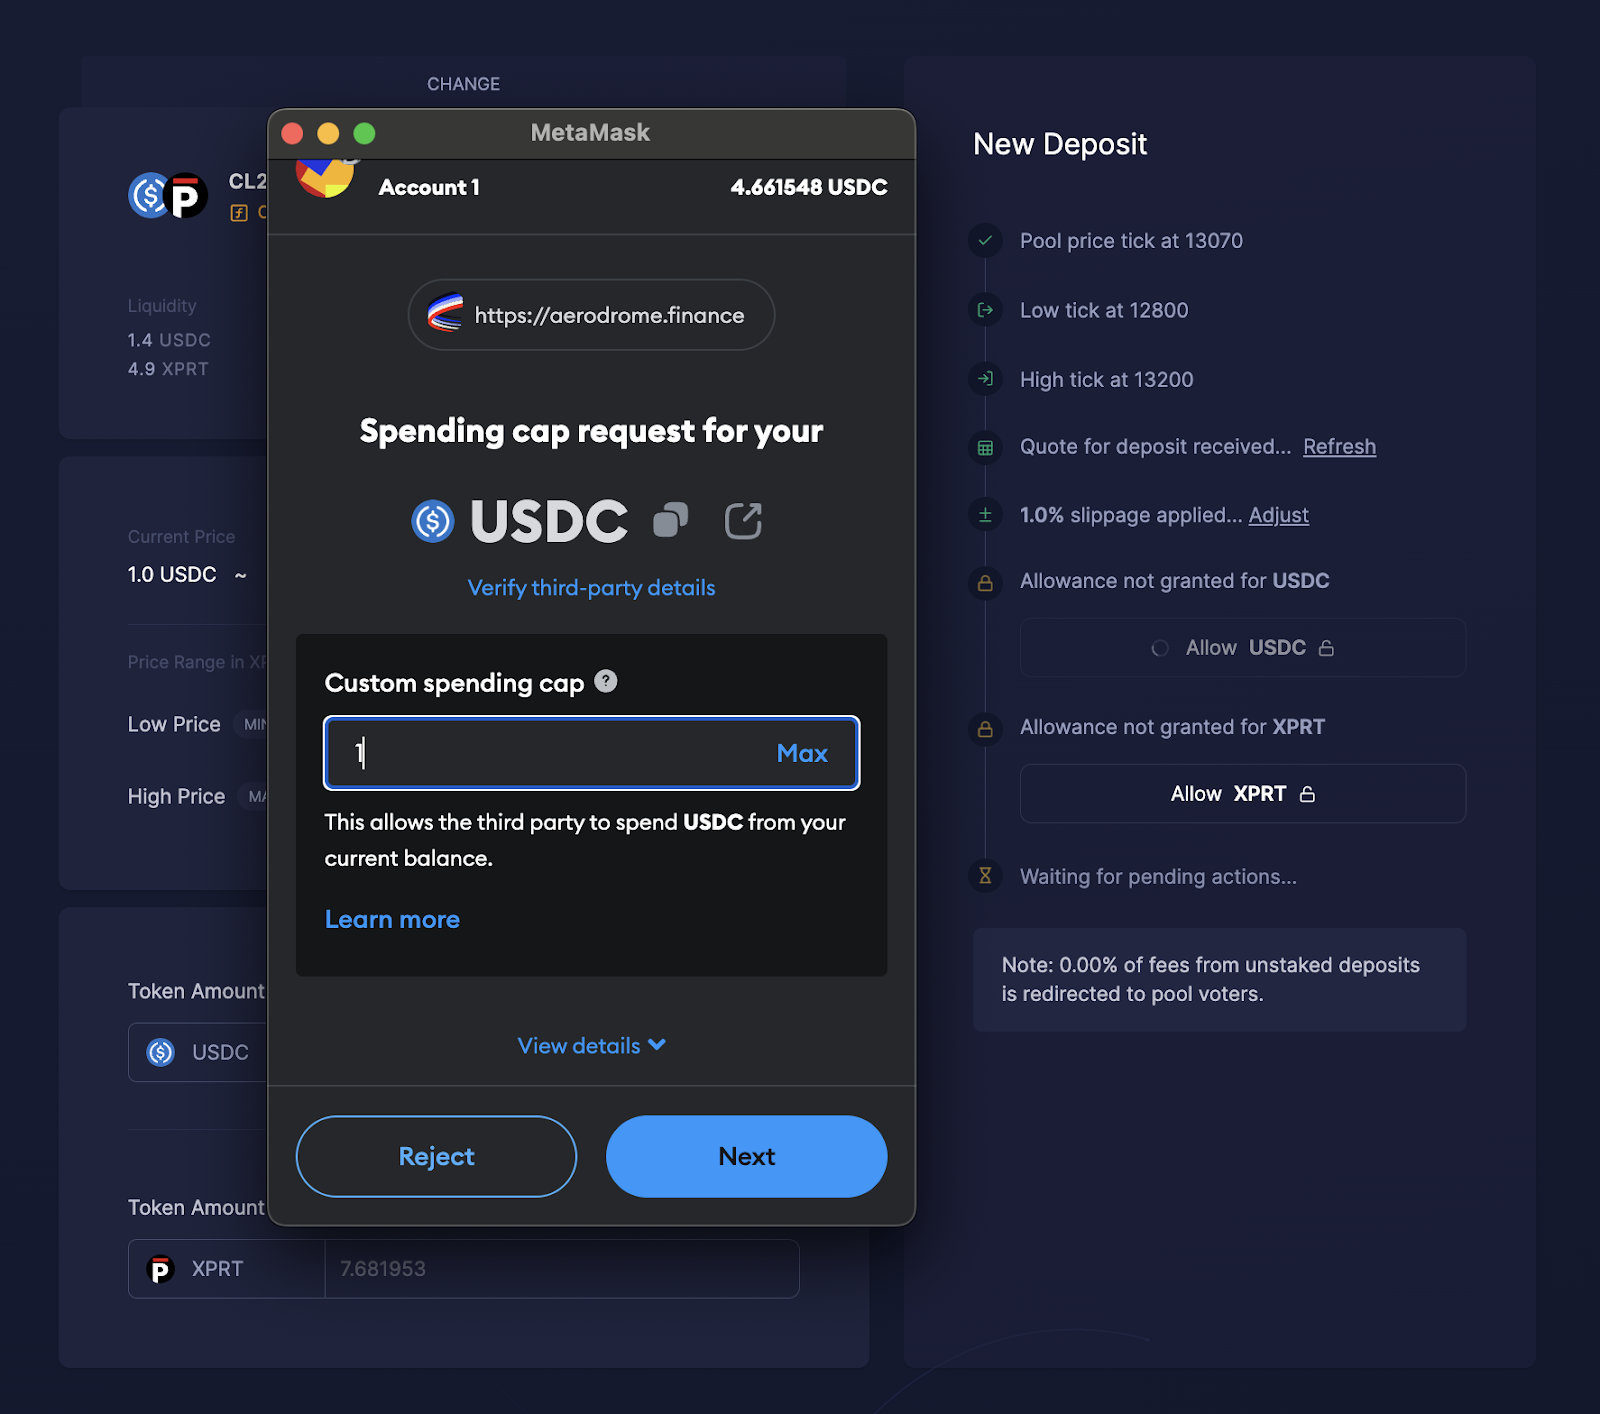
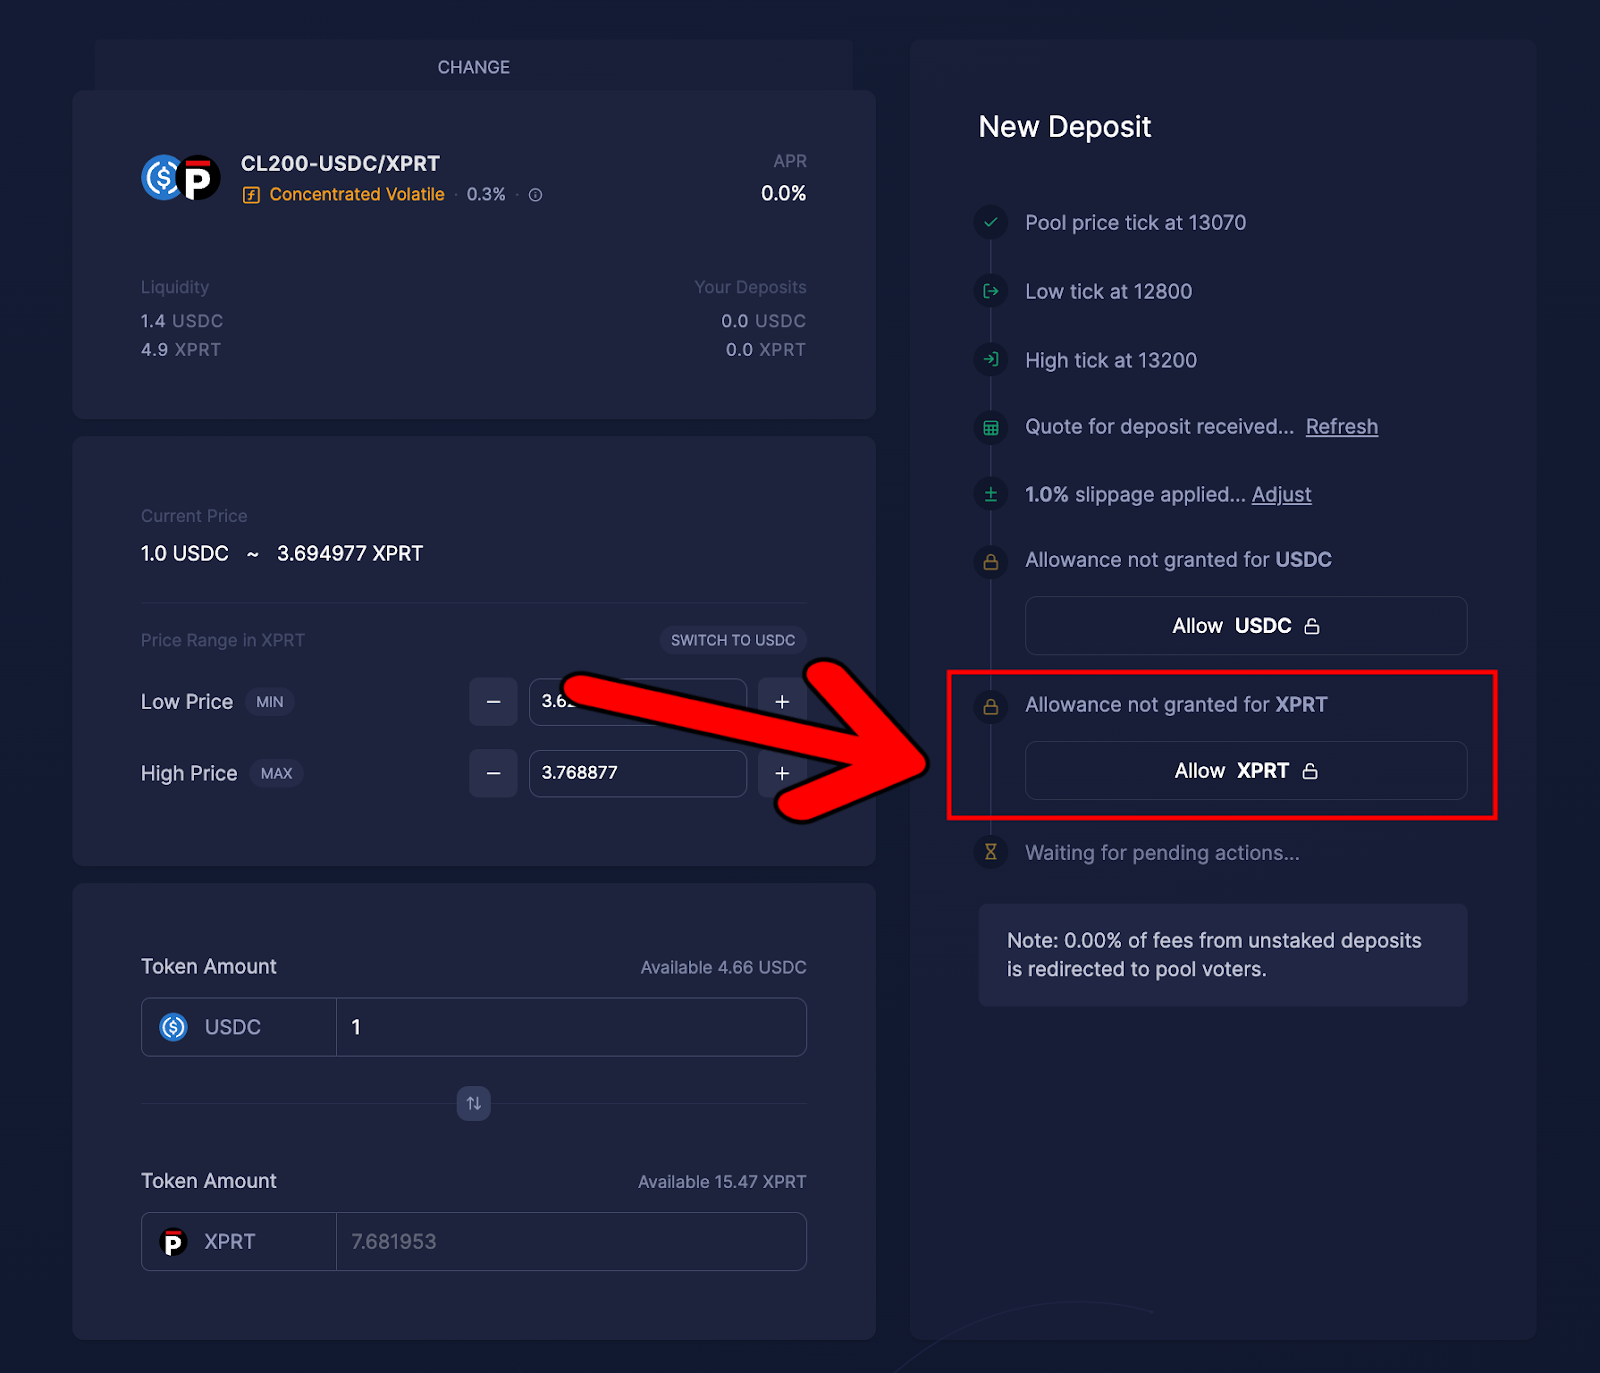
- Next, we need to provide permission for Aerodrome to spend USDC to add liquidity to the pool. Click “Allow USDC”:

- This will bring up the following MetaMask wallet notification, asking for permission to set the spending cap for you to confirm:
- Next, we need to provide the same permission for Aerodrome to utilize XPRT. Click “Allow XPRT” and confirm the subsequent wallet notification prompts as we did previously:
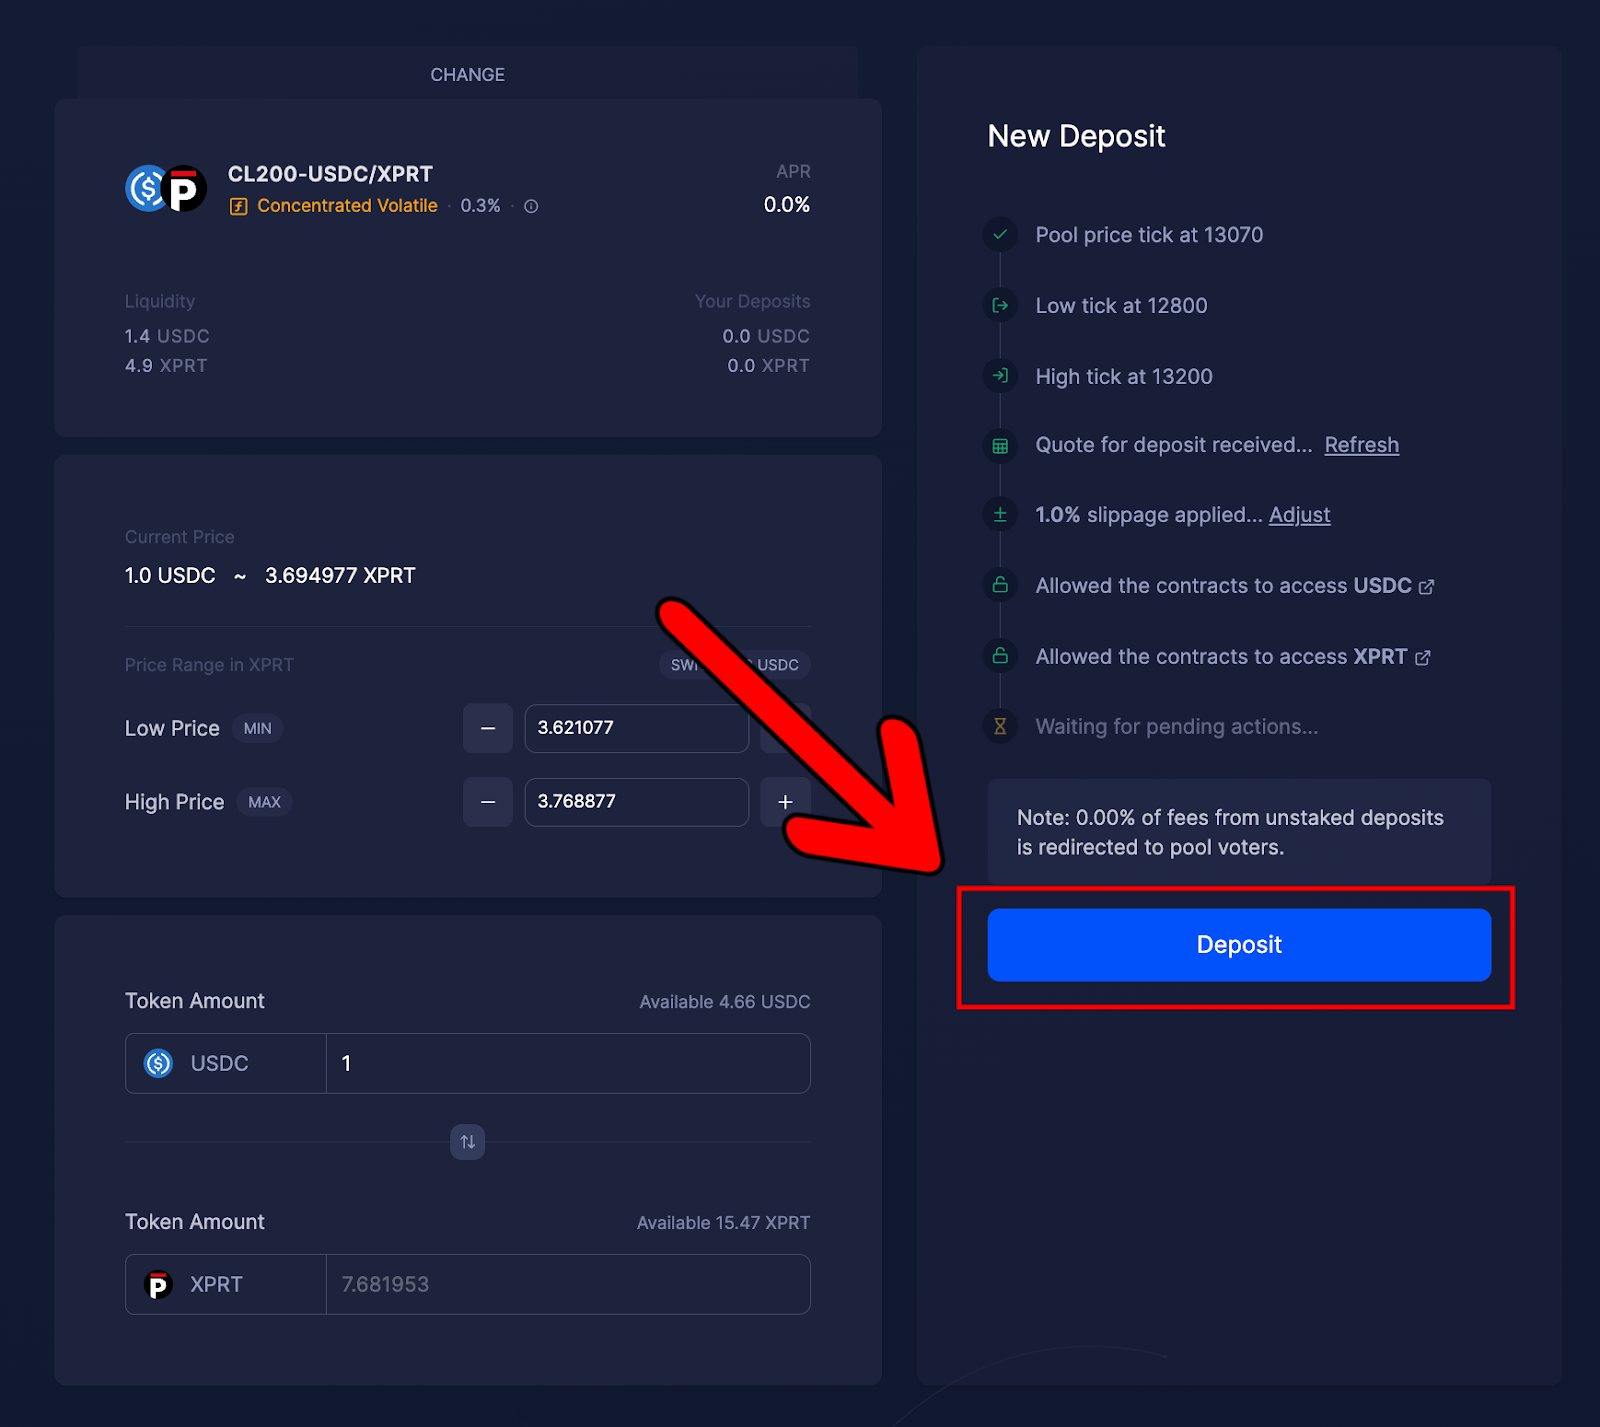
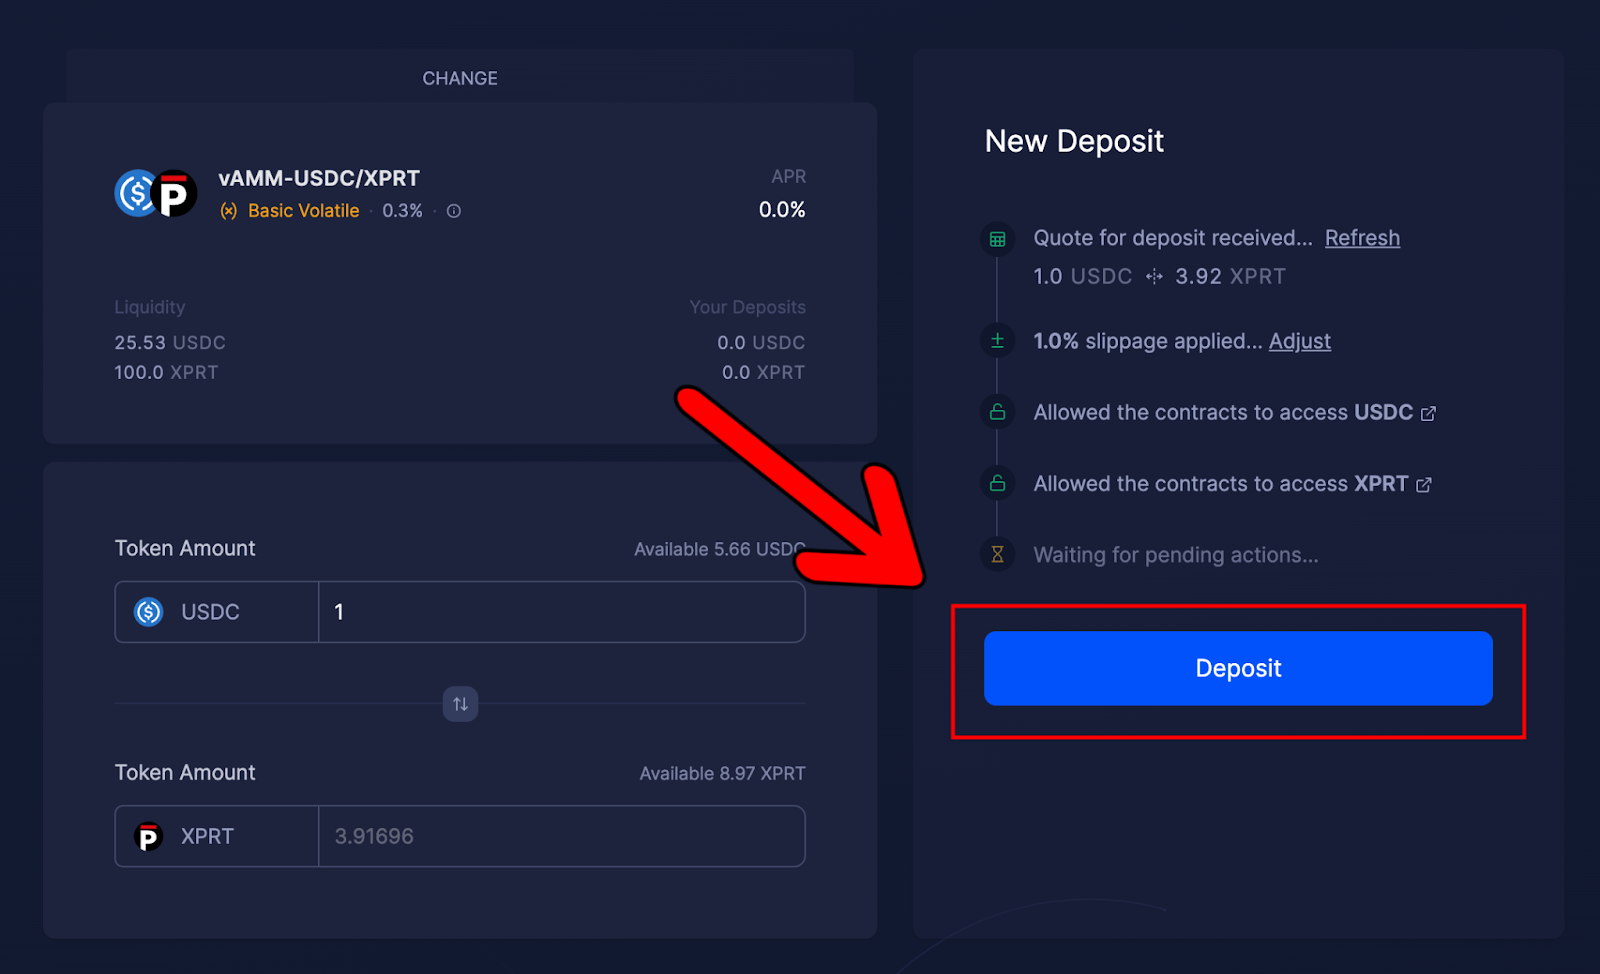
- Once confirmed, we are free to initiate the deposit to add to the liquidity pool. To do this, hit “Deposit”:
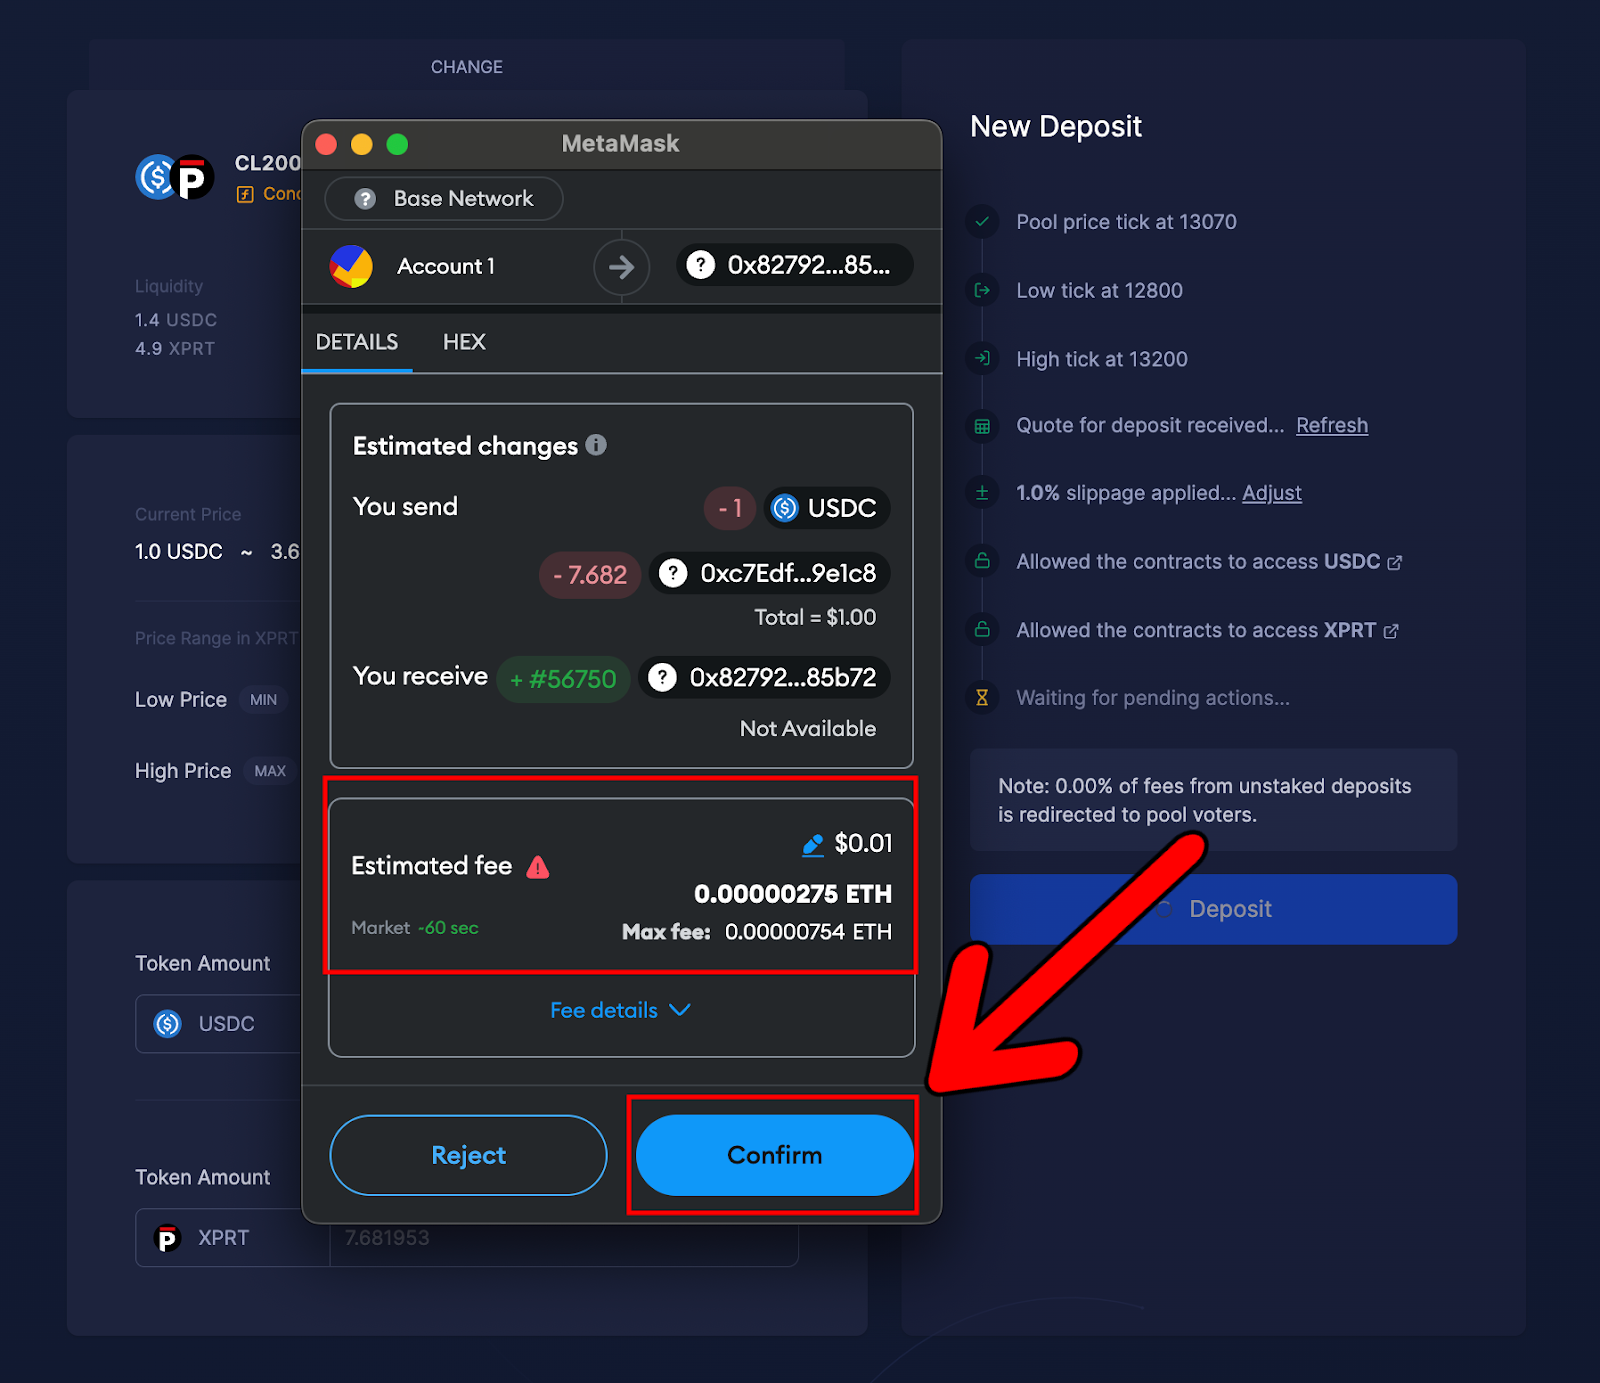
- This will bring up the following MetaMask wallet notification for you to confirm the deposit. Note that there’s another small transaction fee to pay here. If you’re happy to go ahead with the deposit into the liquidity pool, click “Confirm”:
- Once the liquidity has been deposited, you should see the following notification appear:
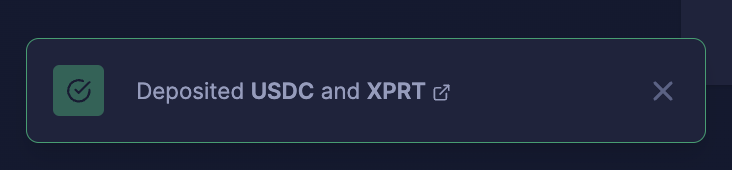
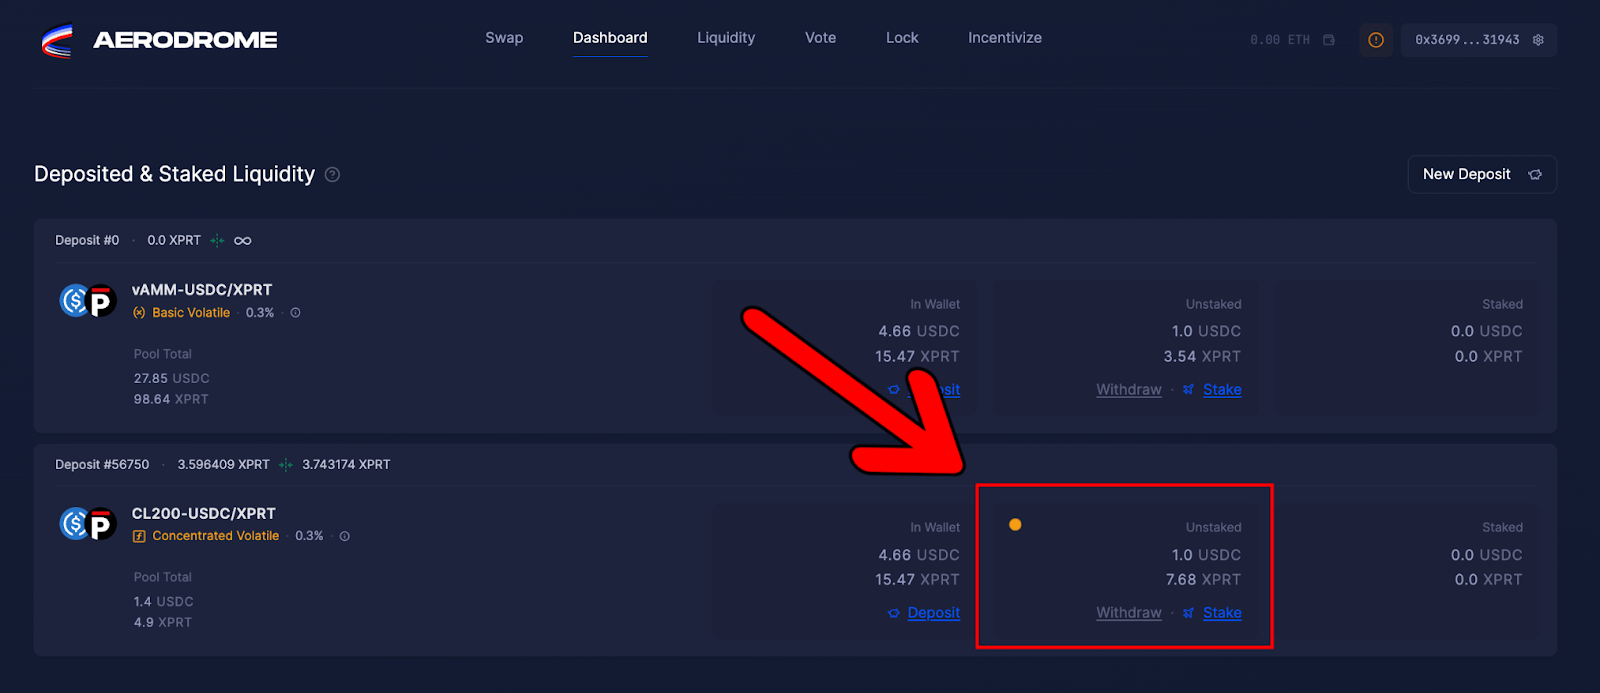
That’s all there is to it. You’ve now added your USDC and XPRT liquidity into the CL200-USDC/XPRT on Aerodrome Finance. You can double-check your deposit on the “Dashboard” page:
Adding Liquidity to the vAMM-USDC/XPRT Pool
This part of the guide will cover how to add liquidity to the vAMM-USDC/XPRT pool—the basic volatile pool. This pool will facilitate transactions and swaps regardless of the price range, so liquidity providers won’t need to adjust the price range.
To get started, we need to navigate to the vAMM-USDC/XPRT and select the quantity of liquidity to add. To add liquidity, you will need to allow Aerodrome Finance to spend your XPRT and USDC in two separate approval transactions before confirming the deposit.
- Head to the liquidity page on Aerodrome Finance and search for XPRT. Note: you might need to select the “All Pools” toggle to find the pool:
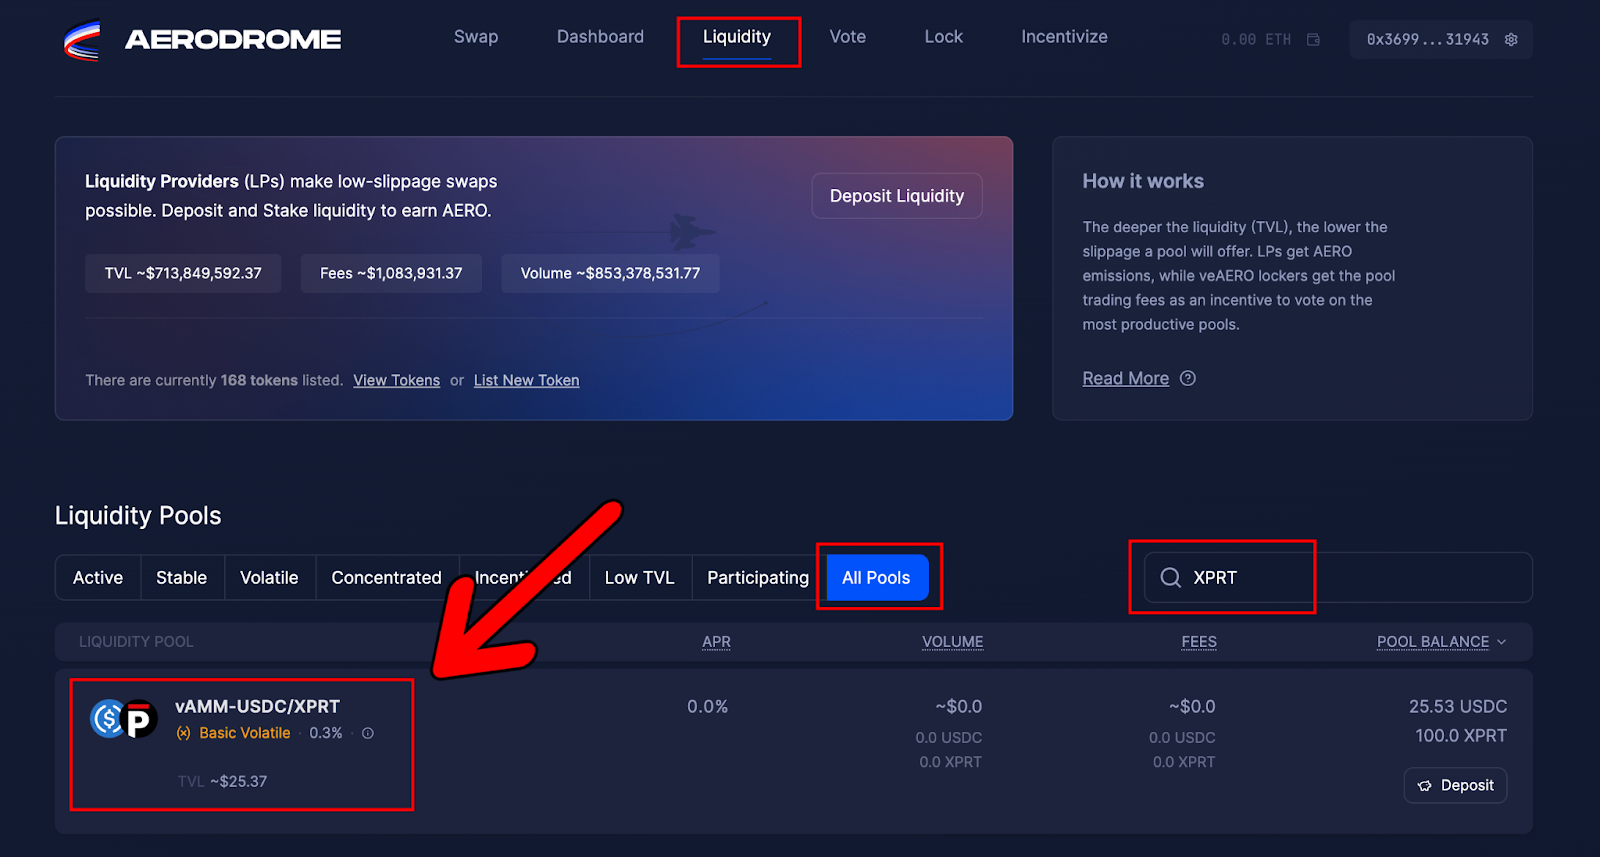
- Once you click the pool, you should see the following screen:
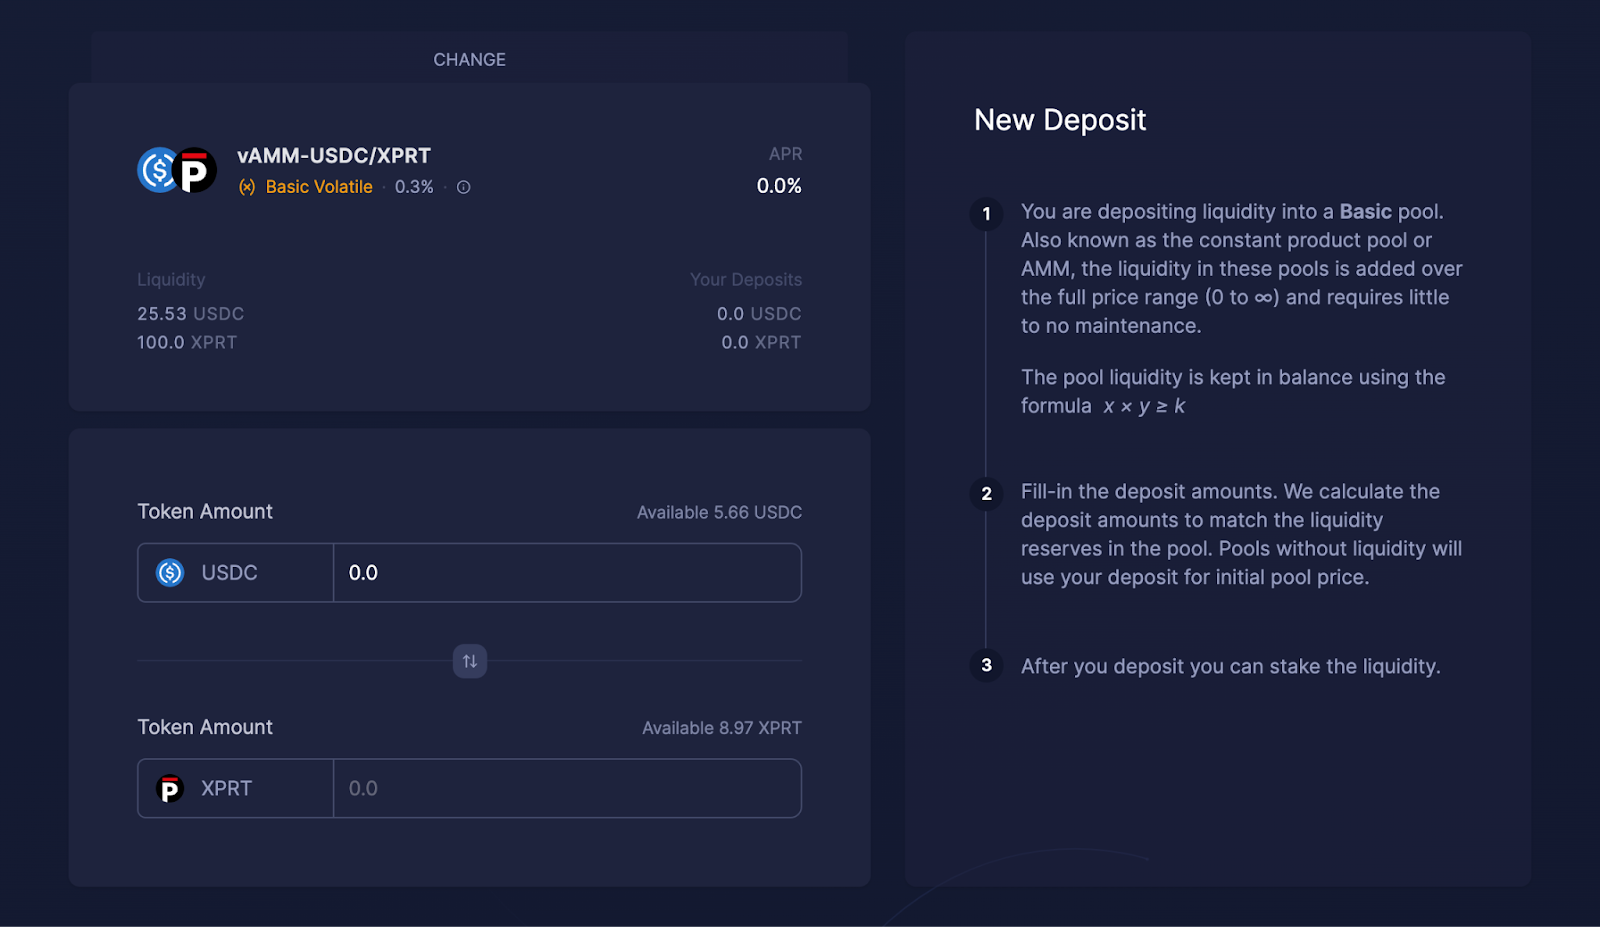
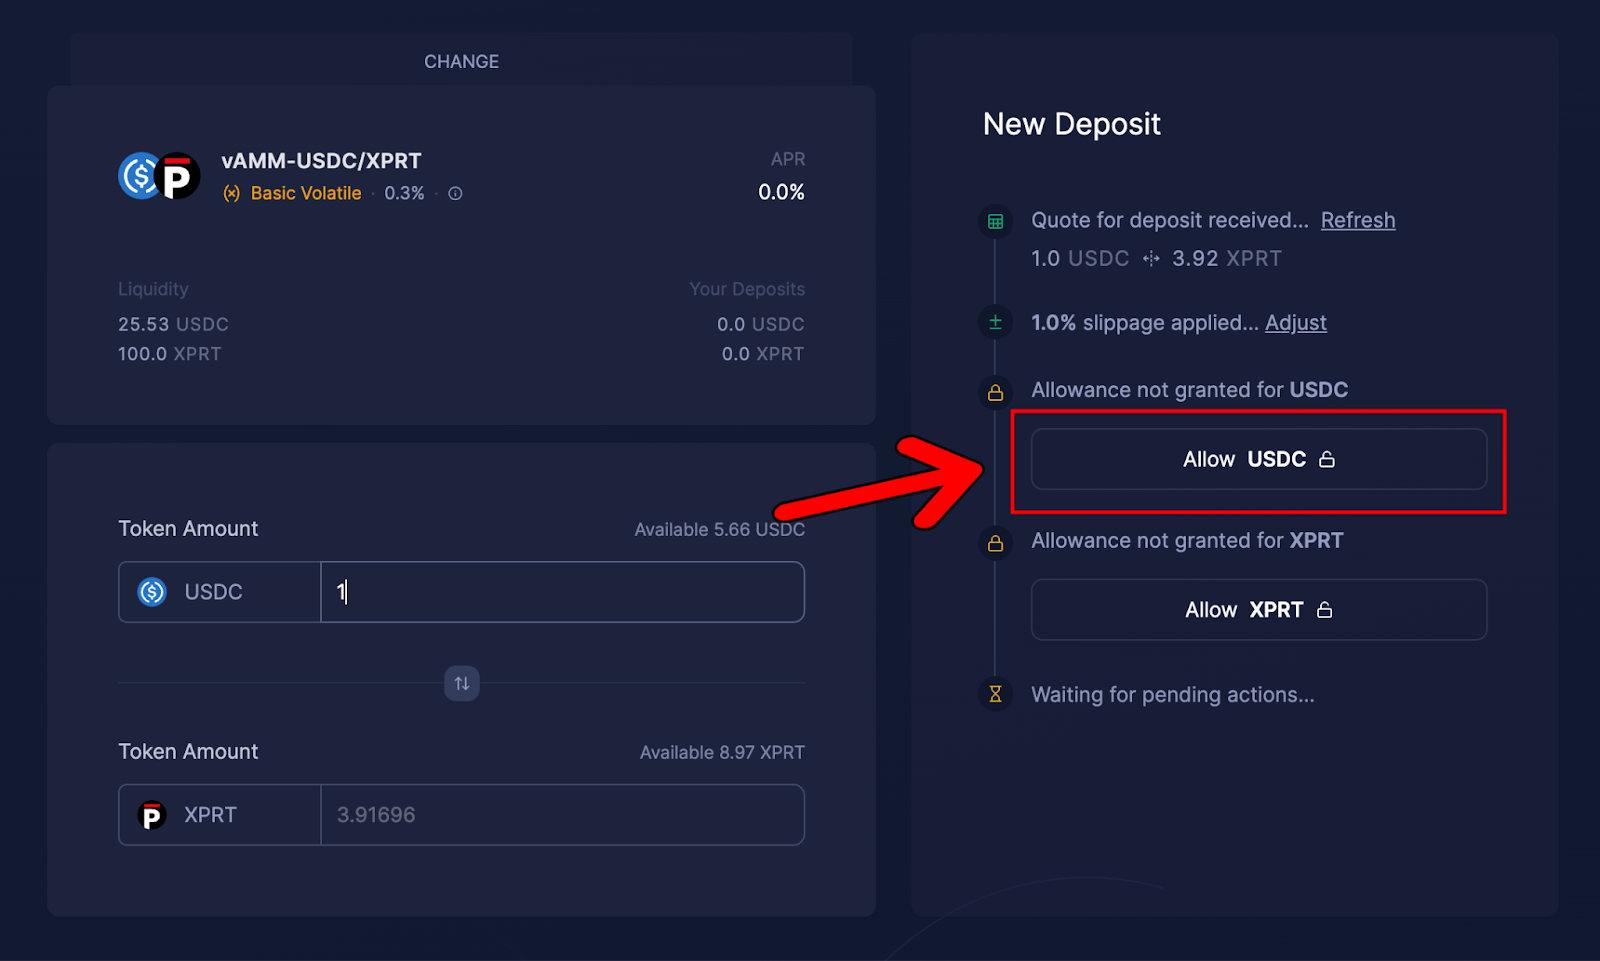
- Next, we need to select the desired amount of liquidity to add to the pool. As the pool is weighted on a 50/50 balance, inputting a quantity into the USDC section will automatically calculate the quantity of XPRT required (or vice versa). For the purpose of this tutorial, we will deposit 1 USDC:
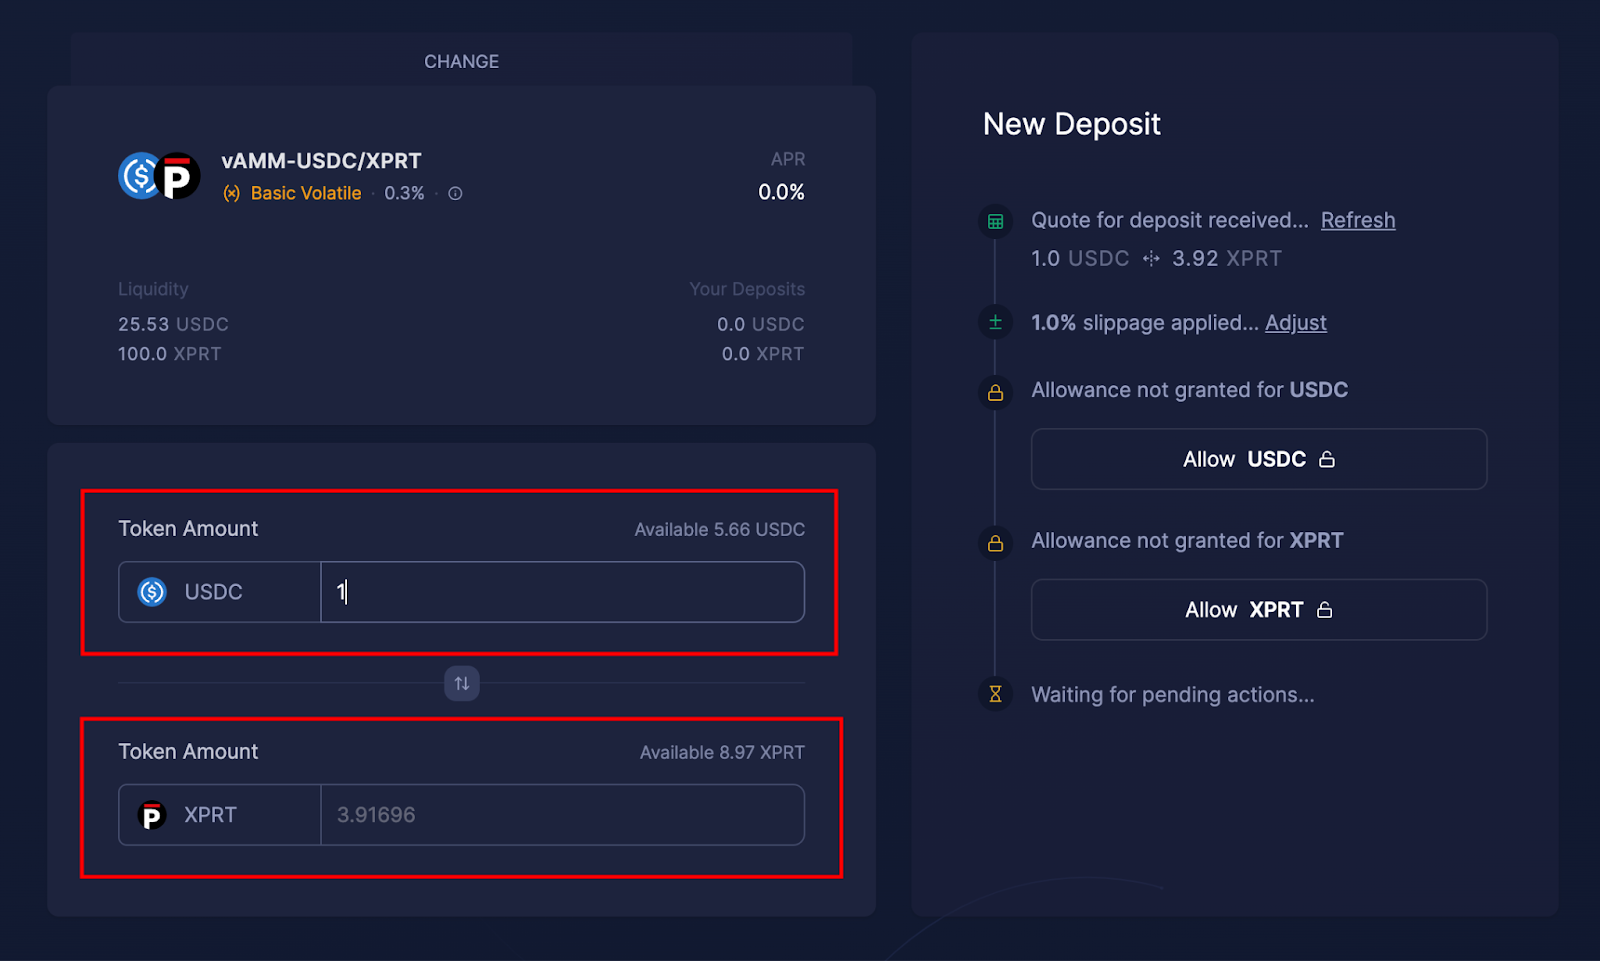
- The next step is to allow Aerodrome to spend your USDC. Let’s click “Allow USDC”:
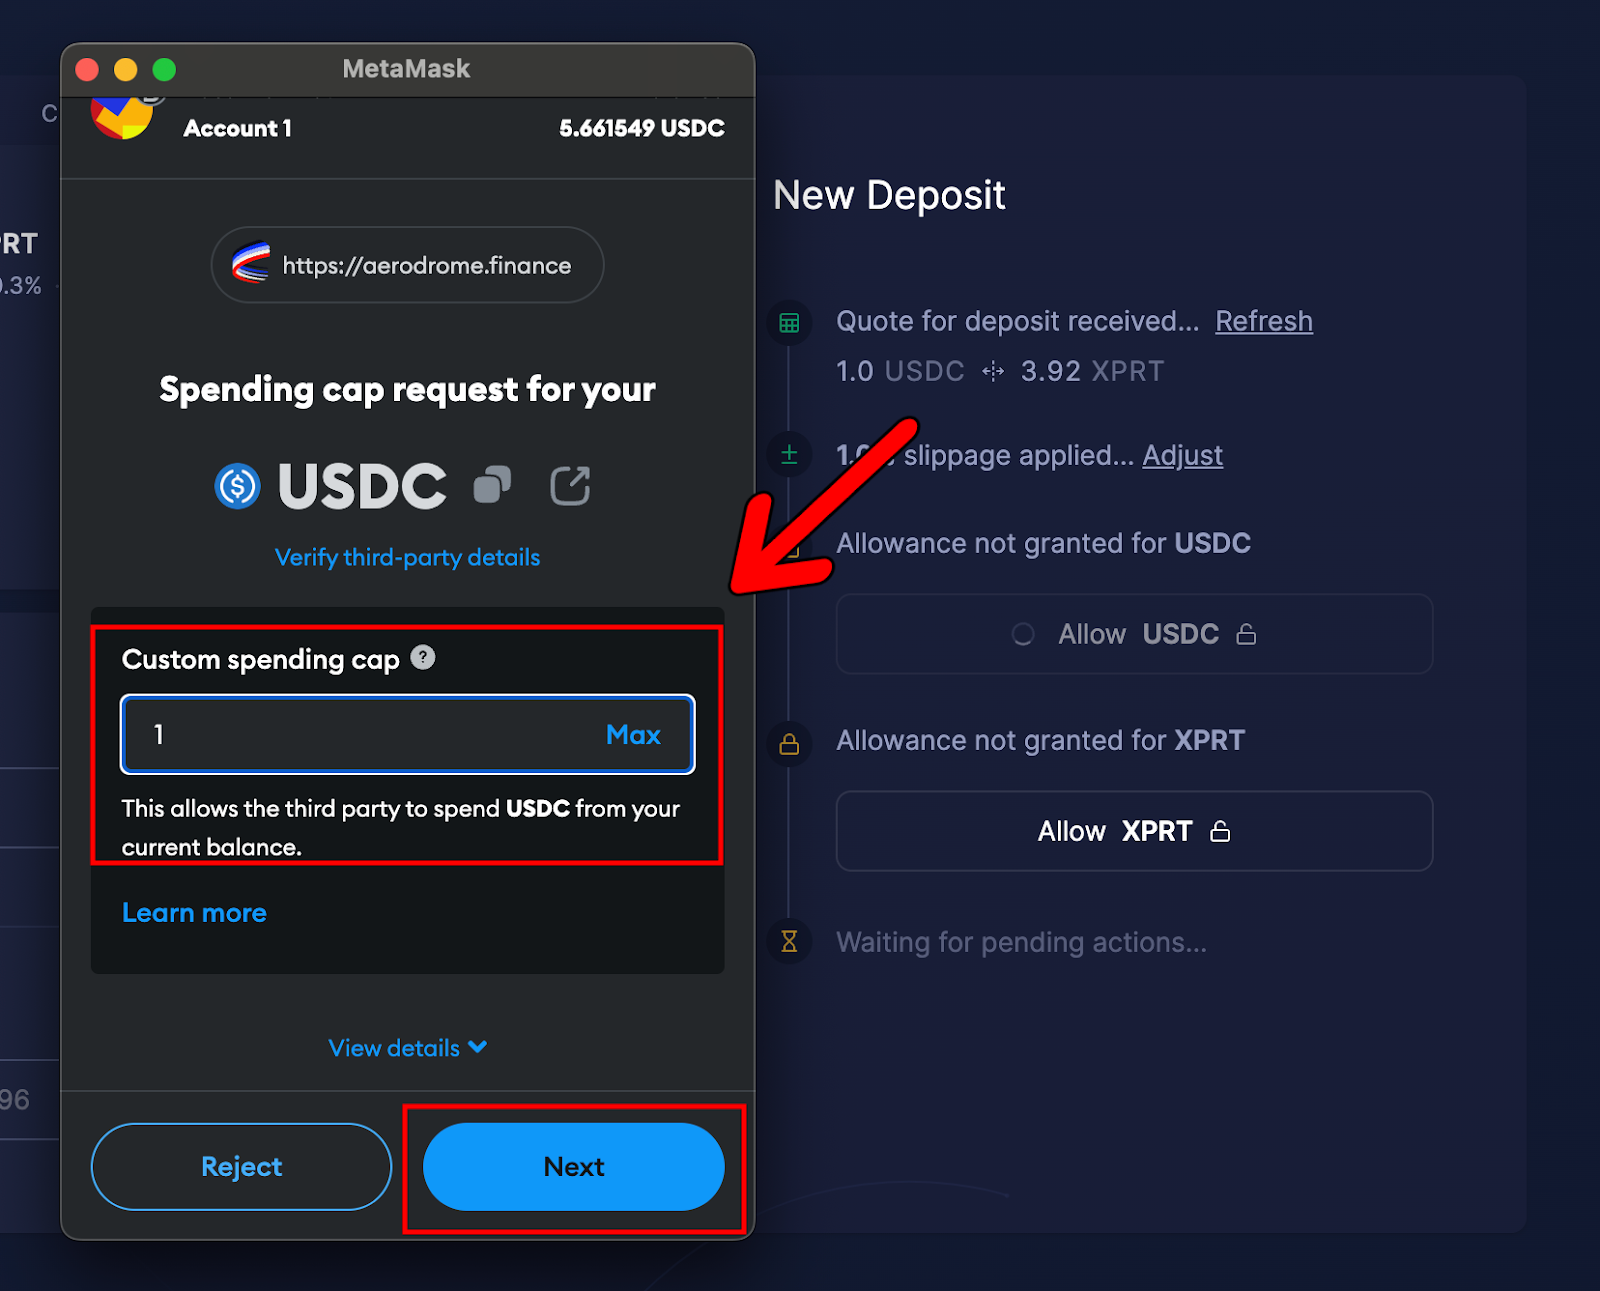
- This will bring up a MetaMask notification, asking to confirm the approval. Here, you can set a spending cap to limit how much USDC access Aerodrome has. In this case, we are adding 1 USDC of liquidity, so we will allow 1 USDC and hit “Next”:
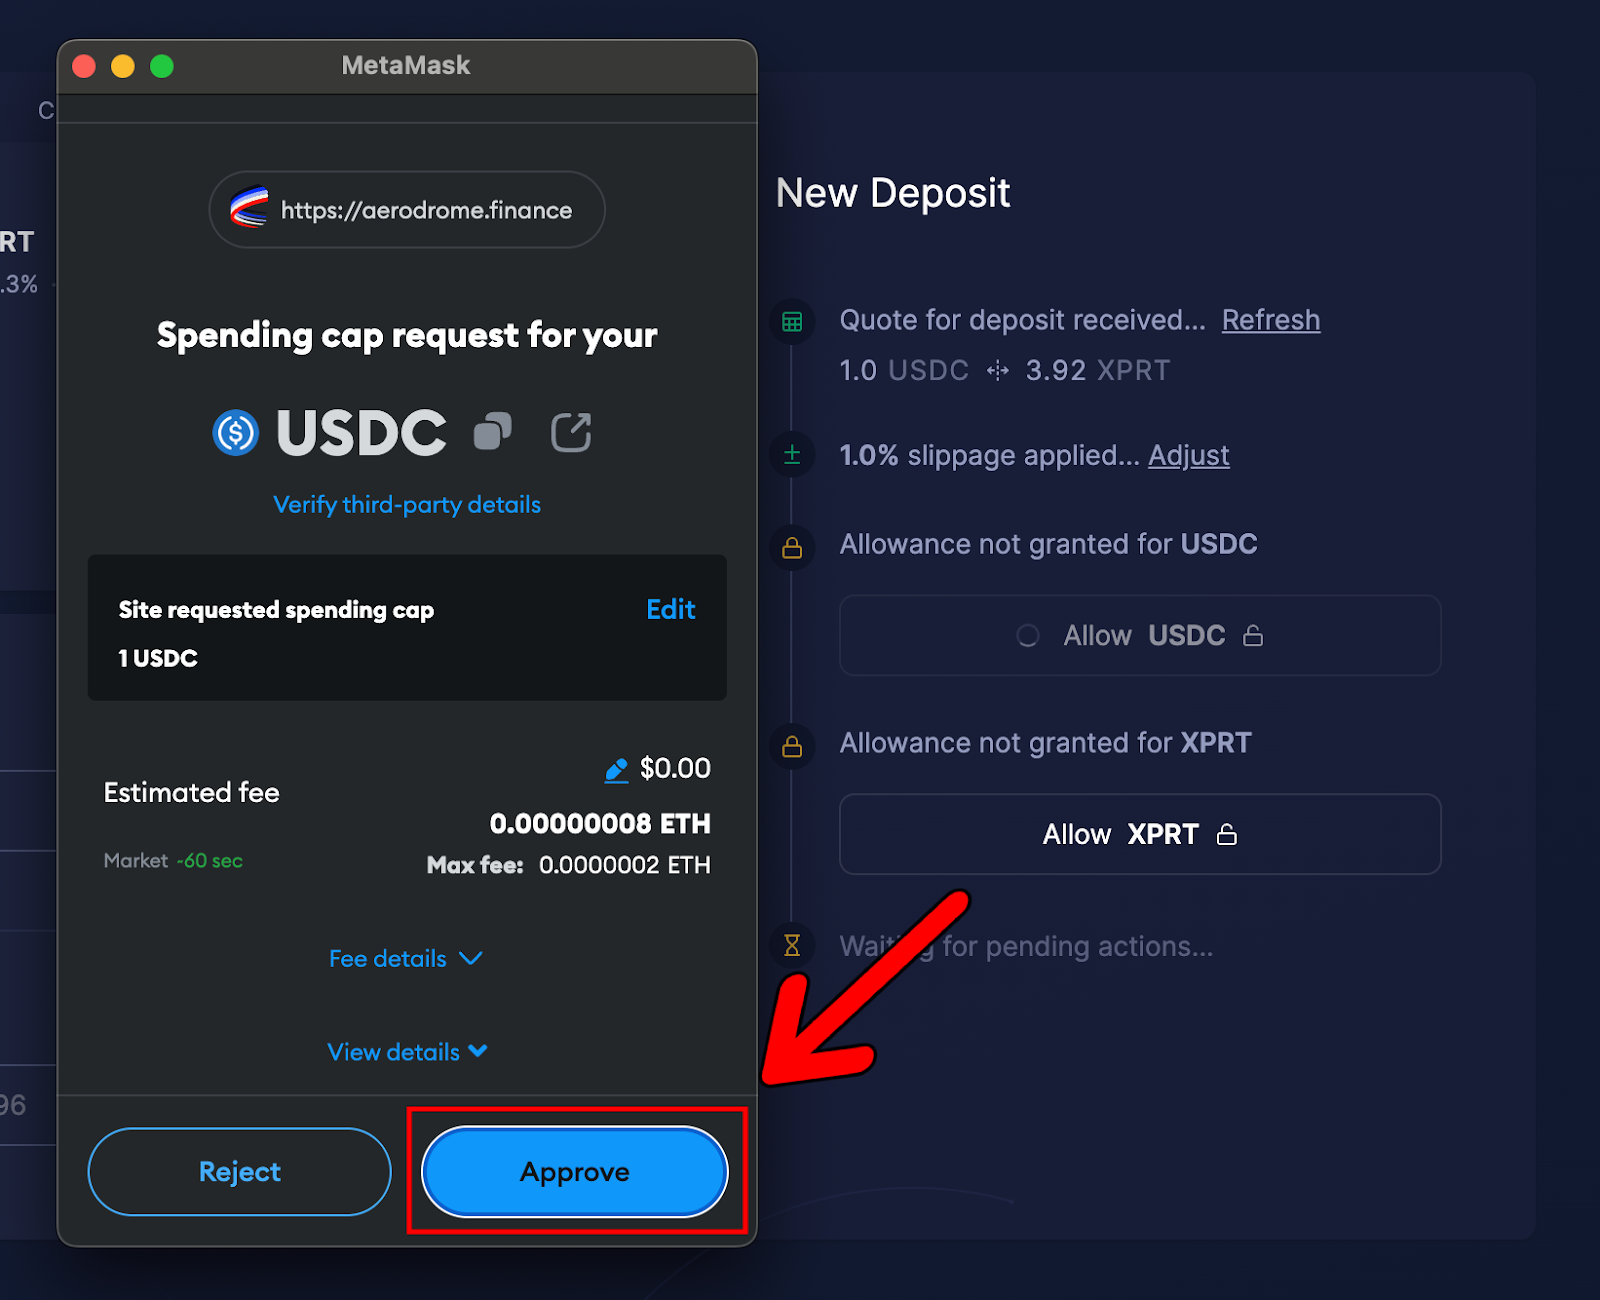
- Now, we must approve this transaction. Simply hit “Approve”:
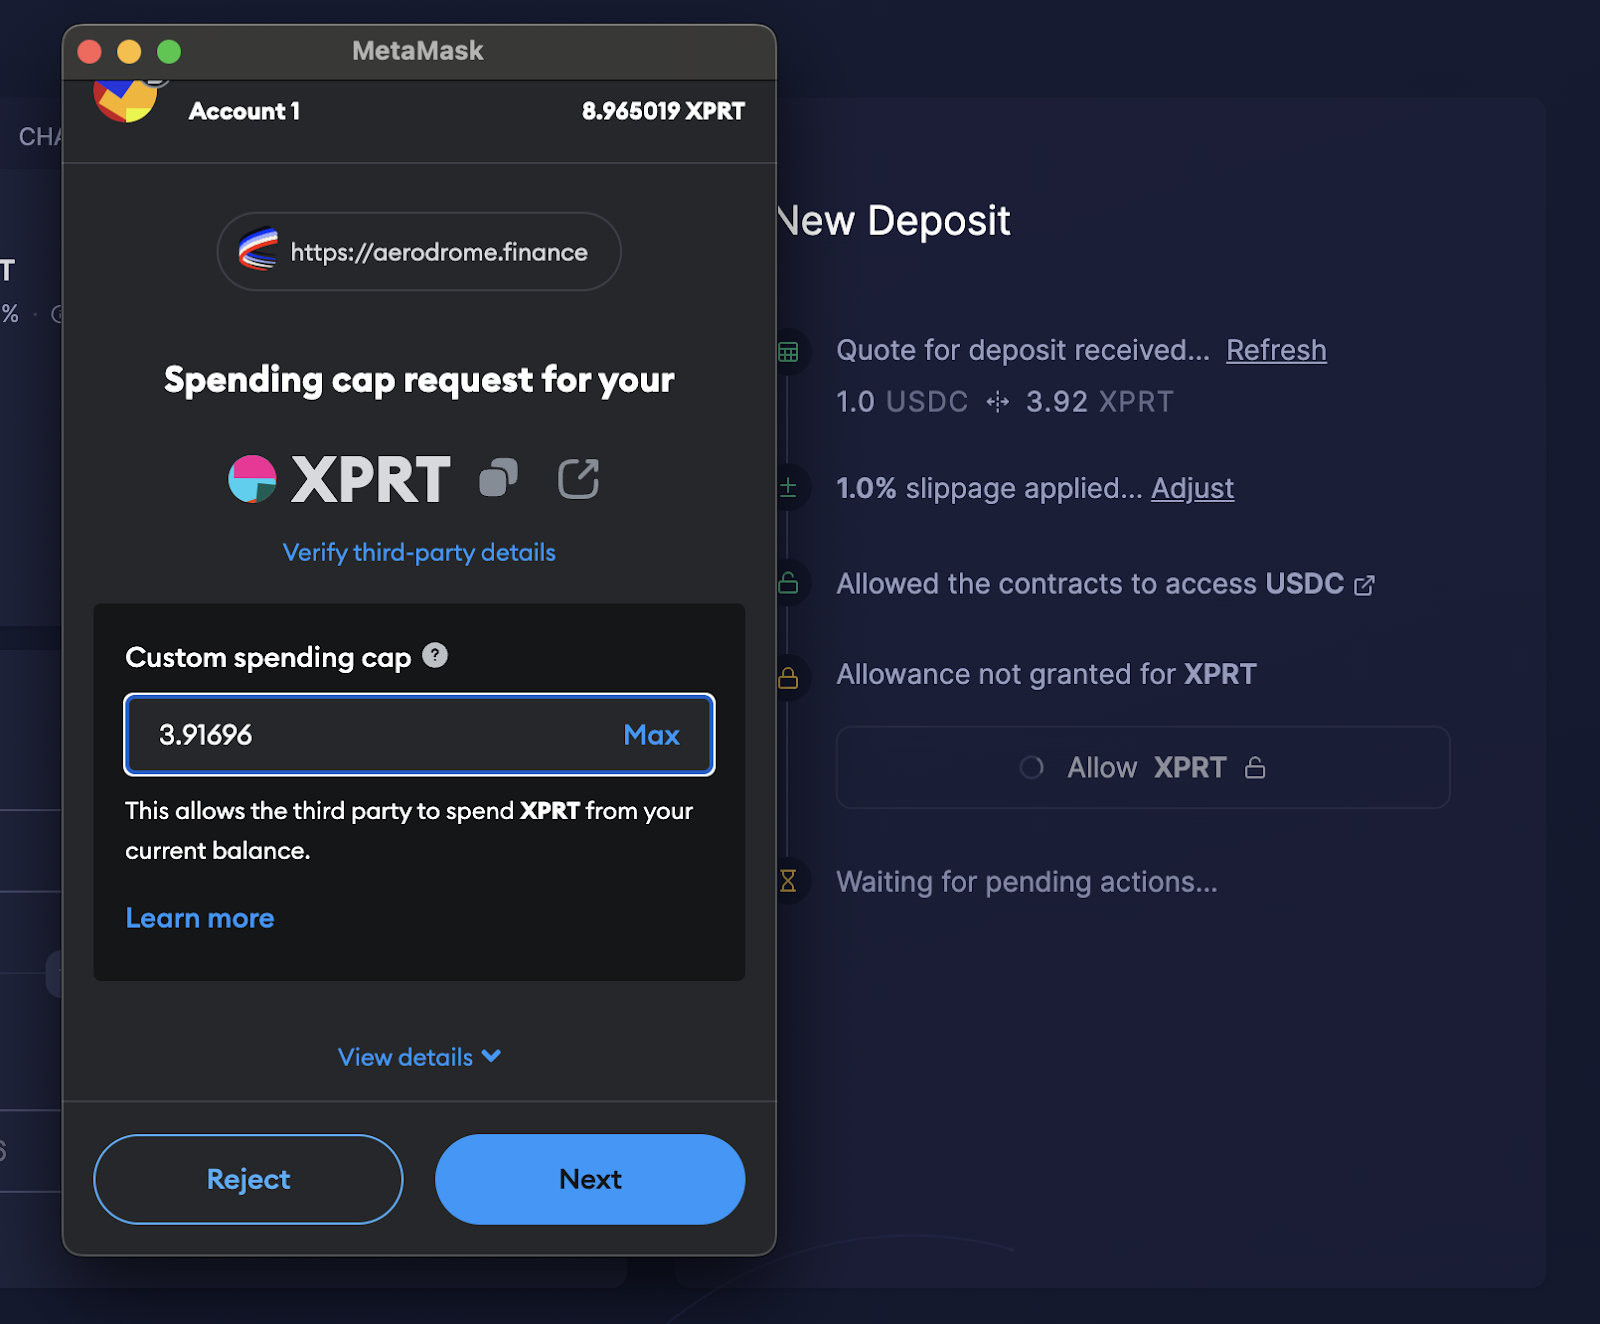
- Once approved, we next need to allow Aerodrome to have access to XRPT. Hit “Allow XPRT”:

- Another MetaMask window will appear, asking you to set the spending cap for XPRT. The spending cap will automatically populate to the amount of liquidity you intend to add. Again, hit “Next”:
- Next, click “Approve” on the subsequent MetaMask notification:

- Once both transactions are confirmed, you are free to go ahead and click “Deposit” to add your liquidity to the pool:
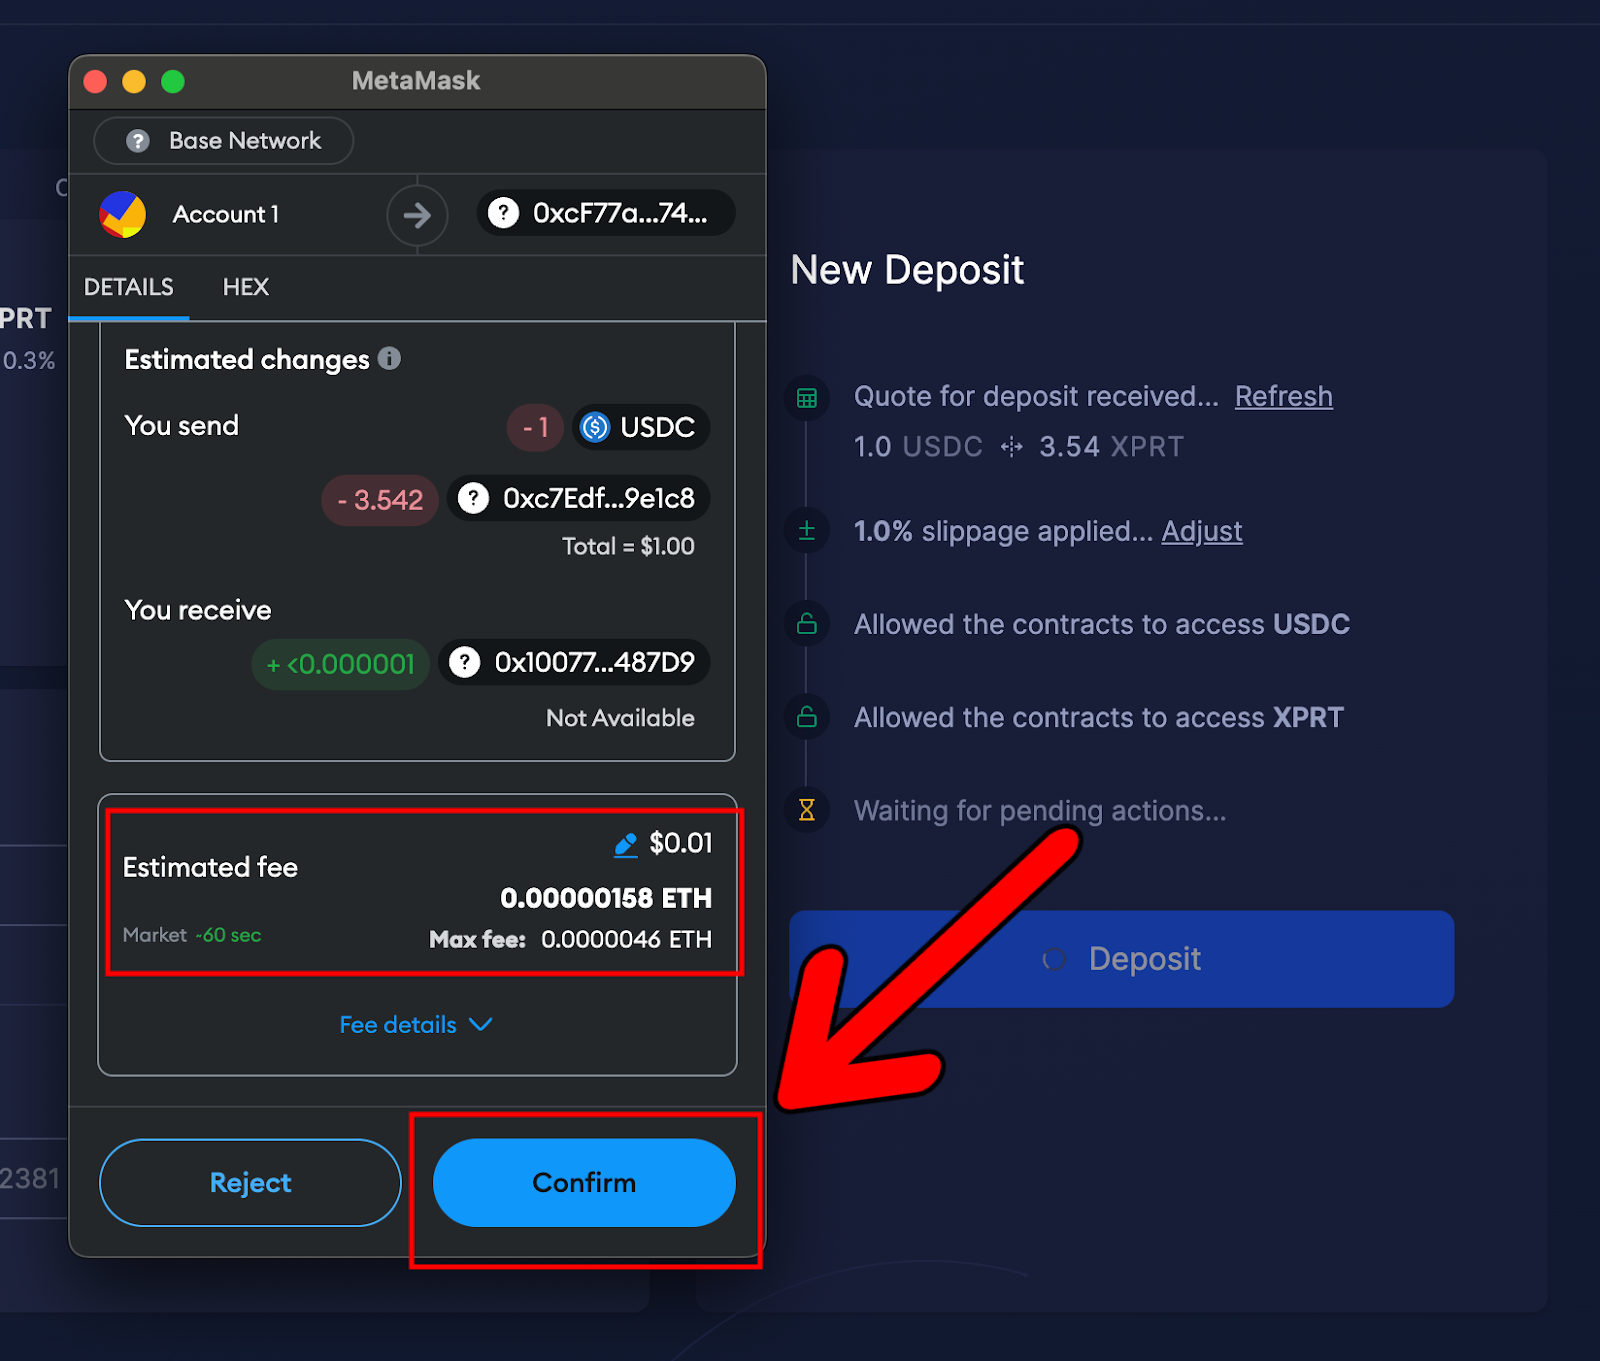
- This will bring up the following MetaMask notification to confirm the deposit into the liquidity pool. If you’re happy to go ahead with the deposit, click “Confirm.” Note, there’s a small transaction fee that is paid in ETH on Base:
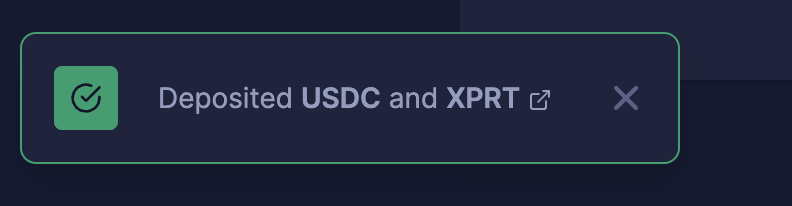
- Once the transaction is complete, you should see the following confirmation notification:
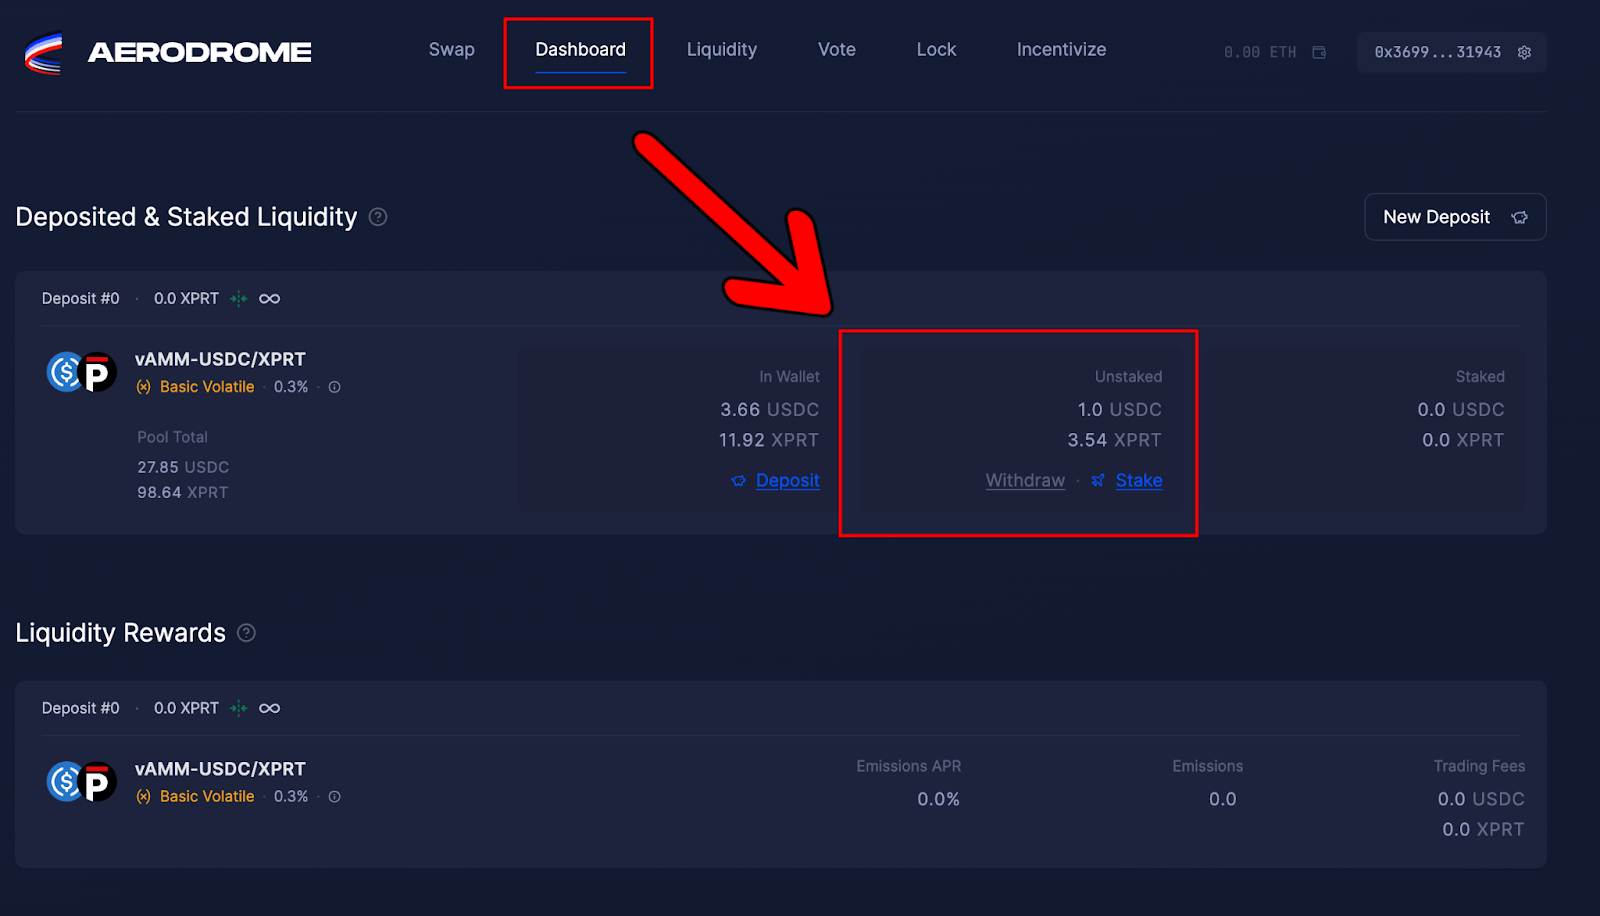
That’s all there is to it. You’ve now successfully deployed XPRT/USD liquidity into the Basic Volatile liquidity pool.
You can check your newly-added liquidity on the dashboard page of Aerodrome Finance:
About Persistence One
Secured by Bitcoin, Persistence One is a hub for trading Bitcoin and Liquid Staked Tokens (LSTs).
Trade efficiently or provide liquidity 👉🏻 app.persistence one
Twitter | LinkedIn | Telegram | YouTube | Reddit | [email protected]