


We recently announced that we’re taking XPRT multi-chain asset by introducing it to new, exciting industry ecosystems, starting with the Base Chain.
The newly emerging Layer-2 Ethereum scaling solution from Coinbase is the perfect place to start building XPRT outside of the Cosmos ecosystem. With lower fees, higher transaction speeds, and Coinbase’s backing, Base Chain has already laid its foundation in the crypto sector for the coming decades.
With XPRT now live on Base, we’ve created a detailed guide on how you can bridge XPRT from the Persistence Core-1 Chain over to the Base Chain.
Thanks to user-friendly bridging solutions like Squid Router and IBC.fun, the process of bridging XPRT is straightforward and can be completed in just a few minutes. This guide will walk you through the steps, ensuring a smooth and hassle-free experience.
In this tutorial, we will use the Squid Router to bridge XPRT from the Persistence Core-1 Chain to the Base Chain.
How to Bridge XPRT to Base Chain Using Squid Router
Platforms like Squid Router make it extremely straightforward to bridge from one chain to another.
Squid is a cross-chain router platform on the Axelar Network that allows users to easily bridge assets between blockchains. The platform provides a simple, yet effective, front-end to easily swap assets across blockchains without having to interact with the underlying infrastructure.
For cross-chain bridges, the platform typically requests that you connect two wallets for the bridge: the wallet with the original tokens and the wallet that will receive the bridged tokens on the new network.
In this tutorial, we will use Keplr as the original wallet and send it to a MetaMask wallet on the Base network. Our XPRT is initially stored on Keplr, and we want to bridge it over to the Base chain, so the destination address will be on Metamask.
- Head over to https://app.squidrouter.com/

- Before connecting our wallet, we want to adjust the assets that we will swap on the bridge.

- In the first box, we need to adjust the original chain to “Persistence” and select “XPRT”.
- In the second, we need to adjust the destination chain to “Base” and select “XPRT”.
- It should look as follows:

Step 2: Connect Cosmos and EVM wallets
Now that we’ve set up Squid Router to swap XPRT from the Persistence Core-1 chain to Base, let’s connect the required wallets to initiate the transaction. Any wallet from the Cosmos ecosystem can be connected to the platform to bridge XPRT. To receive XPRT on Base, an EVM-compatible wallet will be required.
In this tutorial, we will be using Keplr to bridge Persistence Core-1 XPRT to a MeatMask wallet on the Base network.
- First, let’s click “connect wallet” to connect our Keplr (or the wallet where XPRT is held on the Persistence Core-1 chain).
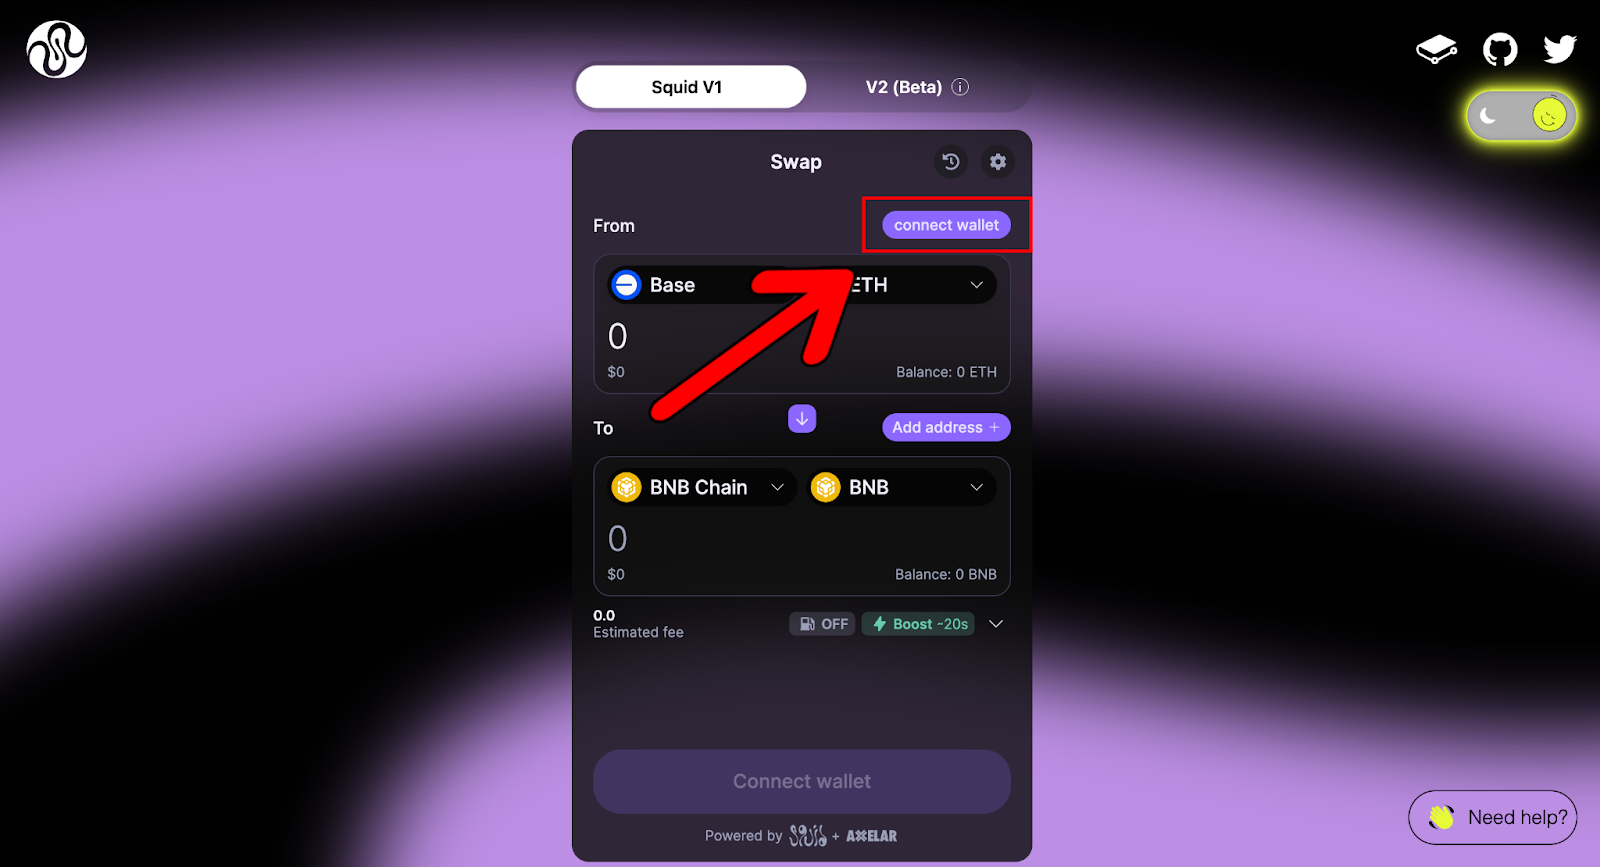
- This will bring up the following menu to select our wallet:
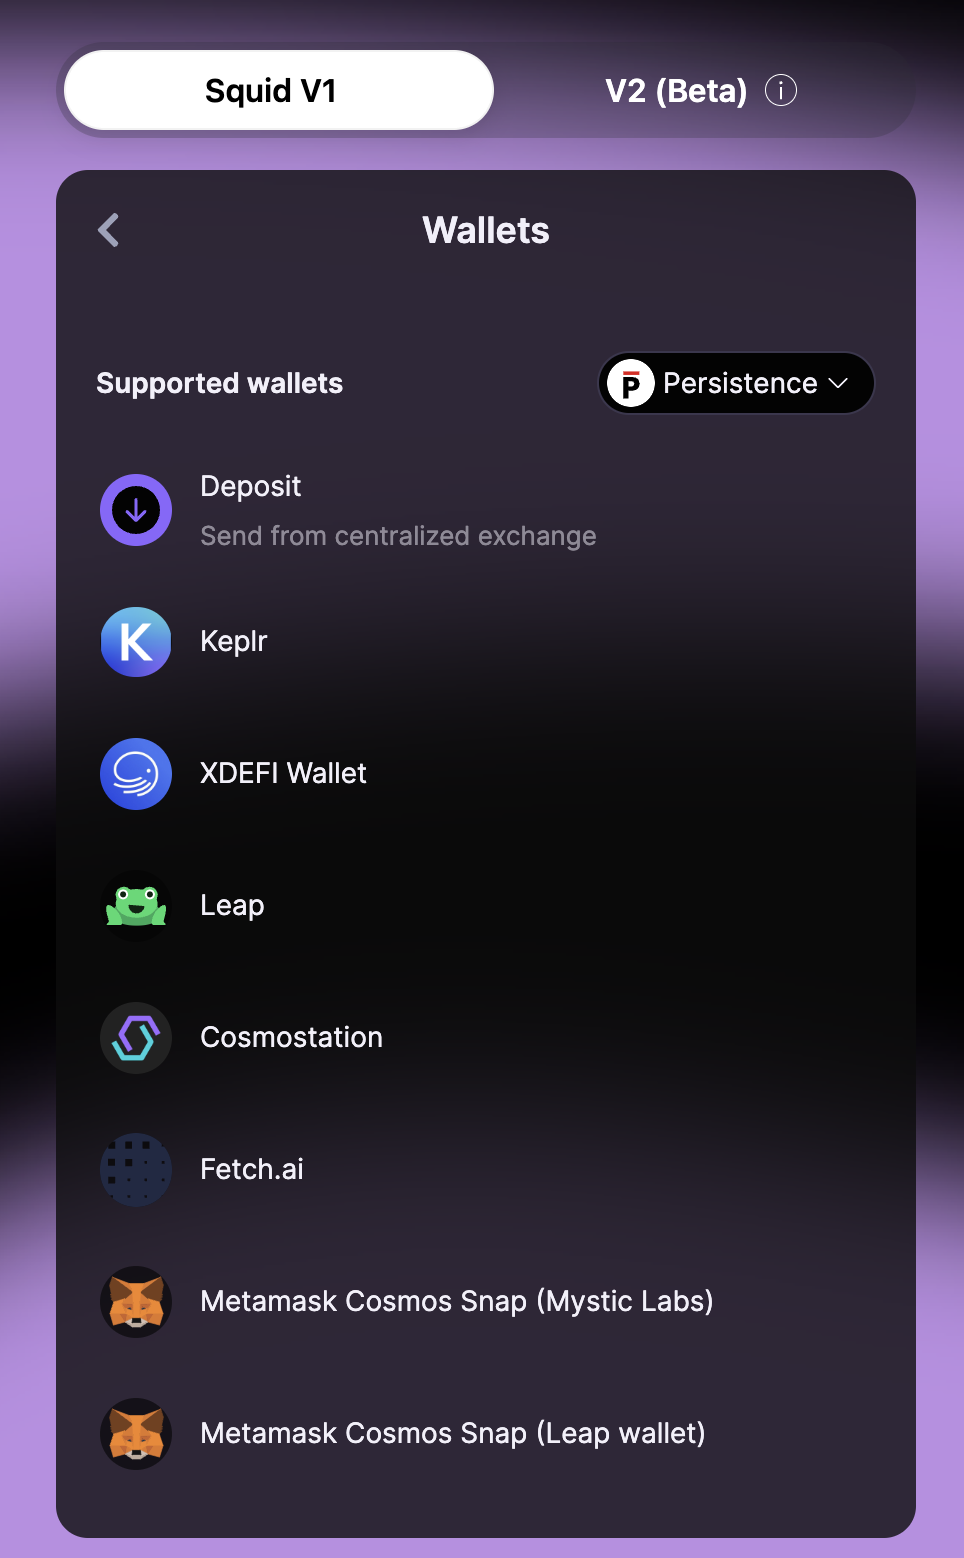
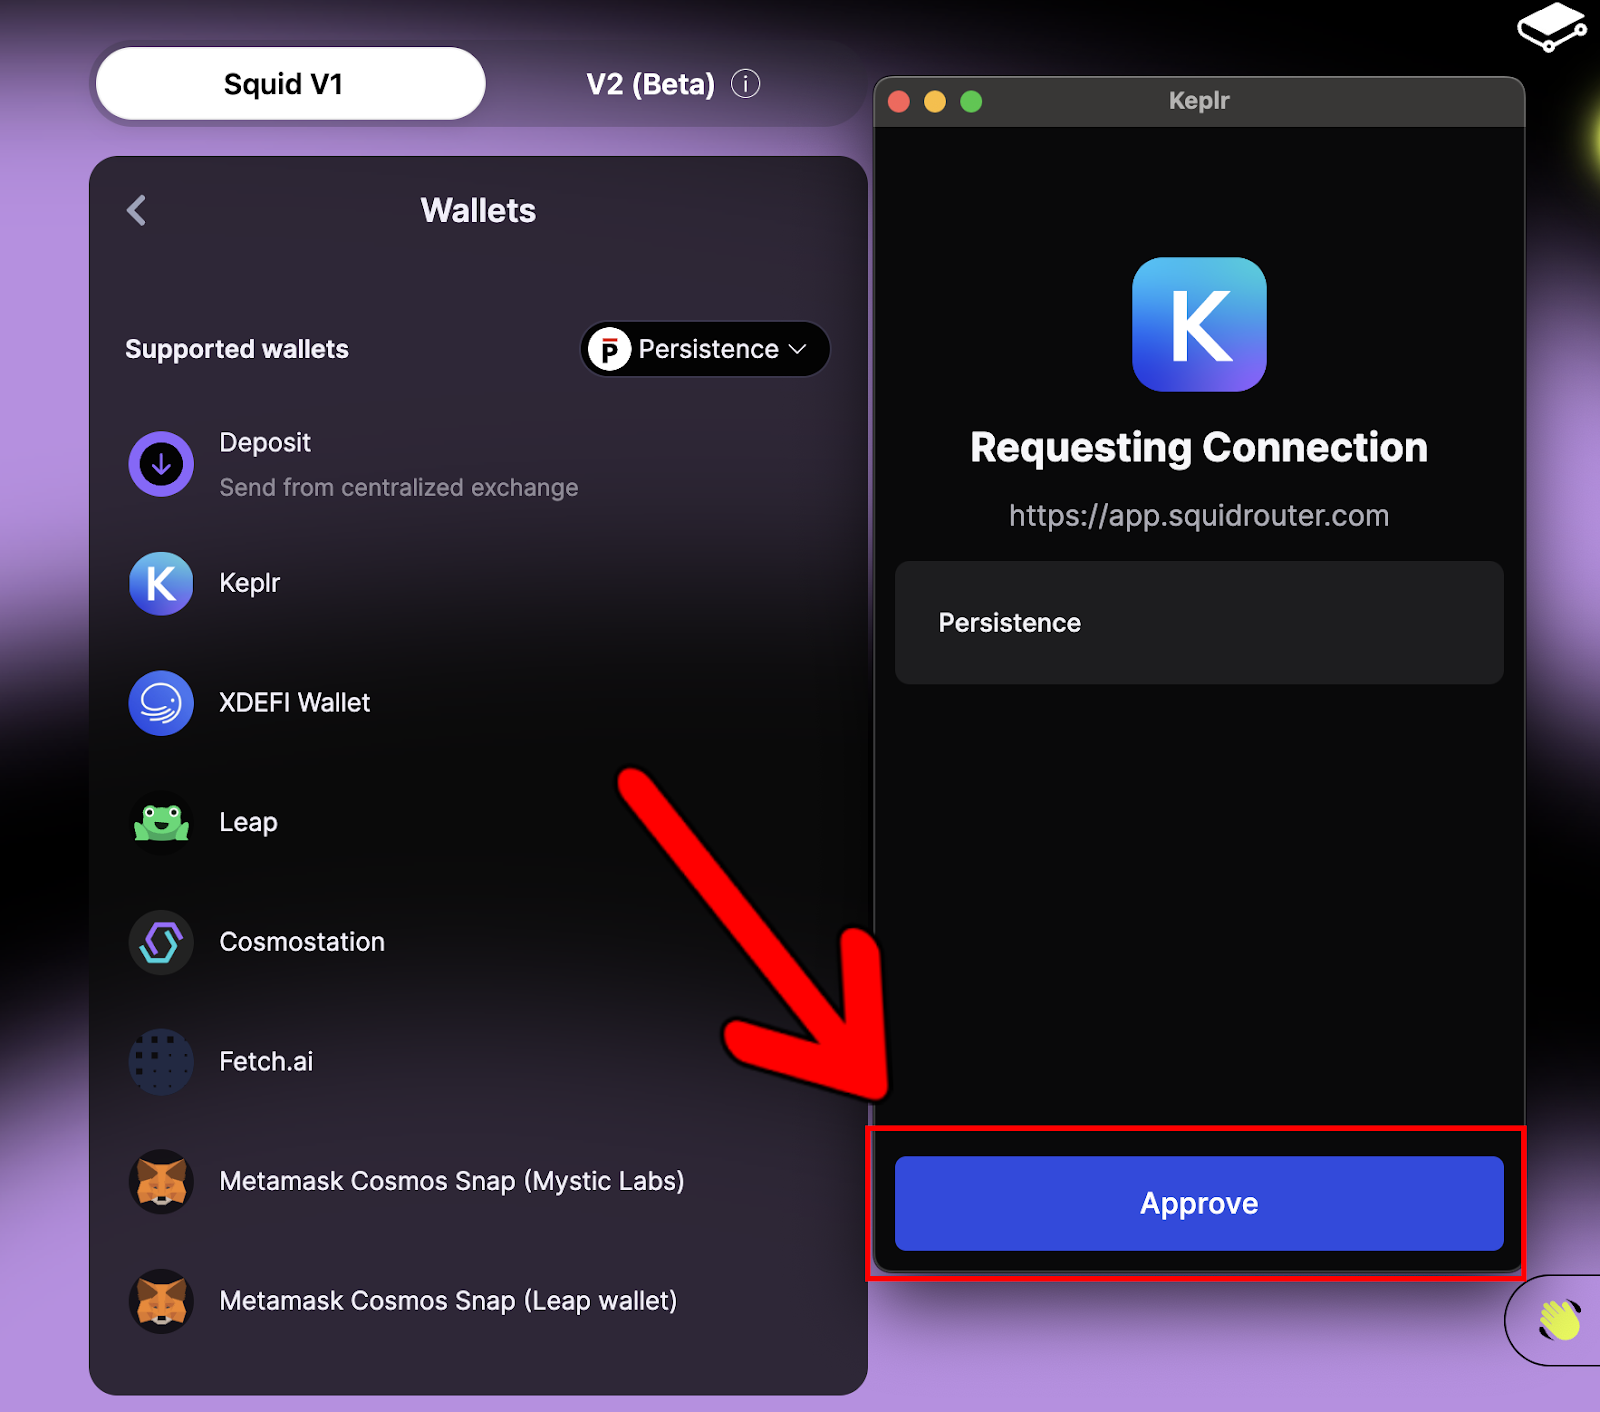
- For this tutorial, we will choose Keplr, but you can choose any supported wallet. A wallet dialogue will appear, asking to approve the connection. Hit “Approve”:
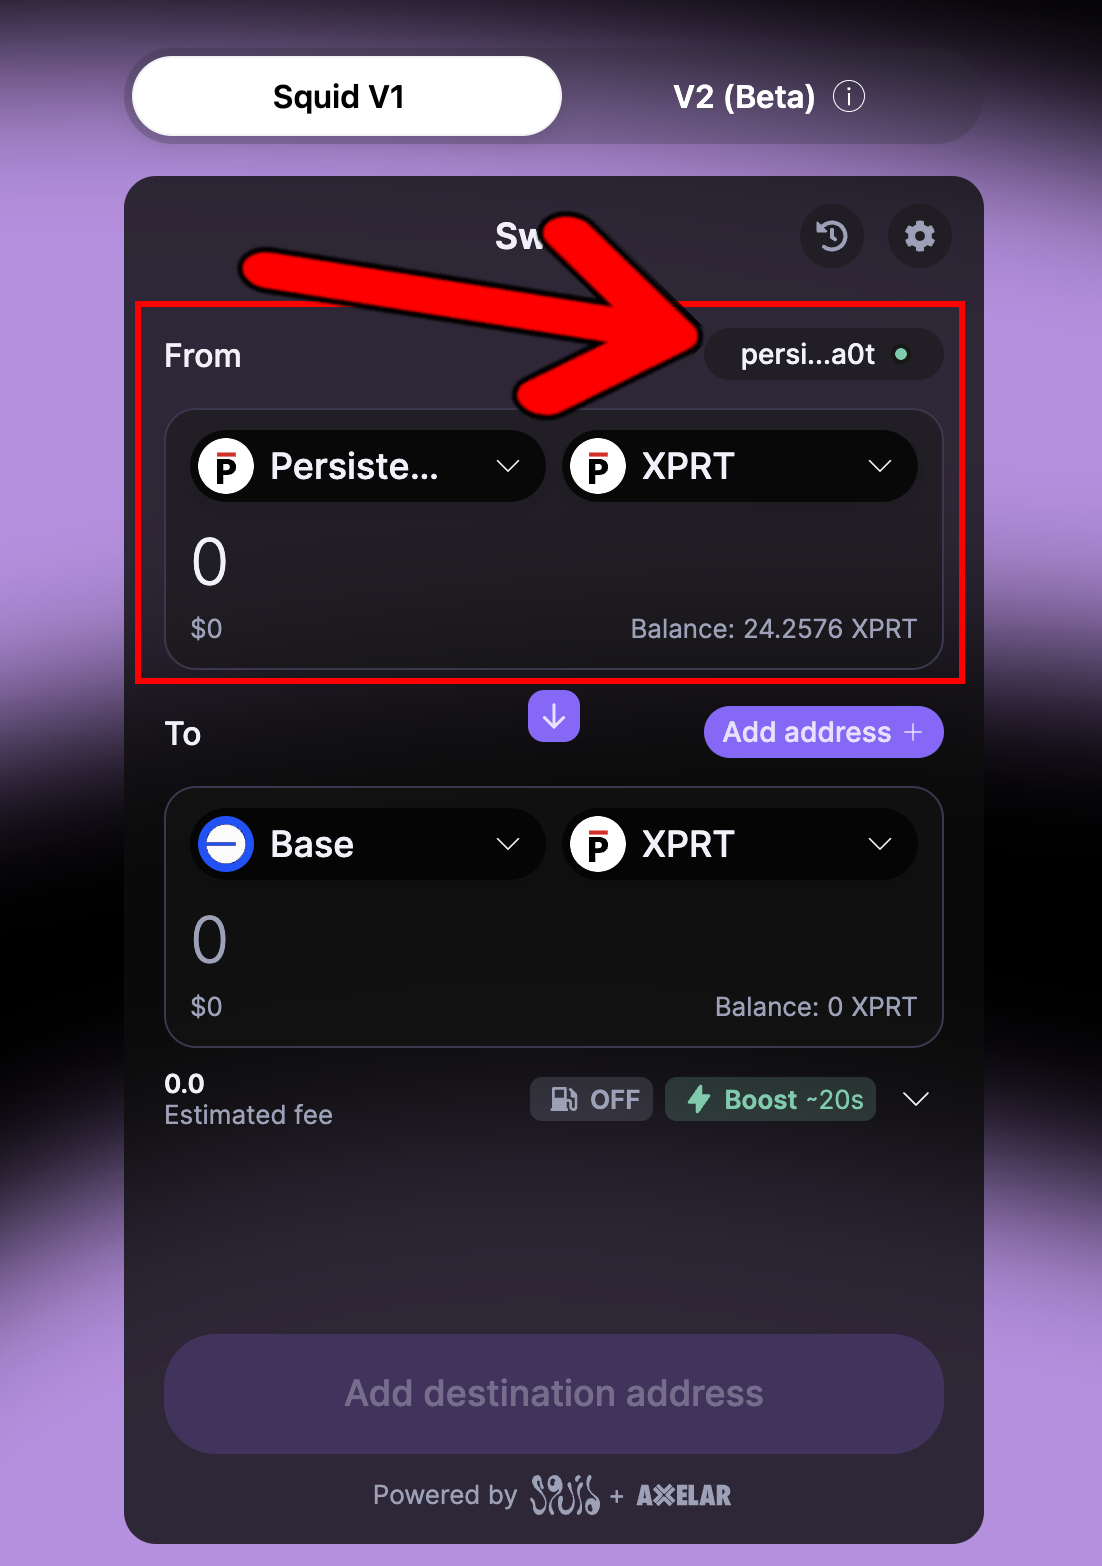
- You will now see that the Keplr wallet is connected to the Squid Router:
- Next, we need to connect the destination address. To do this, select “Add Address”:

- Another dialogue will appear, asking which wallet to connect to. In this case, we will use MetaMask as we can connect it to the Base network. Please select an EVM-compatible wallet to interact with your XPRT on Base:
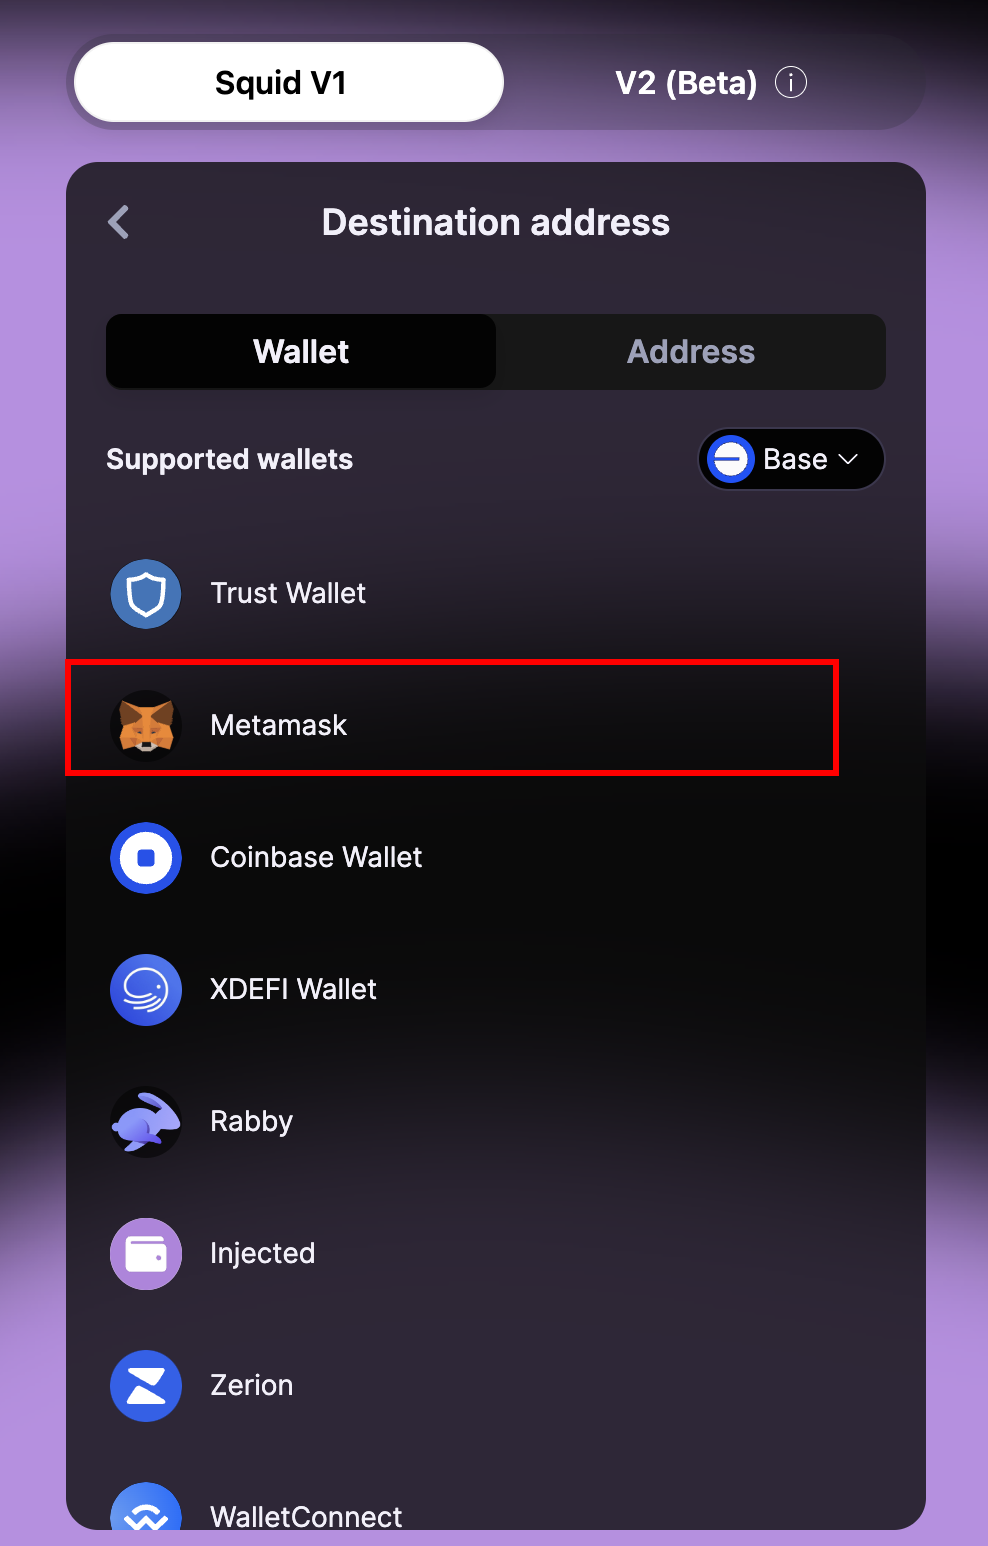
- A MetaMask wallet notification will appear, asking you to connect your wallet. Hit “Connect”:

- Both your Keplr and MetaMask wallets should now be connected to the Squid Router:
Step 3: Initiate Bridge Transaction
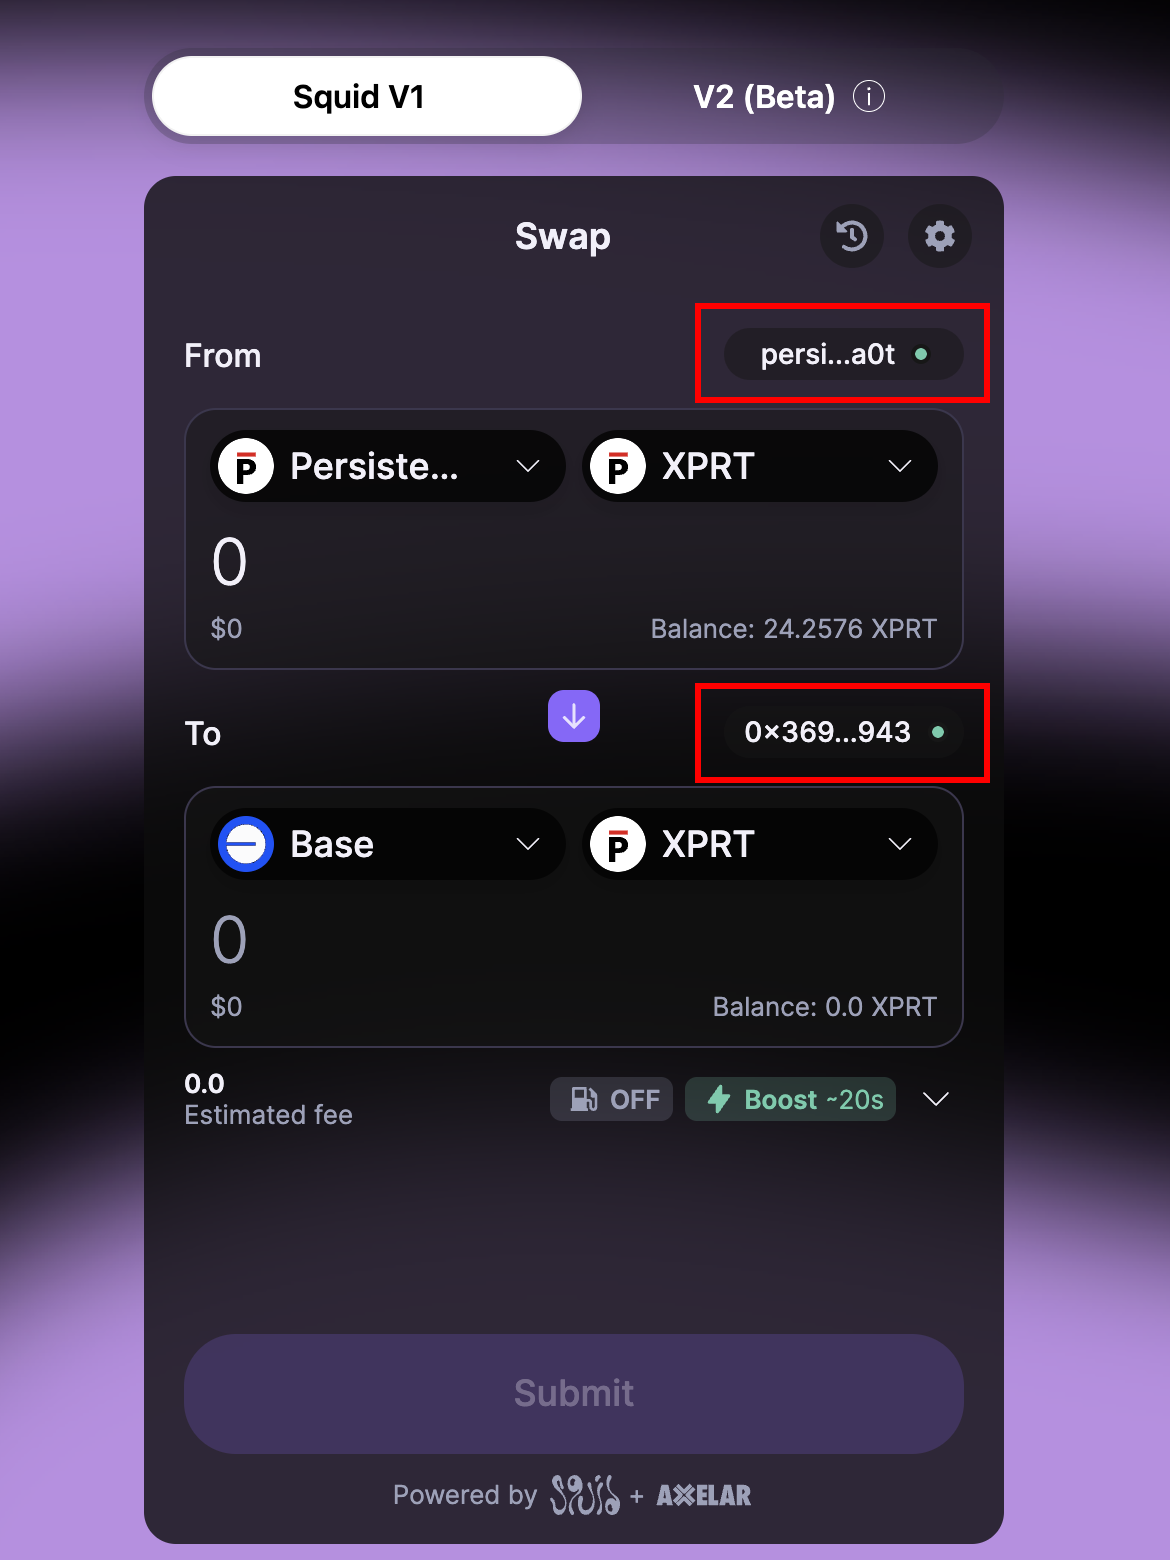
Now that both wallets are connected, the next step is to input the desired amount of XPRT to be bridged to the Base network and initiate the transaction.
For this tutorial, we will bridge a small 10 XPRT from the Persistence Core-1 chain to Base.
- Input your desired amount of XPRT to be bridged. Once inputted, the dashboard will display the expected amount of XPRT to receive on Base minus fees. If you’re happy to go ahead with the bridging, hit “Submit”:
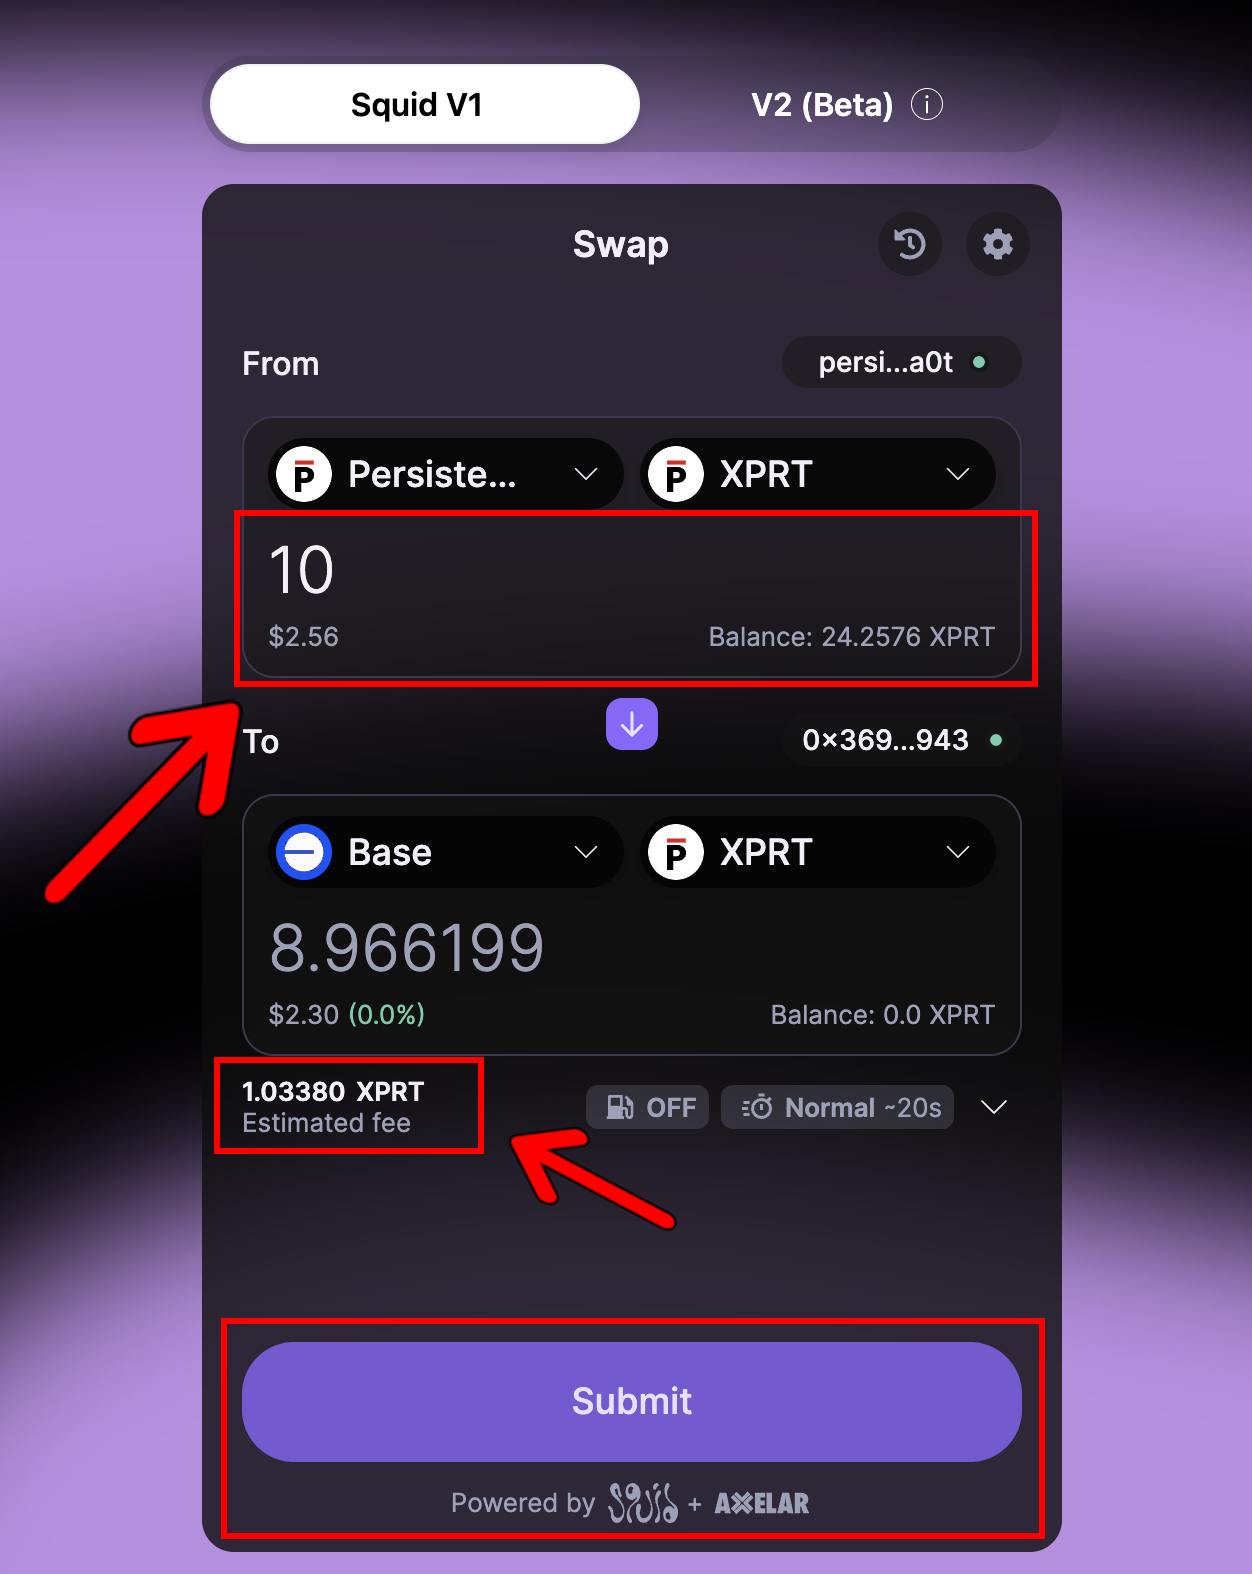
- This will bring up the following wallet notification, asking to approve the transaction. Note that there’s a small XPRT fee to pay for the gas. If you’re happy to go ahead with the bridge, hit “Approve”:
- You will see the following dialogue, showing that the transaction is processing:

- After two or three minutes, the transaction should be complete, and you will see the following:
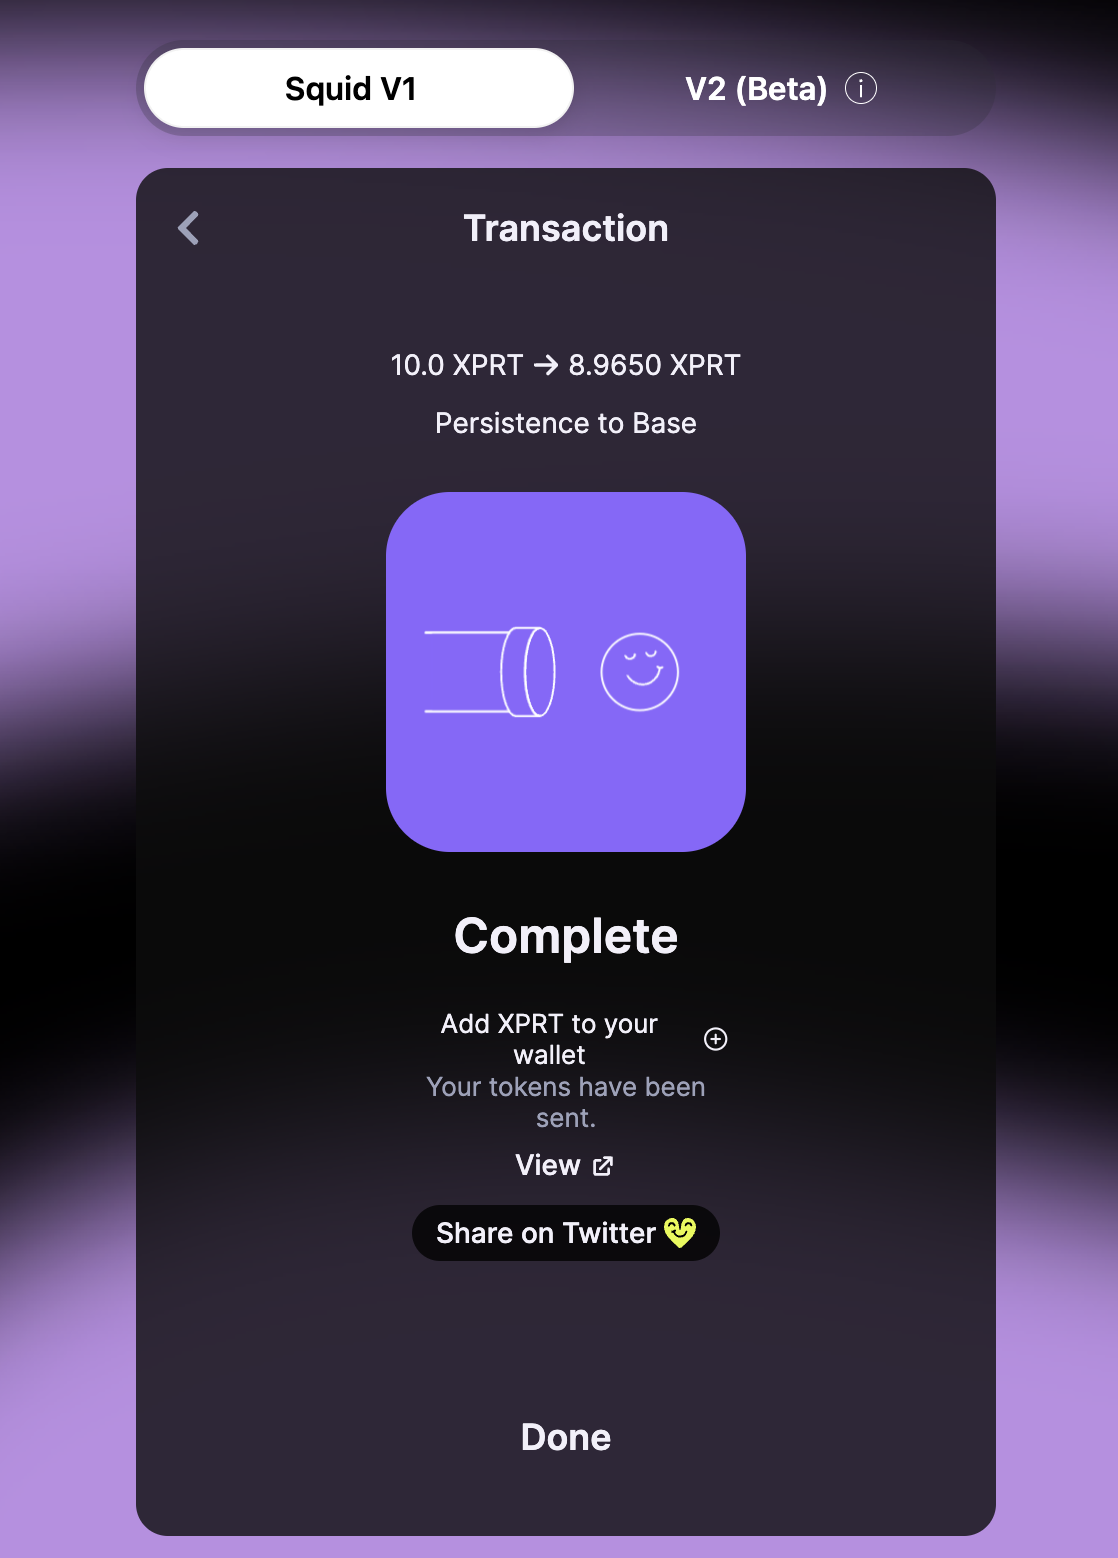
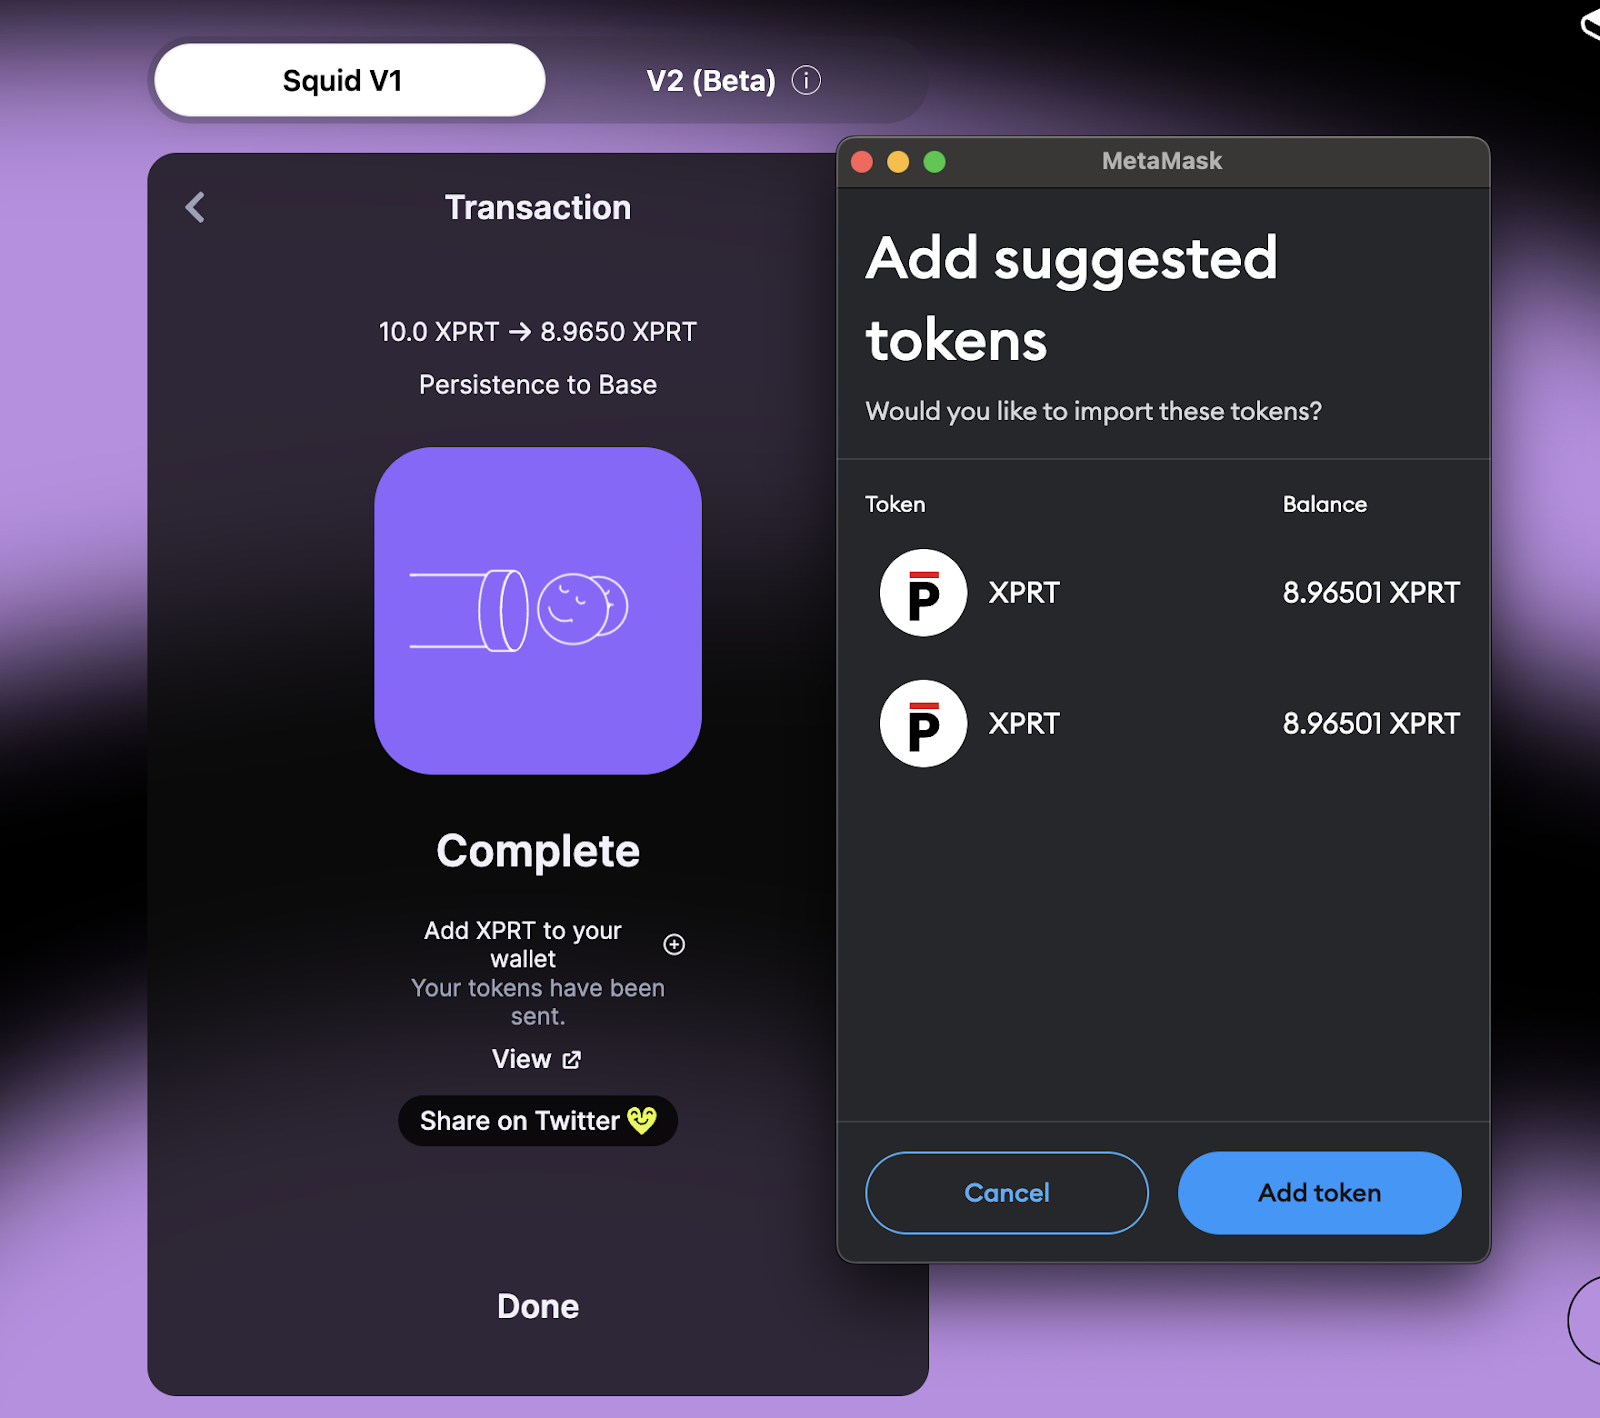
- To see XPRT in your MetaMask on the Base network, you can click “Add XPRT to your wallet”:

- A new MetaMask notification will appear, asking you to add XPRT to your wallet. Hit “Add Token”:
That’s all there is to it.
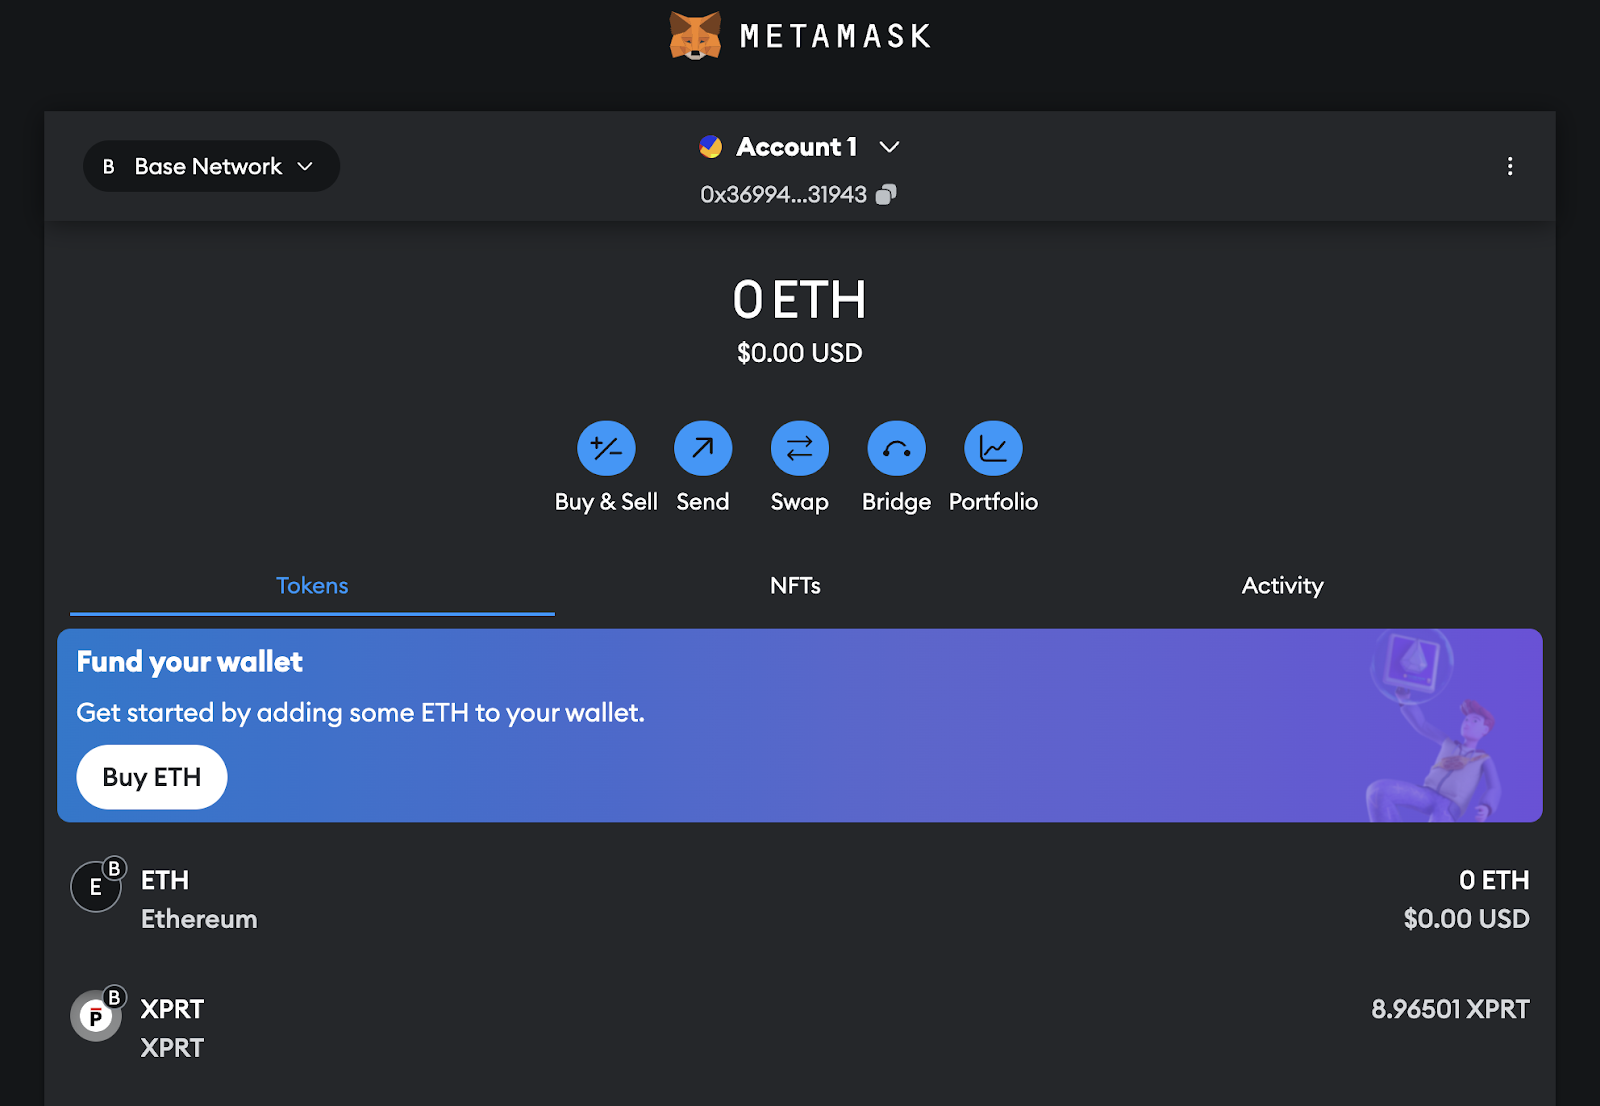
You have now successfully bridged XPRT from the Persistence Core-1 chain to Base.
You should be able to see your bridged XPRT in your MetaMask wallet on the Base network:
About Persistence One
Secured by Bitcoin, Persistence One is a hub for trading Bitcoin and Liquid Staked Tokens (LSTs).
Trade efficiently or provide liquidity 👉🏻 app.persistence one
Twitter | LinkedIn | Telegram | YouTube | Reddit | [email protected]