


Welcome to the Persistence Wallet Guide!
It can be confusing switching from one blockchain to another and understanding all the functionality of an unfamiliar wallet. Whether you’re new to the Cosmos ecosystem or have been using some of the other Tendermint-based chains, this guide should help you understand all of the important functions of the Persistence wallet.
This guide covers:
1. What is a Persistence Wallet
2. How to Create a Persistence Wallet
3. Importing an Existing Wallet (Using Mnemonics or Keplr)
4. How to Sign into the Wallet Dashboard
5. Wallet Dashboard Functions
6. Sending XPRT, Receiving XPRT and ‘Transactions’ Tab
7. Generating KeyStore File
8. Persistence Explorer
9. Help
Note: If you have already set up your wallet and are looking for the XPRT staking guide, read here.
1. What is a Persistence Wallet?
Persistence is an interoperable protocol built to facilitate the creation of next-gen financial products. XPRT is Persistence’s native token, which is used to secure the Persistence network. You need to have a Persistence wallet to store or transact using your XPRT tokens.
The Persistence wallet also allows you to stake your XPRT tokens to accrue staking rewards. Visit Explorer to check the latest APY.
2. How to Create a Persistence Wallet
Create a wallet or import one from an existing seed phrase.
To create a new wallet follow these steps:
Step 1: Create a Wallet
Navigate to https://wallet.persistence.one/ and click the ‘Create Wallet’ button.
Step 2: Read Notes
Please take a moment to carefully read notes about Persistence wallet. Once you have read through, proceed by clicking “Next”.
Step 3: Store Mnemonics
Write down and make sure you store your wallet Mnemonic (seed phrase) somewhere safe. Alternatively, you can click the Copy icon and paste it in a file location of your choice. Do not share your seed phrase with anyone, and remember, if someone has access to your Mnemonic, they have access to your wallet. Think of it as a master password that you wouldn’t want to be leaked.
You will need the seed phrase now in the next step of the setup phase and in future too.
Proceed by making sure each letter and each word is correctly stored. Once done, click the “Next” button.
(DO NOT USE THE MNEMONIC SHOWN ABOVE TO IMPORT THIS EXAMPLE WALLET AS ANYONE WILL BE ABLE TO ACCESS THIS GUIDE. THIS IS FOR EDUCATIONAL PURPOSES ONLY. THE MNEMONIC BELOW SHOULD NEVER BE UTILIZED.)
Step 4: Verifying Mnemonics
On the next screen you will see your Mnemonic but with some of the words missing. This is to ensure that you have safely recorded all the words in order.
Confirm that you have by filling in the missing terms of your mnemonic (seed phrase) in the correct order. Once you’re sure you have them correct, click “Submit”.
Step 5: Generating KeyStore File
If you’ve entered your mnemonic correctly, you will be greeted with a “Create Wallet” screen. Here, you can download and generate the KeyStore file.
The KeyStore file is an added layer of security, basically it’s an encrypted copy of your Mnemonic seed phrase with a password to enter the file. Once you generate the KeyStore file, secure the keystore.json file in a safe location.
You will need your KeyStore file and password to conduct transactions.
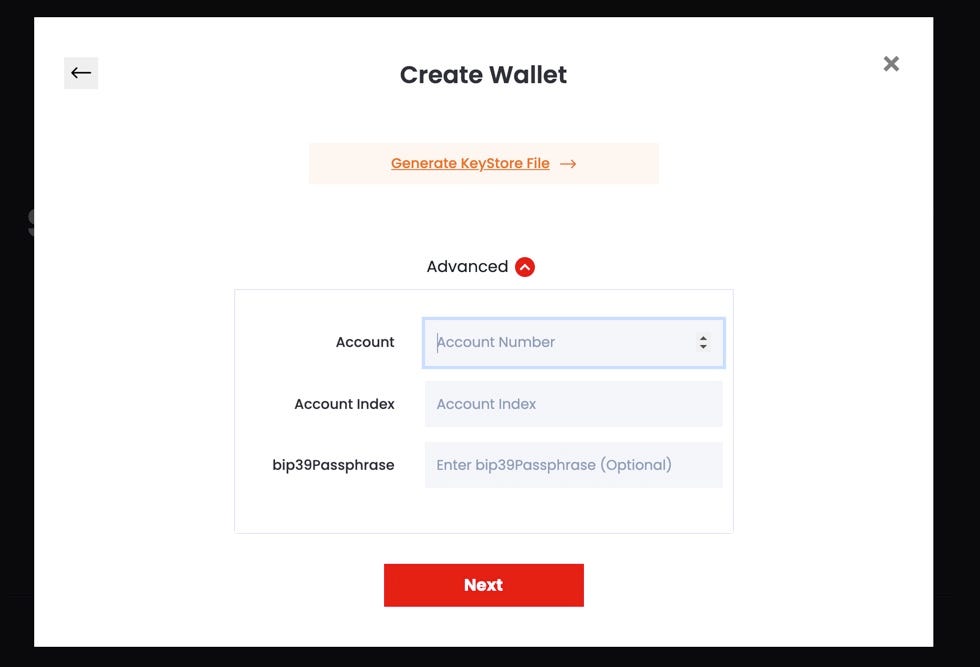
Step 5.1 (Optional): Create the HD Wallet Path
Optionally, click Advanced to create the HD (Hierarchical Deterministic) Wallet path and enter the Account, Account Index, and bip39Passphrase. Once complete, click “Next”.
Step 6: Create a Password to Encrypt Mnemonic
You will then enter a password to encrypt your mnemonic (seed phrase).
Note: This password does not help you generate your mnemonic (seed phrase). It is for use with your KeyStore file. After entering a password, your KeyStore file will download for you to save on your device. Once you are done, click “Submit”.
Step 7: Wallet Path & Address
You will then be shown your wallet path and wallet address. Ensure that you note the wallet path and address for future use. Once you have done so, Click ‘Done’.
You’re all set! You have now successfully created a Persistence wallet.
Now let’s learn how you can import an existing wallet.
3. Importing an Existing Wallet
If you already have a Persistence wallet, you can import it using the Import an existing wallet button. You will need to use your mnemonic and password. So keep it handy when you import a wallet.
Alternatively you can use Keplr. Keplr is a simple, open-source browser extension wallet for our ecosystem. You can add Keplr extension to your browser and sign into your wallet. It helps you sign into your wallet and transactions with ease.
4. How to Sign into the Wallet Dashboard
Step 1: Sign In
Head over to https://wallet.persistence.one/ and click on the “Sign In” button on the top right.
Step 2: Continue with Address
Click on the “Continue with Address” button.
Step 3: Submitting Address
Enter in your wallet address and click “Submit”.
That’s it, you’re now in the dashboard!
5. Wallet Dashboard Functions
The Wallet page tracks the following details of your wallet in the Wallet Balances region of the app for quick reference. This region is available in the Staking page as well. The wallet attributes in this region include:
- Total Balance: Sum of the balance available to delegate, delegated amount, and XPRT token in unbonding state
- Delegatable Balance: Indicates the number of XPRT token you can delegate
- Delegated Amount: Indicates the number of XPRT token you have already delegated
- Vesting Balance: Indicates the number of XPRT token in vesting (locked) state
- Transferable Amount: Indicates the number of XPRT token that you can transfer
- Current Price of each token in USDT
- Current Value of XPRT in USDT
- Rewards: Indicates the staking rewards
- ‘Claim’ Button: Option to claim staking rewards
- Unbonding Token: Indicates the number of XPRT tokens that are in unbonding state. Click the ‘View’ link to view the unbonding XPRT schedule details. If you have no unbonding tokens, then the View link does not appear.

The Wallet page has 3 tabs:
- Send: Send your XPRT tokens to another person with a Persistent wallet.
- Receive: Find your wallet ID. Copy and share it with others who want to send you XPRT tokens. Scan the QR code for your address to share or reveal it.
- Transactions: All your transactions are tracked in this tab in a table with these attributes: Transaction Hash, Transaction Type, Transaction Result, Transaction Amount, Transaction Fee, Block Height, and Transaction Time. You can filter the sent and received transactions using the ‘Sent’ and ‘Received’ buttons in the Transactions tab.
*Use the Refresh icon to view the latest details after transacting in the app.
6. Sending XPRT, Receiving XPRT and ‘Transactions’ Tab
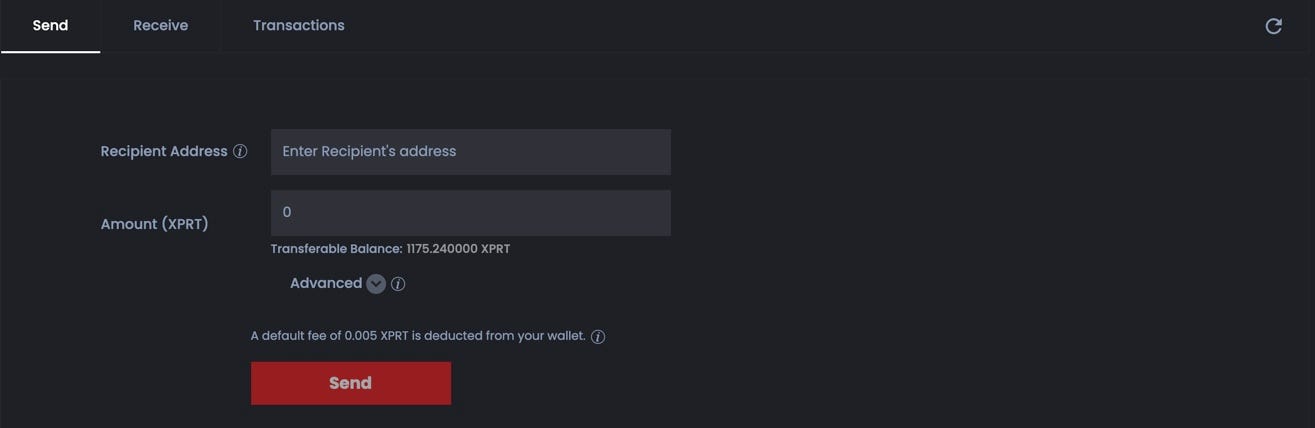
Sending XPRT Tokens
You may want to send some XPRT to someone who has a Persistence wallet.
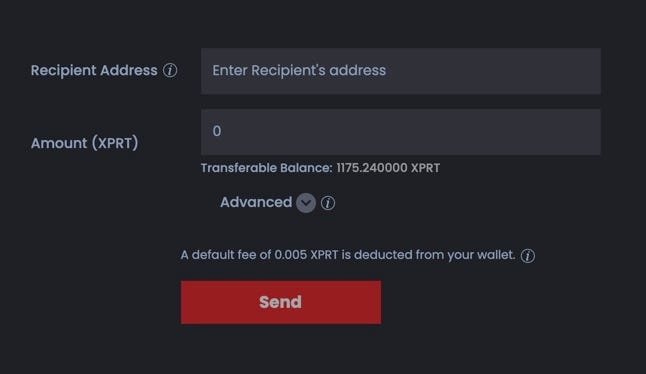
- From the Wallet page, Send tab, copy and paste Recipient Address. You obtain their wallet address from the application.
- Enter the Send Amount.
- Optionally, click Advanced and enter your comments or remarks in Memo. Don’t provide any sensitive information such as password or mnemonic in this Memo field. Centralized exchanges use this info to identify a transaction when crediting to an account.
The application calculates the transaction fee in XPRT token and is deducted from your wallet.
4. Click Send.
5. Sending will require that you enter your KeyStore file and wallet password. Upload your KeyStore file, and then enter your password.
A confirmation message appears after you have successfully sent the XPRT tokens. Click the transaction hash link and view the details or you can review the details under the Transactions tab.
6. Click Done to return to the Wallet page.
Receive XPRT Tokens
Within the “Receive” tab, you are able to view your wallet address to send to users who would want to send you XPRT.
Copy the Wallet Address and share it with others to receive your XPRT tokens.
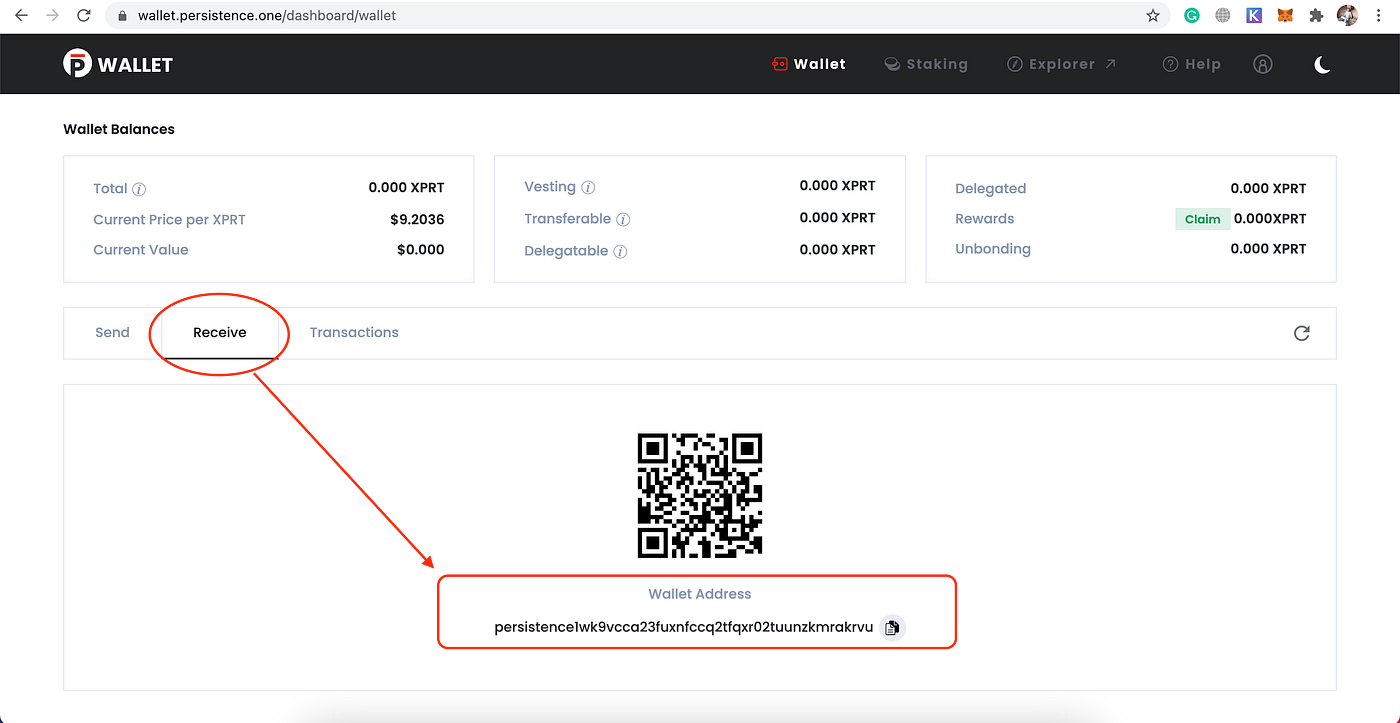
You can also find your wallet address in the user profile menu in the top right of the app.
Transactions Tab
Within the “Transactions” tab, users are able to view their recent transactions and monitor their wallet activity.
7. Generating KeyStore File
If you lose your KeyStore file or need to download another, you can do so using your Mnemonics/seed phrase.

- Click the user profile icon at the top right and click the Generate KeyStore button.
- Copy or enter your mnemonics/seed phrase and click Next.
- Enter Password. Your password encrypts your seed phrase. Note that this password does not help you generate your seed phrase, it is for use with your KeyStore file.
- Click Submit. Note that the KeyStore file is generated and saved to your local Downloads folder. Rename the file if you want to and move it to a location of your choice. Keep it handy so that you can use it when required.

8. Persistence Explorer
When you click the Explorer in the global region, it takes you to the Persistence Explorer app. Information is segregated and placed in various cards in the your dashboard:
- Latest Block: Indicates the block height, who proposed it, its time stamp in UTC, and average block time (100000 blocks)
- Tokens: Includes the inflation, bonded tokens, bonded amount, total supply, and the community pool.
- Voting Powers: The voting power is calculated based on the number of tokens staked with the validator. Graphically represents the active validators and their voting power percentage.
- Recent Activity: Indicates the important blockchain notifications related to validators such as validator missing blocks or getting jailed and changing commission rate.
The others pages in the Persistence Explorer app include:
- Blocks page: The latest block and other blocks information appears here.
- Transactions page: You can find your transactions by transaction type, status and time.
- Validators page: View the active and inactive validators, their voting power, commission rate, and delegated amount. You can order the table and quickly search for a validator too. Use the validator link and view the specific details of the validator.
- Proposals page: View suggestions for the better functioning of the blockchain. These proposals aid in voting.
9. Help
Go to the app help for all Wallet and Staking related FAQs

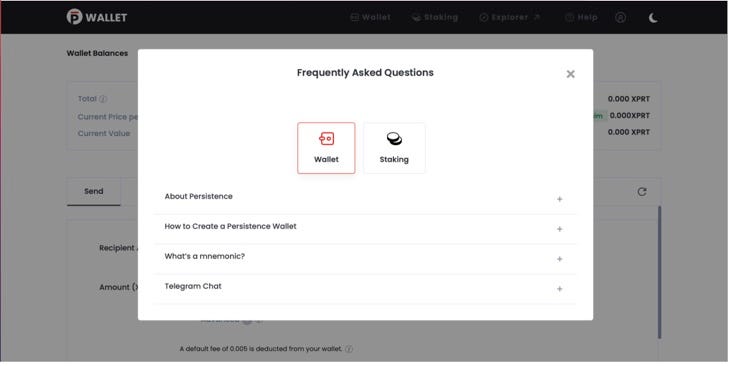
Here, you will find sections for frequently asked questions of all kinds, and a link to our Telegram group.
Hopefully, you are now fully equipped with the knowledge you need to be able to set up and use the Persistence wallet and be able to send & receive transactions. In case you have any questions, we remain at your disposal as always. Don’t hesitate to reach out to us!
About Persistence
Persistence is a Tendermint-based, specialised Layer-1 network powering an ecosystem of DeFi applications focused on unlocking the liquidity of staked assets.
Persistence facilitates the issuance and deployment of liquid-staked stkASSETs, allowing users to earn staking rewards while participating in DeFi primitives, such as lending/borrowing and liquidity provisioning on DEXs.
Persistence aims to offer a seamless staking and DeFi experience for PoS (Proof-of-Stake) users and enable developers to build innovative applications around stkASSETs.
Join Our Movement
Twitter | LinkedIn | Telegram | YouTube | Reddit | [email protected]