


Welcome to the Persistence XPRT Staking Guide!
XPRT staking is now live, having launched on April 1st, 2021, offering rewards of 35%+ APR for the first year! This rewards rate is among the highest in the industry. Therefore, we understand our community is anxious to learn how they will be able to stake their XPRT tokens.
You can stake your XPRT on desktop using the Persistence native wallet. If you prefer to stake via a mobile wallet, you can use Cosmostation to securely store and stake your XPRT. Check out their guide here to learn how to set up a Cosmostation wallet and begin staking your XPRT: Link
This guide below will teach you how to stake using the Persistence native wallet, covering:
1. Introduction to XPRT Staking
2. How to Sign into the Wallet Dashboard
3. How to Delegate (Stake) Your XPRT
4. Claiming Staking Rewards
5. How to Redelegate to Another Validator
6. Persistence Explorer
7. Help
To learn how to create a Persistence wallet, please read this guide.
1. Introduction to XPRT Staking
As the Persistence chain runs on a delegated Proof-of-Stake based Tendermint PBFT consensus engine, staking is integral to ensuring a secure and robust network.
Upon the launch of staking on April 1st, XPRT token holders will be able to delegate their tokens to our network validators for staking. Stakers will receive rewards in the form of XPRT in return for contributing to the security of the network.
The XPRT staking yield for the first year will be 35%+ APR — among the highest in the industry.
These lucrative staking rewards incentivize XPRT holders to stake their tokens, thereby increasing network security. Due to high initial rewards, early stakers will be rewarded with the best staking yields.
XPRT is the token around which the entire Persistence ecosystem is built; thus, staking XPRT to secure the chain will also result in a great deal of exposure to multiple dApps in the ecosystem for stakers.
You will be able to stake your XPRT tokens via the Persistence wallet.
2. How to Sign into the Wallet Dashboard
Step 1: Sign In
Head over to https://wallet.persistence.one/ and click on the “Sign In” button on the top right.
Step 2: Continue with Address
Click on the “Continue with Address” button.
Step 3: Submitting Address
Enter in your wallet address and click “Submit”.
That’s it, you’re now in the dashboard!
3. How to Delegate (Stake) Your XPRT
Step 1: Go to the Staking Section
Sign in through https://wallet.persistence.one/ & navigate to the “Staking” section of the Persistence wallet dashboard.
On this screen, you will see your balance, delegated XPRT, and other data at the top of the page. The staking page also tracks your wallet balance details. Apart from this, you have 2 tabs in this page:
- Active: All active validators are listed here.
- Inactive: When validators get jailed for downtime, they are removed from the active validators and listed as inactive.
Only the top validators (50 for core-1), based on the total delegation amount, are active validators. The rest of the active validators, even if not jailed, are moved out as inactive. The inactive validators are in the Unbonding or Unbonded status.
The Active tab displays various active validators, the voting power (based on the number of tokens staked with the validator), commission percentage, validator status, and an Actions menu to perform tasks such as:
- Delegate XPRT
- Redelegate XPRT
- Unbond XPRT
- Claim Rewards
Step 2: Selecting a Validator
Delegate your XPRT tokens to a validator such as Cosmostation, StakeFish, and so on. As you stake your tokens, you can earn rewards too.
Each validator has their voting power, commission rate, status (checkmark means online, x mark means offline). You will want to consider these data points before choosing a validator.
Note: Do not delegate to the Foundation nodes. The commission rate for these validators is 100%, meaning you will not receive staking rewards. These are temporary nodes maintained by the Persistence team to contribute to network stability in the initial stage and will be switched off by the end of Q2 2021 or early Q3 2021.
Step 3: Delegating
From the Staking page, Active tab, select a validator and then select the Actions button.

Here you will see the buttons to delegate, redelegate, unbond, or claim rewards.
A window will appear with the validator name, commission percentage, and actions you can perform. Click Delegate.

In the Delegate to “VALIDATOR” window, enter how many XPRT tokens you’d like to delegate to this validator into the “Delegation Amount” field.
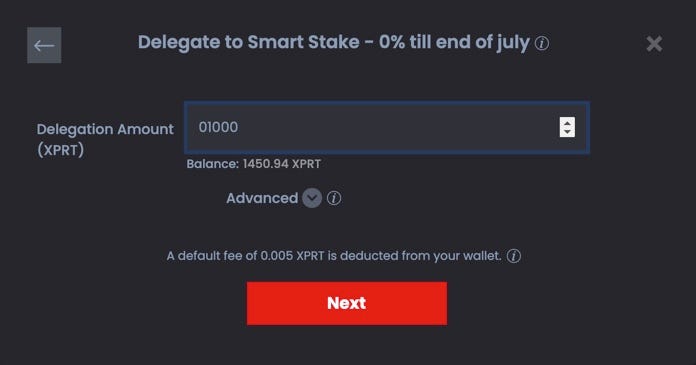
Step 3b (Optional): Optionally, click Advanced and enter your comments or remarks in Memo.

Click ‘Next’.
Step 4: Signing the Delegation Transaction
Once you click “Next”, you will be greeted with this screen to use your KeyStore file password to delegate.

Step 5: Confirmation of Delegation
Once you click “Delegate” you will be shown the transaction hash of your transaction to verify that you have successfully delegated to that validator:
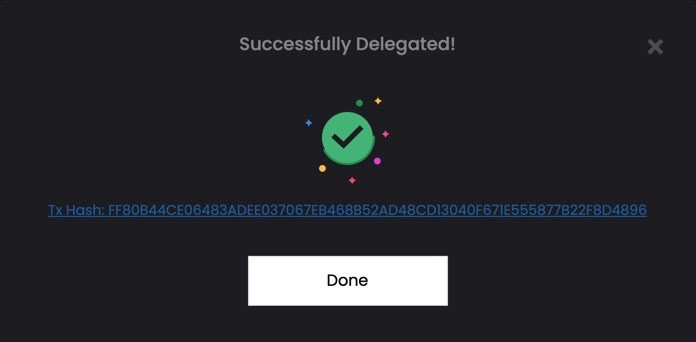
You can click the link and view the transaction details or you can review the delegation details under the Transactions tab.
Congratulations, you have now successfully delegated to a validator and will begin receiving staking rewards from the network!
Please note that the unbonding period is 21 days. Once you unbond your XPRT from a validator, you will have to wait 21 days to be able to delegate your tokens again or transfer them.

4. Claiming Staking Rewards
After you delegate your XPRT, you will begin receiving staking rewards. You can claim the rewards from all the validators by using the Claim button that is adjacent to the Rewards in the wallet details region or you can claim staking rewards from a single validator transaction in the Staking page, Actions button:
- Once you’ve clicked Actions on the validator you selected, you’ll see this screeen. Select “Claim Rewards”.

The value of each XPRT token is indicated in USD. The total available XPRT also is displayed. Click “Next”.

3. Optionally, click Advanced and enter your comments or remarks in Memo. You can’t claim your rewards from a validator partially.
4. Click Next and enter your Password.


5. Click Submit. Your rewards appear in the wallet details region.

Where Can I Find My Claimed Rewards?
You will find your rewards in your delegator wallet. If you’ve set up a different address for withdrawing rewards, for example, your vesting account address, then your rewards are automatically transferred to that address when you claim rewards.
5. How to Redelegate to Another Validator
Note: If you have delegated to a Foundation node then you should follow the below steps to redelegate to another validator. Foundation nodes are not meant for delegations and you will not receive staking rewards if delegating to a Foundation node.
After you delegate your XPRT tokens with a validator, at some point you may want to redelegate the XPRT to another validator. You can redelegate the XPRT by selecting the transaction in the Staking page:
1: Click Your Current Validator and “Redelegate”
From the Staking page, Active or Inactive tabs, select the validator from whom you want to redelegate and then select the Actions button.
2: Redelegate
A window appears with the validator name, commission percentage, and actions you can perform. Click Redelegate.
3: Confirm New Validator and Redelegation Amount
In the Redelegate from
Select your chosen validator and enter the amount of XPRT tokens you wish to delegate to the new validator.
4: Enter Redelegation Amount
The Delegation Amount is displayed for your reference. Enter the Redelegation XPRT Amount. You can’t redelegate more than the delegated amount. If you redelegate a portion of the amount, the remaining XPRT tokens, will be with the initial validator.
5. Click “Submit”.
Optionally, click Advanced and enter your comments or remarks in Memo.
6. Click “Next”. Then enter your wallet password.
7. Click “Redelegate”
Step 4: Confirmation
A confirmation message appears after the successful redelegation of the XPRT token. The transaction hash link is provided. You can click the link and view the transaction details or you can review the delegation details under the Transactions tab.
You have now successfully redelegated to another validator!
6. How to Unbond XPRT Tokens
After you delegate your XPRT tokens, they are in the bonding period of 21 days. You can unbond them earlier by selecting the transaction in the Active or Inactive Validators tab of the Staking page.
- After selecting the transaction, click Actions.
- In the validator window click Unbond.
- In the Unbond from
window, The Staked Amount is displayed. - Enter Unbonding Amount to unbond.
- Optionally, click Advanced and enter your comments or remarks in Memo.
6. Click Next. Note that if your transaction isn’t eligible for unbonding, then the Next button isn’t enabled.
7. Enter your wallet password and click Unbond. The transaction hash appears and you can find the details when you click the link.

7. Persistence Explorer
When you click the Explorer in the global region, it takes you to the Persistence Explorer app. Information is segregated and placed in various cards in the your dashboard:
- Latest Block: Indicates the block height, who proposed it, its time stamp in UTC, and average block time (100000 blocks)
- Tokens: Includes the inflation, bonded tokens, bonded amount, total supply, and the community pool.
- Voting Powers: The voting power is calculated based on the number of tokens staked with the validator. Graphically represents the active validators and their voting power percentage.
- Recent Activity: Indicates the important blockchain notifications related to validators such as validator missing blocks or getting jailed and changing commission rate.
The others pages in the Persistence Explorer app include:
- Blocks page: The latest block and other blocks information appears here.
- Transactions page: You can find your transactions by transaction type, status and time.
- Validators page: View the active and inactive validators, their voting power, commission rate, and delegated amount. You can order the table and quickly search for a validator too. Use the validator link and view the specific details of the validator.
- Proposals page: View suggestions for the better functioning of the blockchain. These proposals aid in voting.
8. Help
Go to the app help for all Wallet and Staking related FAQs

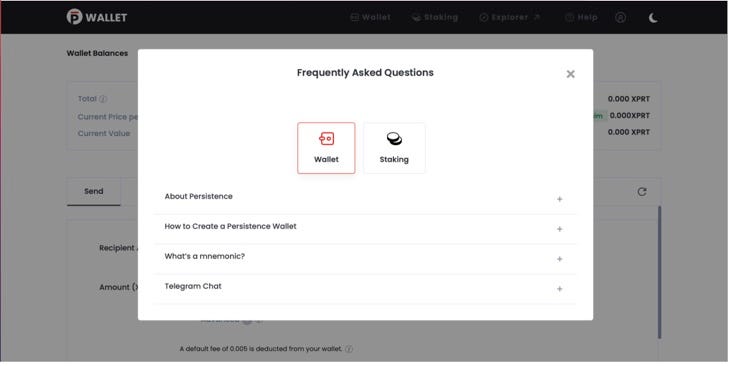
Here, you will find sections for frequently asked questions of all kinds, and a link to our Telegram group.
Hopefully, you are now fully equipped with the knowledge you need to be able to sign in to the Persistence wallet and to stake your XPRT tokens. In case you have any questions, we remain at your disposal as always. Don’t hesitate to reach out to us!
About Persistence
Persistence is a Tendermint-based, specialised Layer-1 network powering an ecosystem of DeFi applications focused on unlocking the liquidity of staked assets.
Persistence facilitates the issuance and deployment of liquid-staked stkASSETs, allowing users to earn staking rewards while participating in DeFi primitives, such as lending/borrowing and liquidity provisioning on DEXs.
Persistence aims to offer a seamless staking and DeFi experience for PoS (Proof-of-Stake) users and enable developers to build innovative applications around stkASSETs.
Join Our Movement
Twitter | LinkedIn | Telegram | YouTube | Reddit | [email protected]